safrane
Member
- Messages
- 16,879
Well I always find that the rear scrip is a bugger to clean, so as per the last two, I decided to remove it to clean both the scrip and the area underneath.
1) Remove the liner, it has a lot of studs which I used a crows foot tool to pull out. Leave the ones next to the lock last as this holds the liner out of the way whilst you remove the rest


2)Once this is out of the way...all 19 clips (You could hang a bus up with 15!) you should be able to view the clips that hold the scrip in place. These number three and are not to be confused with the bolts holding the spoiler in place (If you have a GS etc) you can see the spoiler bolts in the bottom of the first photo below for the spoiler. The scrip clips are backed with a white bush to prevent the metal on metal damage. The circles or x mark the spot they are located.


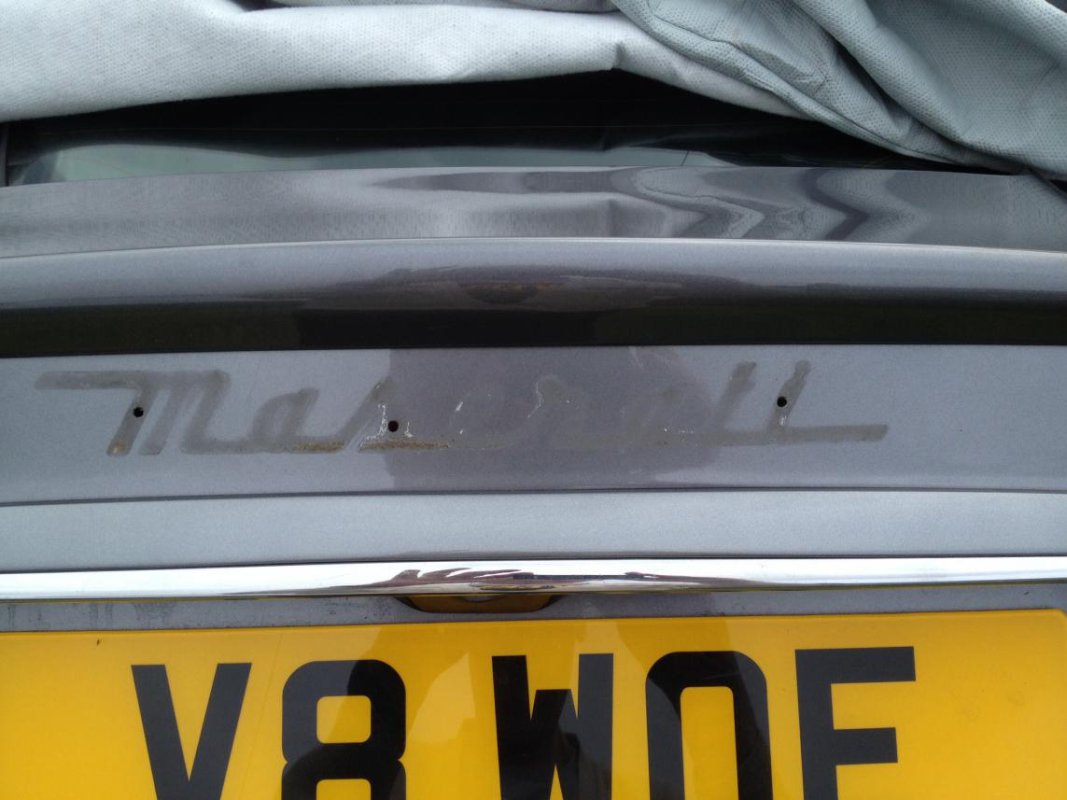
3) Once the clips have been removed the scrip lifts off, (sadly I did not take a photo of the filth underneath before I cleaned it) however I did see some micro pitting where the scrip and the dirt had damaged the paint...does not show well on the photos, so I have highlighted the pitting. This is caused by the dirt lodging under the scrip and if left untreated could cause rust

View attachment 21180
4) I then cleaned the area using a tar remover, then Swisvax cleaner fluid, and then three coats of Swisvax Onex. Before re fitting I touched up the holes on the inside of the boot with some paint and then rust protector before a liberal coating of waxoil.
5) Refitting is the opposite of removal, but I suggest closing the clips a little by tapping the clips with a hammer. Job takes about 45 mins
6) Cup of tea and stand back and admire your reflection...or at least the scrip's reflection if you look like Parisian!..Nice and clean afterwards.


The tiny reflections are just the metallic reflecting the camera flash and some minor scratching of the scrip...why this is not chromed from the factory is beyond me.
1) Remove the liner, it has a lot of studs which I used a crows foot tool to pull out. Leave the ones next to the lock last as this holds the liner out of the way whilst you remove the rest
2)Once this is out of the way...all 19 clips (You could hang a bus up with 15!) you should be able to view the clips that hold the scrip in place. These number three and are not to be confused with the bolts holding the spoiler in place (If you have a GS etc) you can see the spoiler bolts in the bottom of the first photo below for the spoiler. The scrip clips are backed with a white bush to prevent the metal on metal damage. The circles or x mark the spot they are located.
3) Once the clips have been removed the scrip lifts off, (sadly I did not take a photo of the filth underneath before I cleaned it) however I did see some micro pitting where the scrip and the dirt had damaged the paint...does not show well on the photos, so I have highlighted the pitting. This is caused by the dirt lodging under the scrip and if left untreated could cause rust
View attachment 21180
4) I then cleaned the area using a tar remover, then Swisvax cleaner fluid, and then three coats of Swisvax Onex. Before re fitting I touched up the holes on the inside of the boot with some paint and then rust protector before a liberal coating of waxoil.
5) Refitting is the opposite of removal, but I suggest closing the clips a little by tapping the clips with a hammer. Job takes about 45 mins
6) Cup of tea and stand back and admire your reflection...or at least the scrip's reflection if you look like Parisian!..Nice and clean afterwards.
The tiny reflections are just the metallic reflecting the camera flash and some minor scratching of the scrip...why this is not chromed from the factory is beyond me.
")