4200 & GranSport Doorcard Removal

lozcb

Member
Messages
12,501
STEP 4
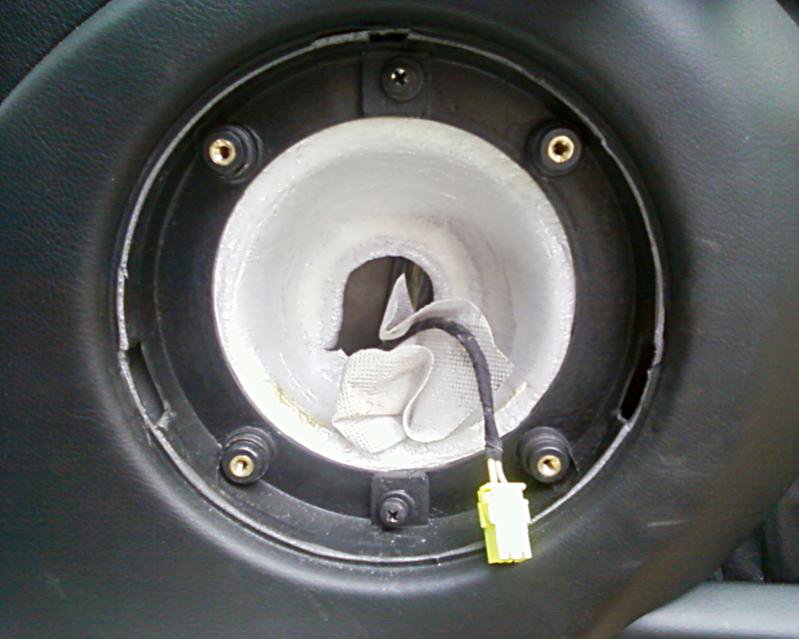
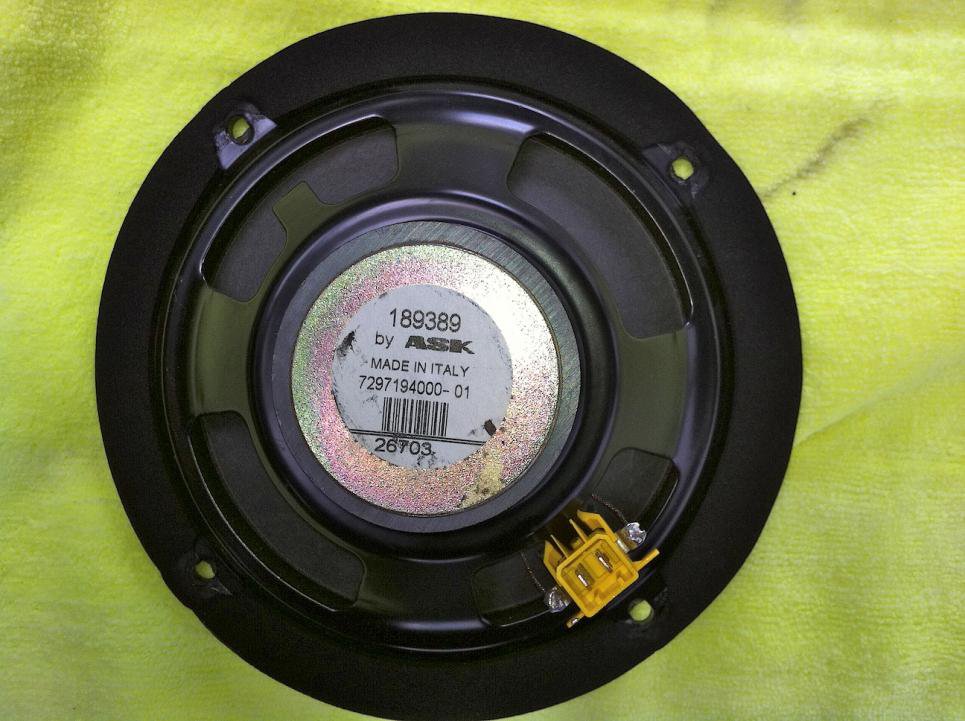
Remove the larger speaker by gently prising off the cover to reveal the speaker held in by 4 screws undo these and remove the speaker carefully, undo the electrical connector this will reveal another two fixing screws

Below is a step by sep guide to removing the doorcard from a 4200 & GranSport. The 3200 is very similar but not identical.

The 3200 does not have the thin plastic trim in STEP 1 but you just remove the oval panel in the same location, by prising it up.

Ideal for access to:

  • Speaker change
  • Window adjustment
  • Window /handle micro switches
  • Wing Mirror removal
  • Door airbags


Tools needed Phillips screw driver prising tool and a felt pad

STEP 1
Remove the long thin metal strip as in Fig 1, you will see one end has a very small slot , this will enable you g to get a small prising tool in there and with a felt pad to protect your leather lever the end out , its held in with spring clips so gently ease it out making sure not to bend it , once out it will reveal 4 fixing screws:
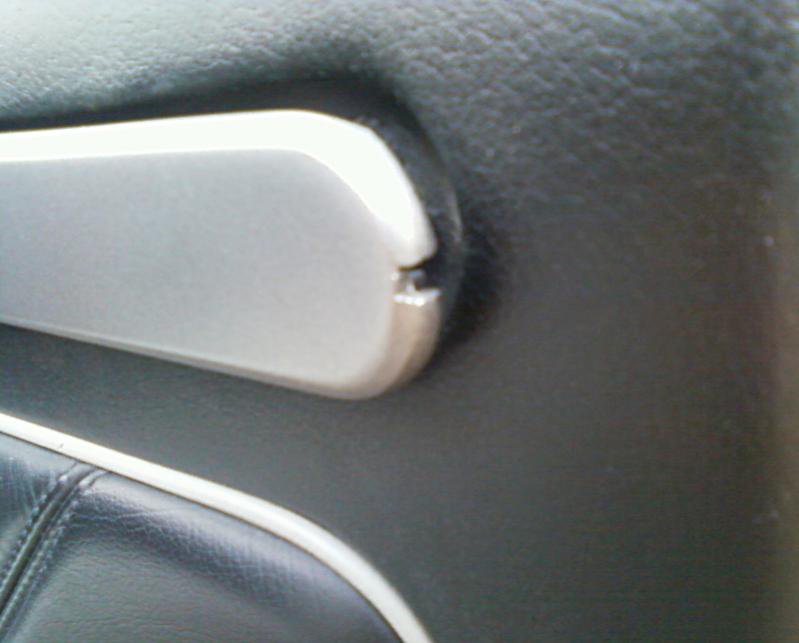
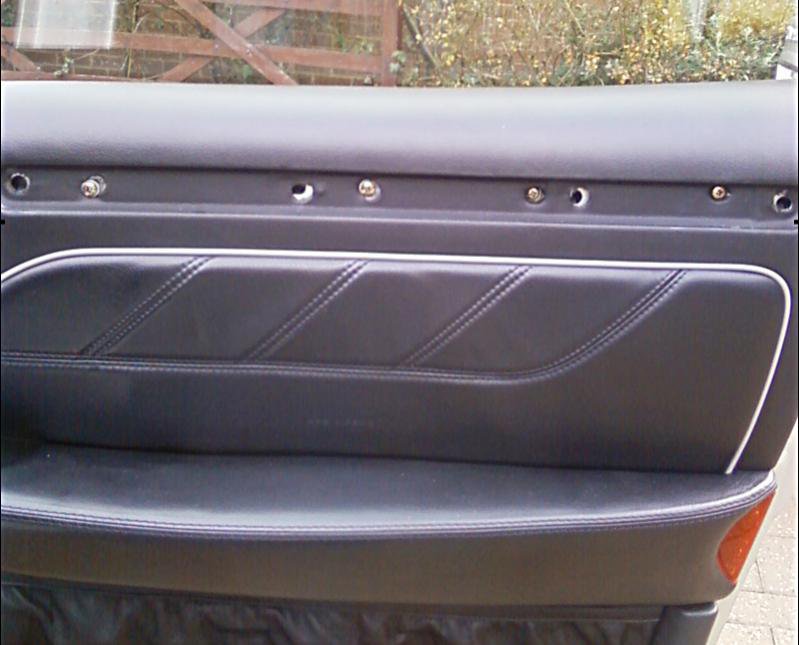
fig01.jpg

fig02.jpg

STEP 2
Remove the red reflector lens by again prising it out , again this will reveal another fixing screw:
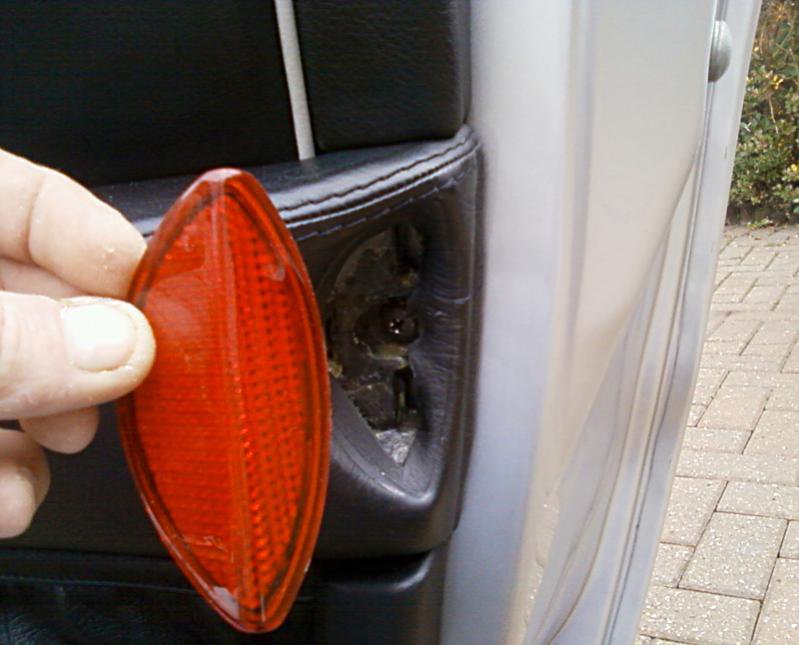
fig03.jpg

STEP 3
Remove the small speaker by gently prising it out to reveal yet another fixing screw undo the electrical connector and then do the same for the larger speaker:
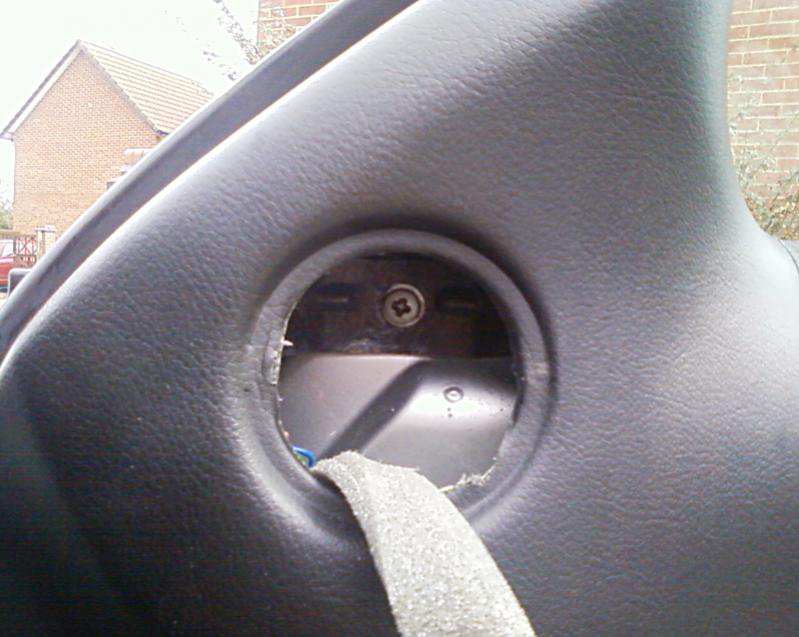
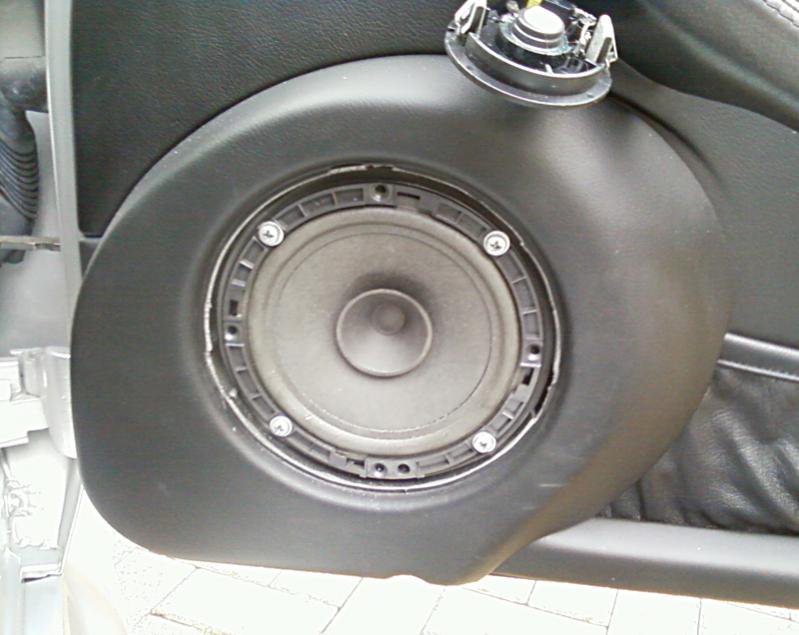
fig04.jpg

fig05.jpg

fig06.jpg

STEP 5
Remove the small rectangular cover behind the door handle by prising it out with the slot provided , this will reveal a small self tapping screw , remove that and the plastic handle surround by gently prizing it out, to reveal yet another fixing screw:
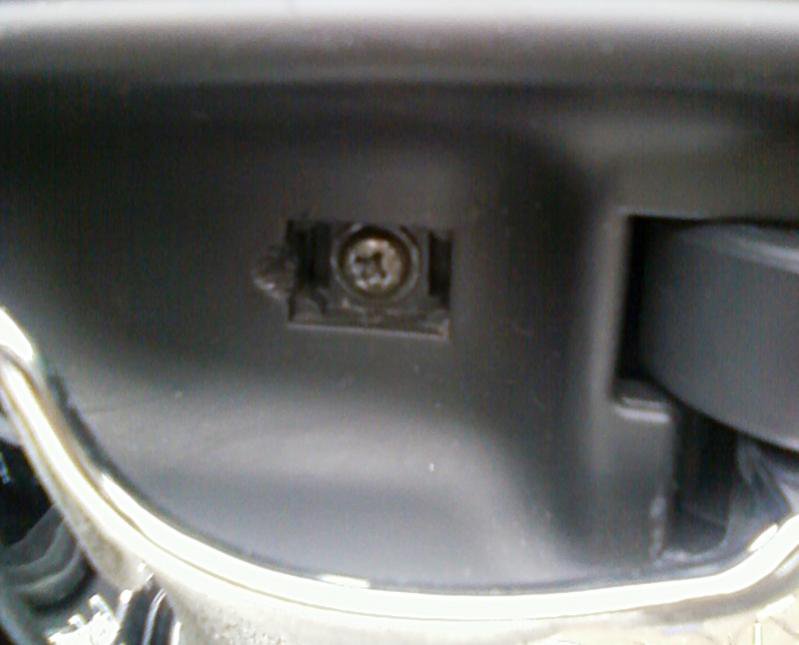
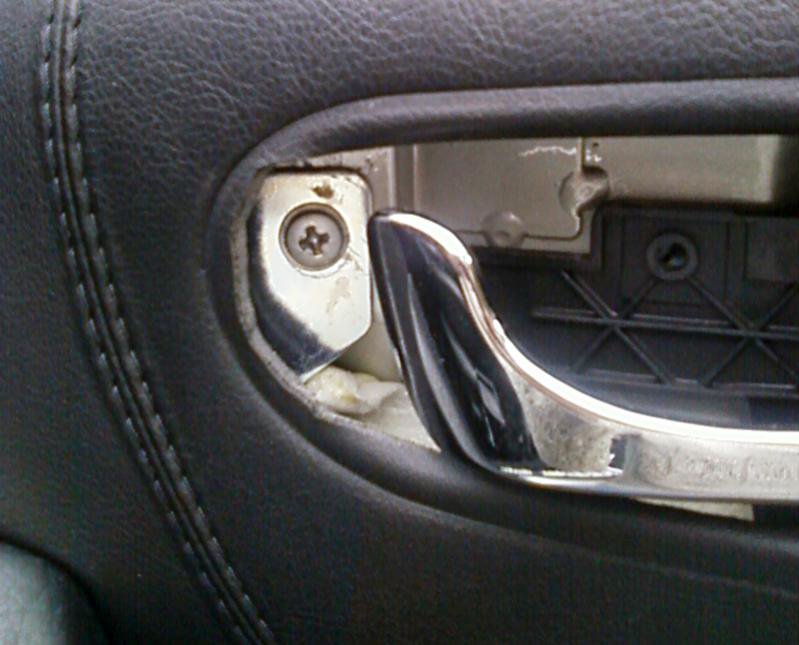
fig07.jpg

fig08.jpg

STEP 6
Remove the clear plastic light at the bottom underside of the doorcard by prising it out a little then sliding it either forwards or backwards then disconnect the connector:
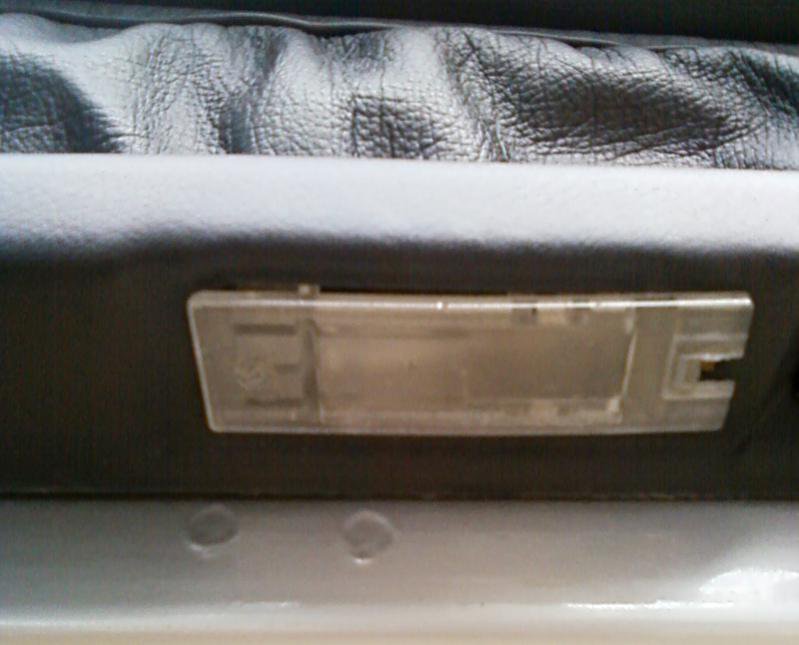
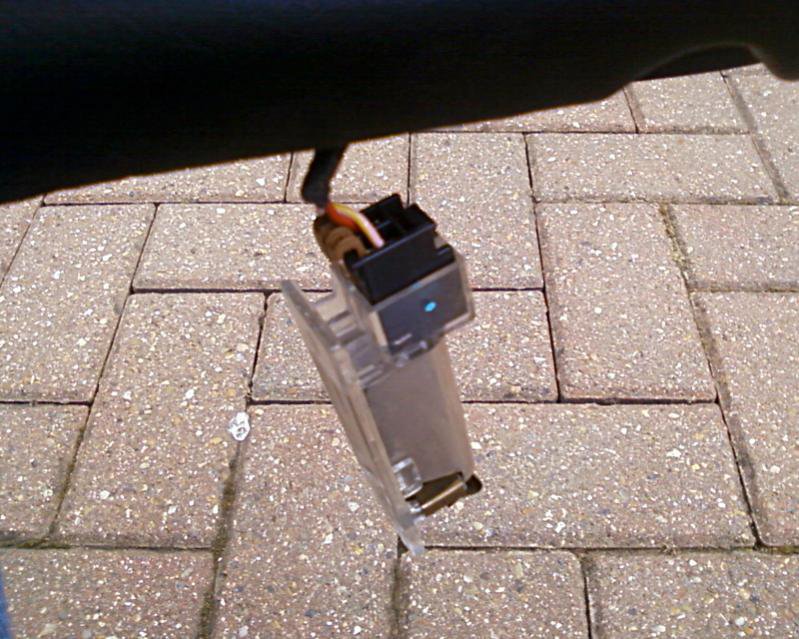
fig09.jpg

fig10.jpg

STEP 7
Remove the single fixing screw underneath the centre of the armrest:
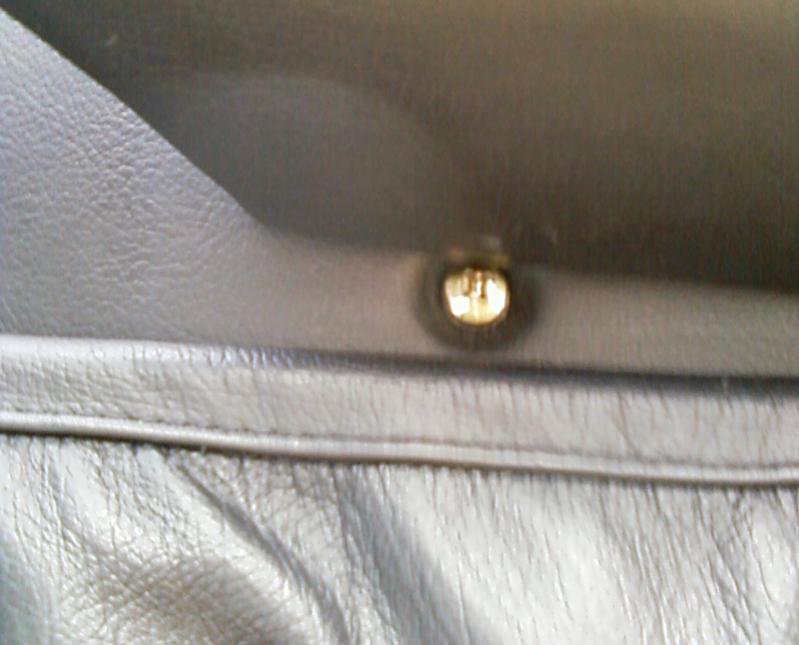
fig11.jpg

STEP 8
Remove the 4 fixing screws that run along the bottom of the doorcard:
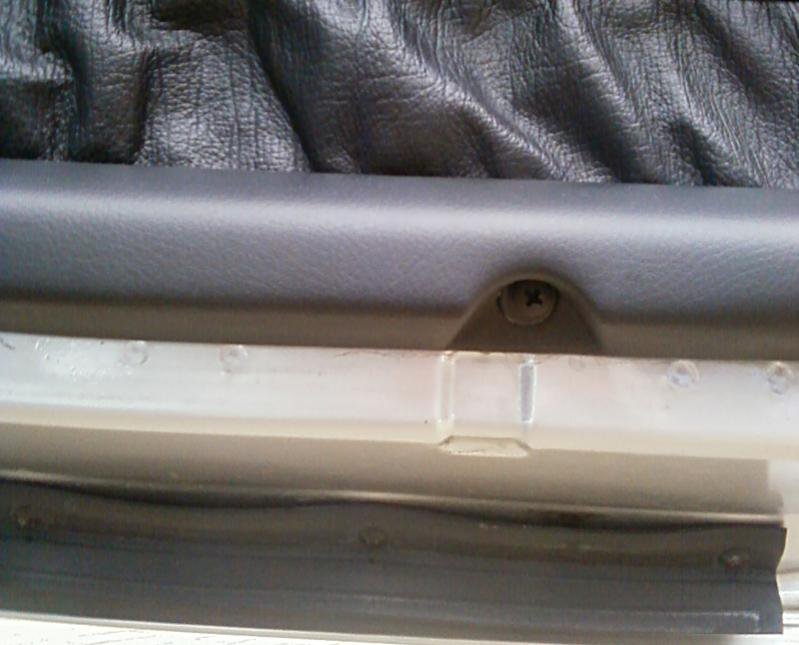
fig12.jpg

STEP 9
You are now ready to remove the doorcard , gently but firmly wriggle the doorcard upwards and it will become free:
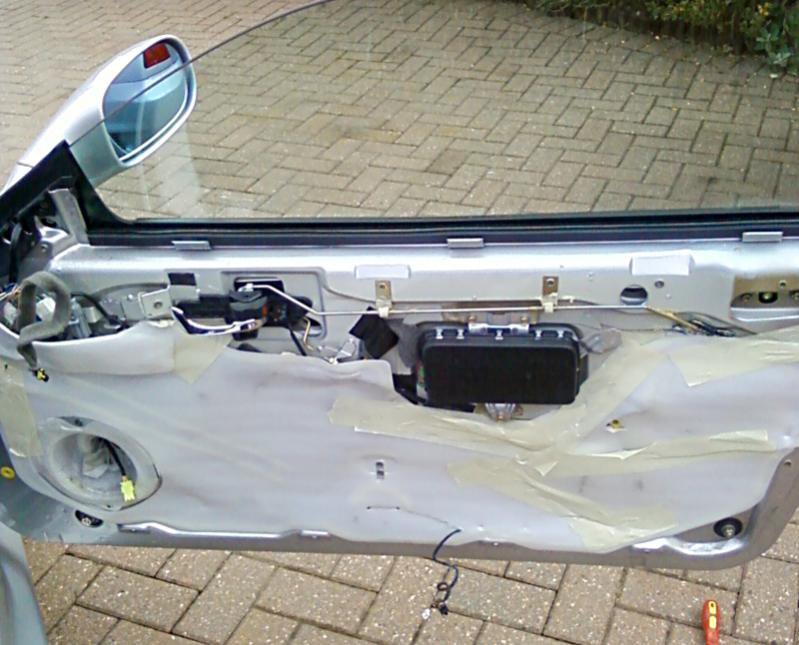
fig13.jpg

STEP 10
Replace in the reverse order.
 
Last edited:
  • Like
Reactions: Geo

conaero

Forum Owner
Messages
34,625
Yeah, I noticed that too. I hope he actually had a job to do taking this off and photographing it all, knowing Loz, not, just an excuse to tinker!
 

lozcb

Member
Messages
12,501
Funny that as Honda and ordinary looking as they are the 4200 lights are easily recognizable , still not a touch on the boomerangs tho god i hate having to say and admit that:frusty6:


regards loz
 

Klive

Junior Member
Messages
724
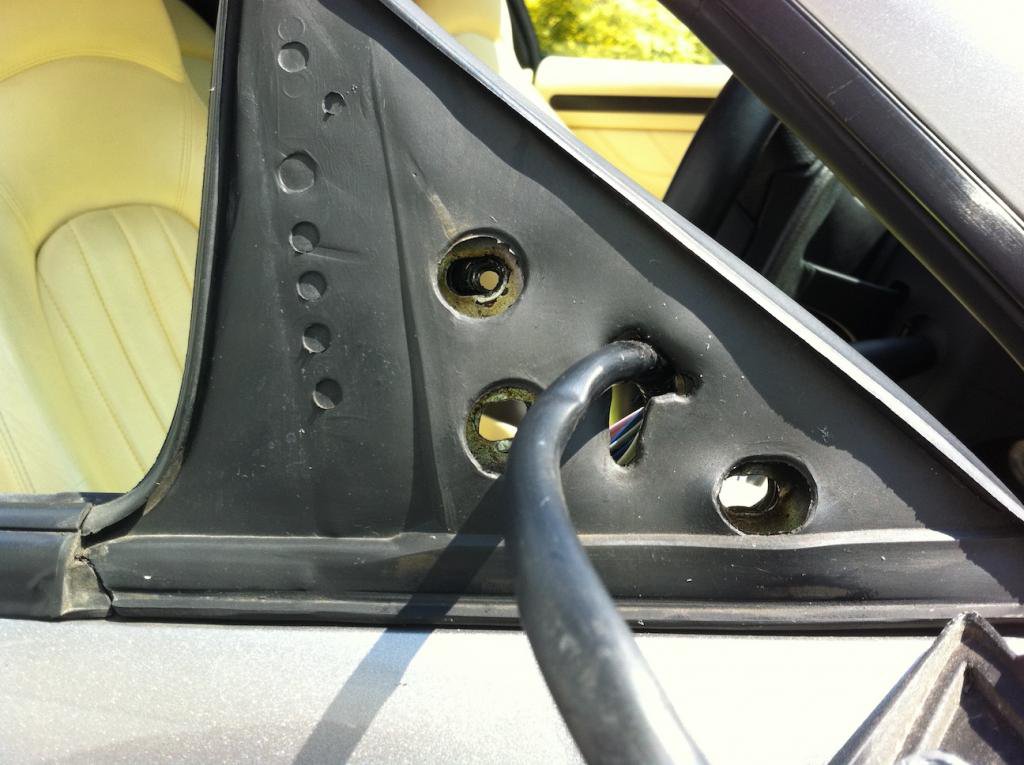
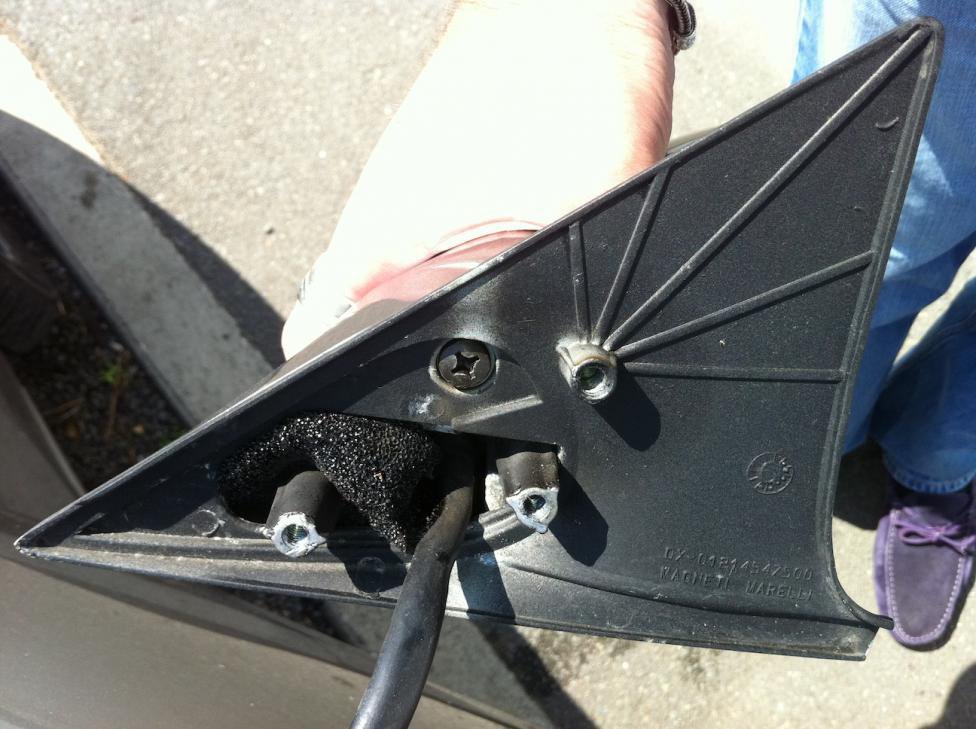
I used this write up today to replace a corroded wing mirror part.
Good job Loz. Thank you.
 

Emtee

New Member
Messages
8,446
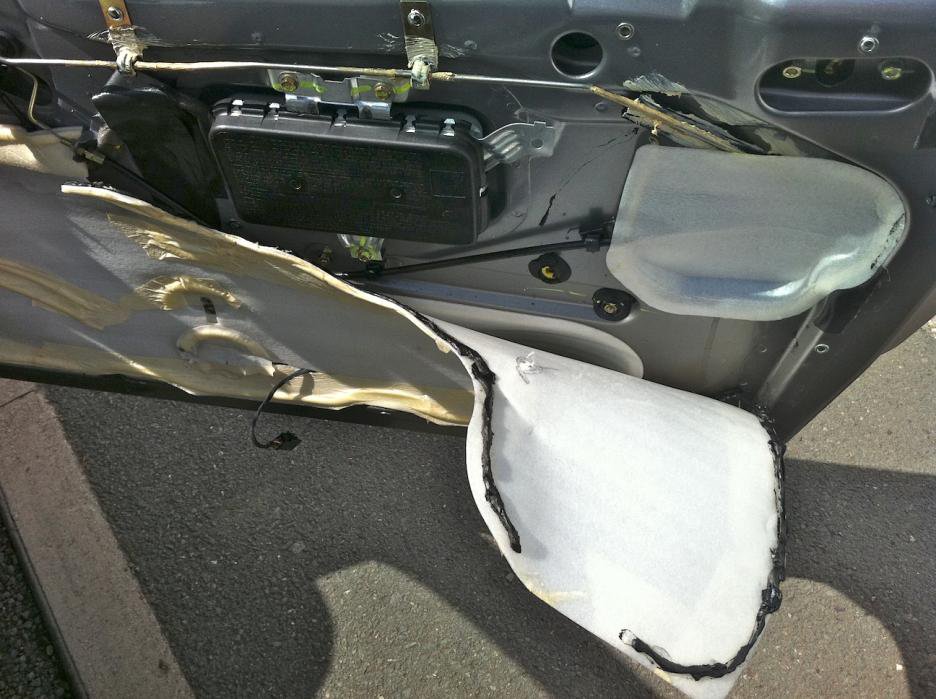
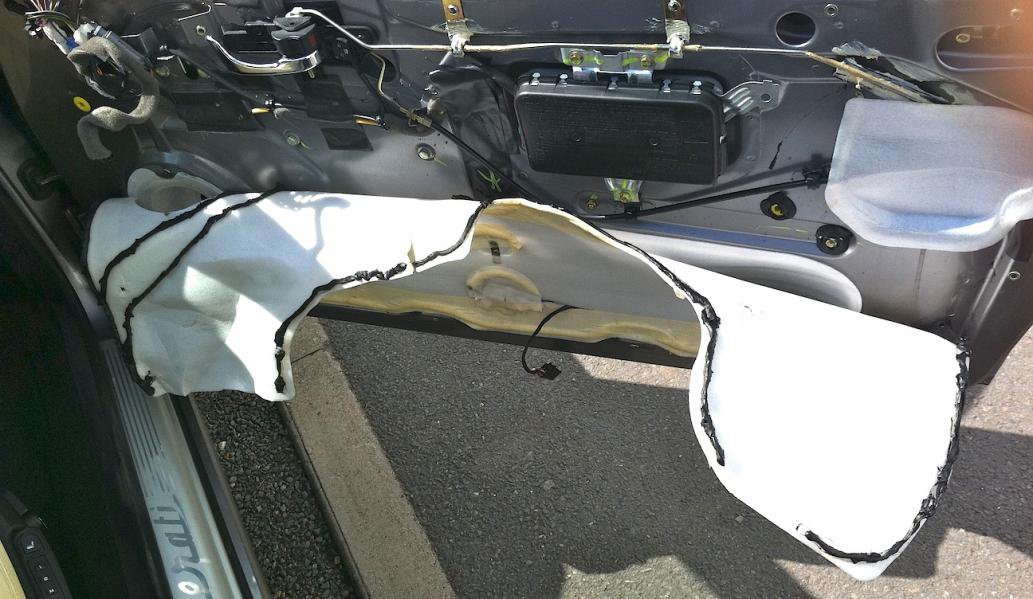
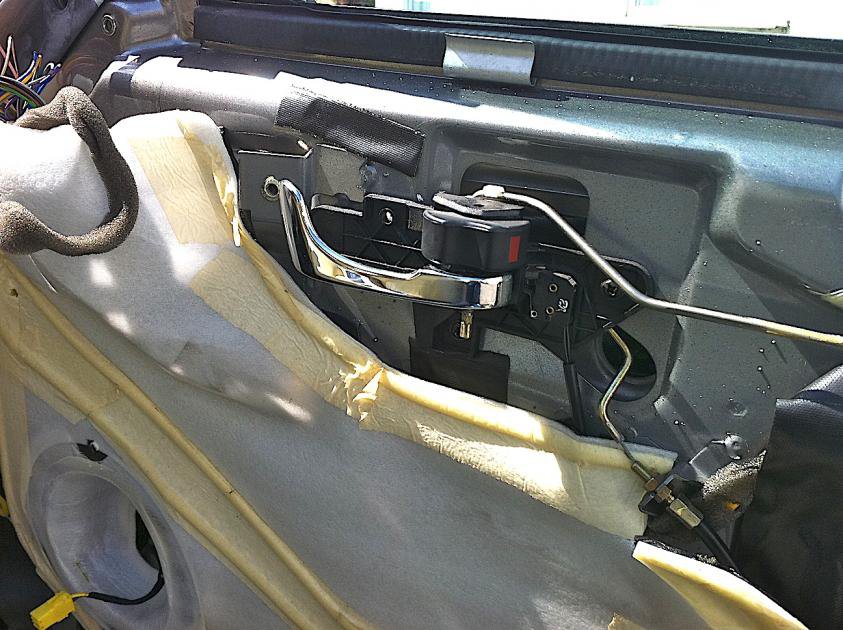
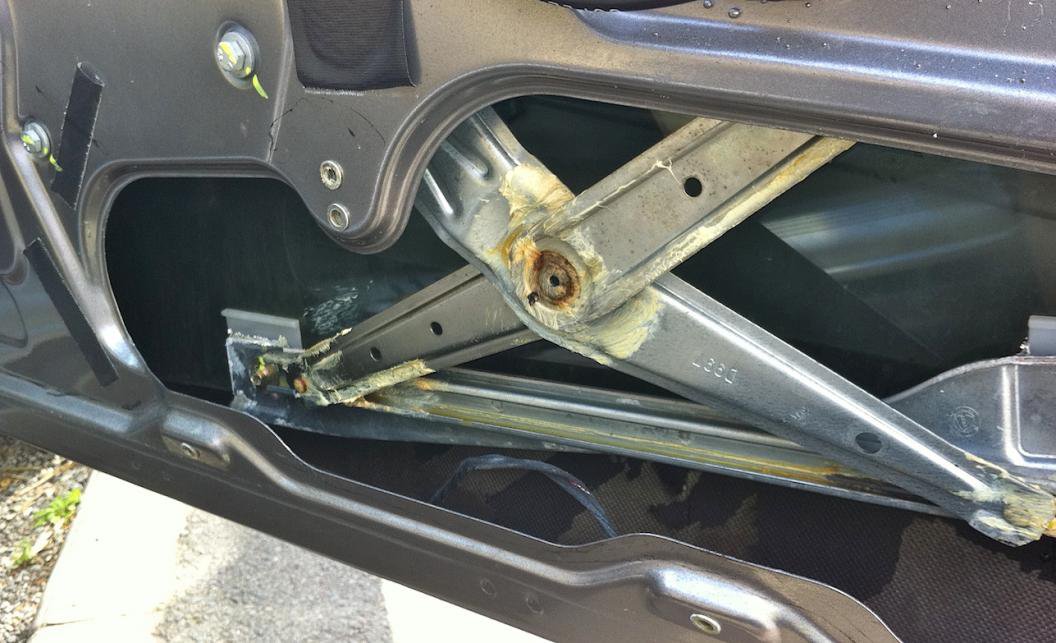
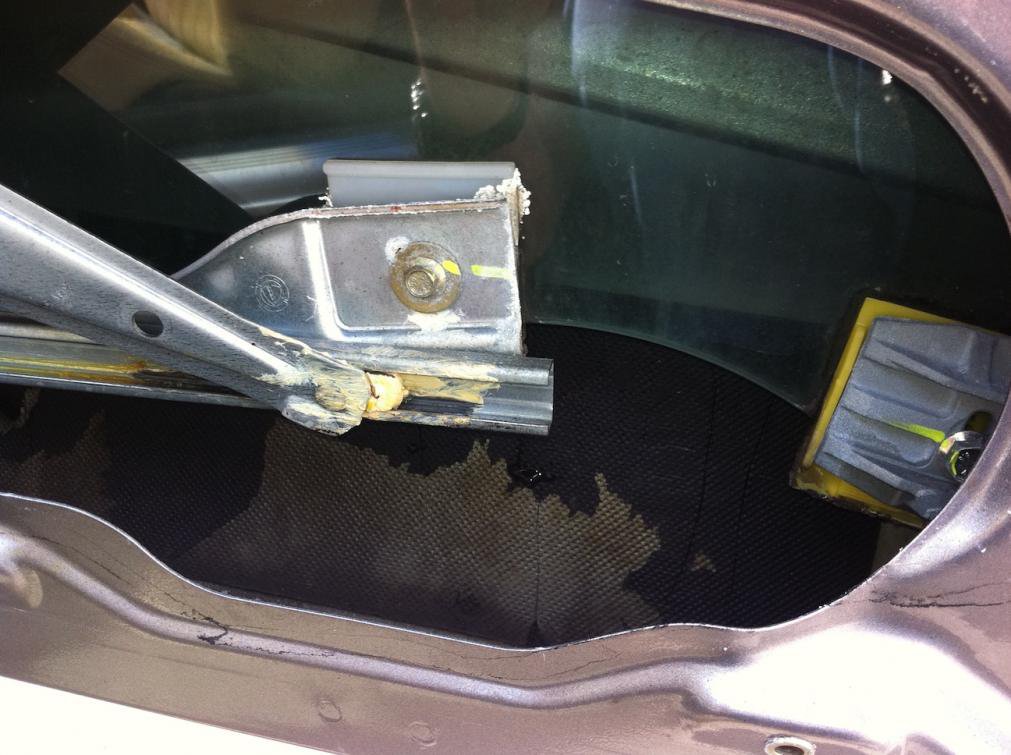
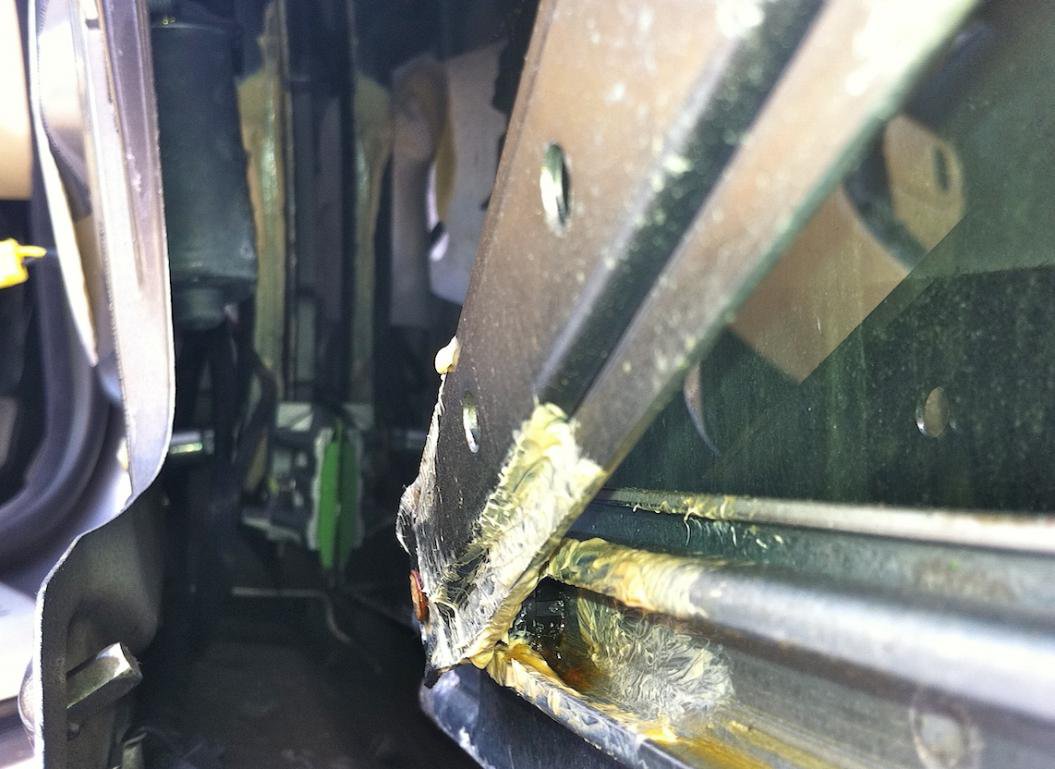
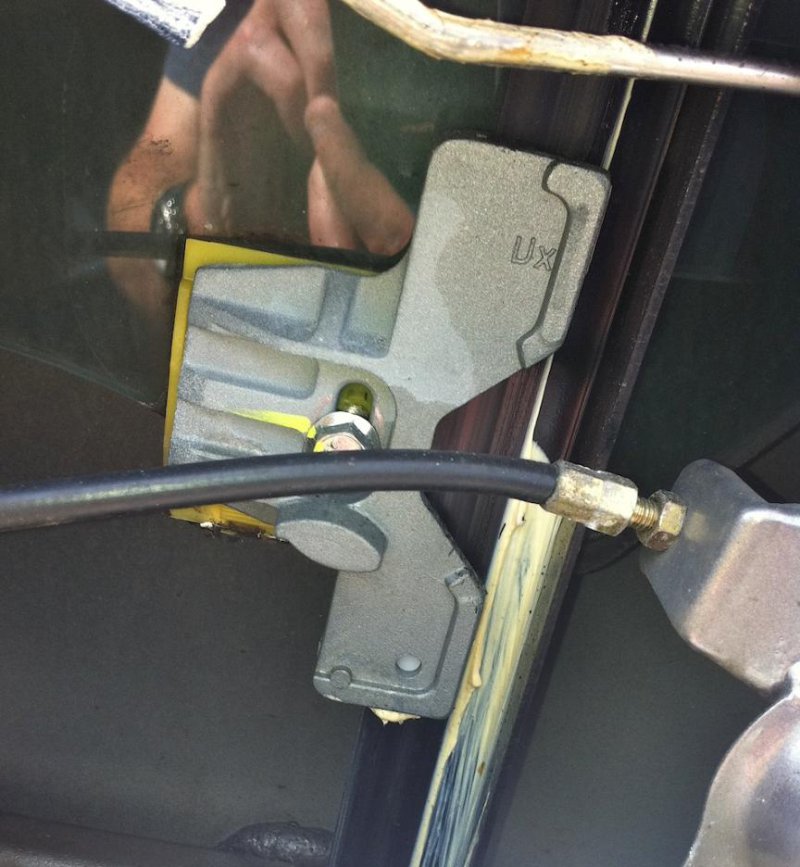
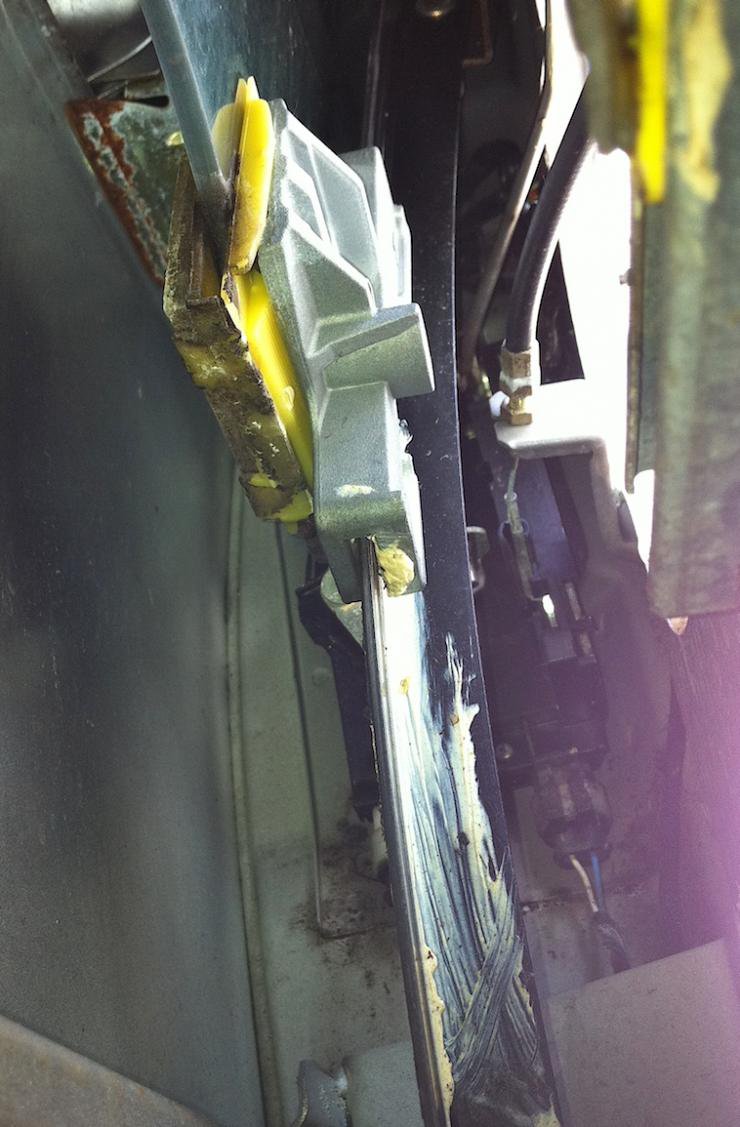
Having a lazy drivers side window, I wanted to get inside the door and re-grease all the lifter mechanism pivots.

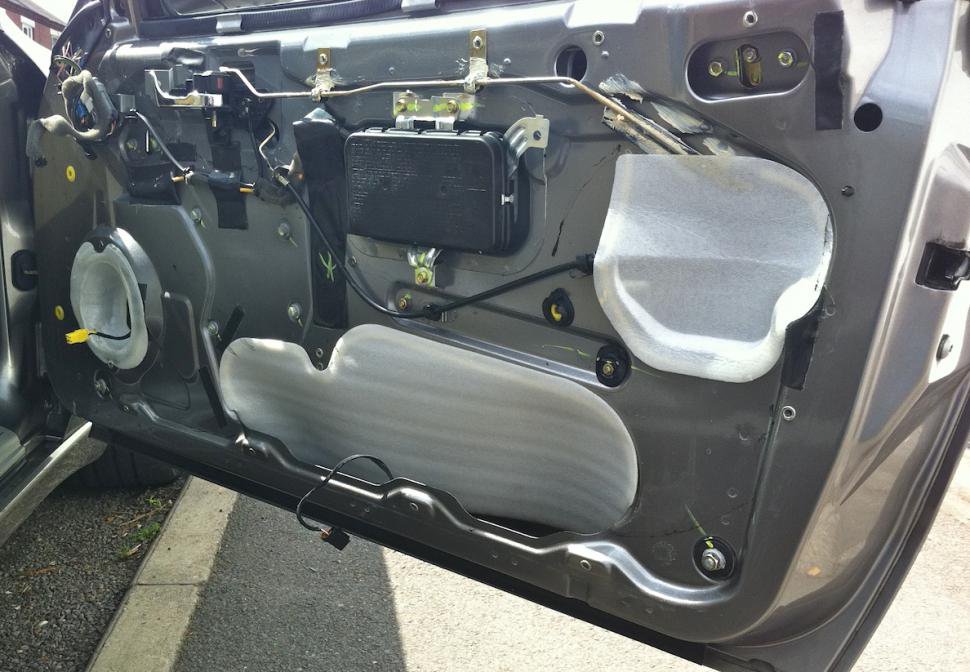
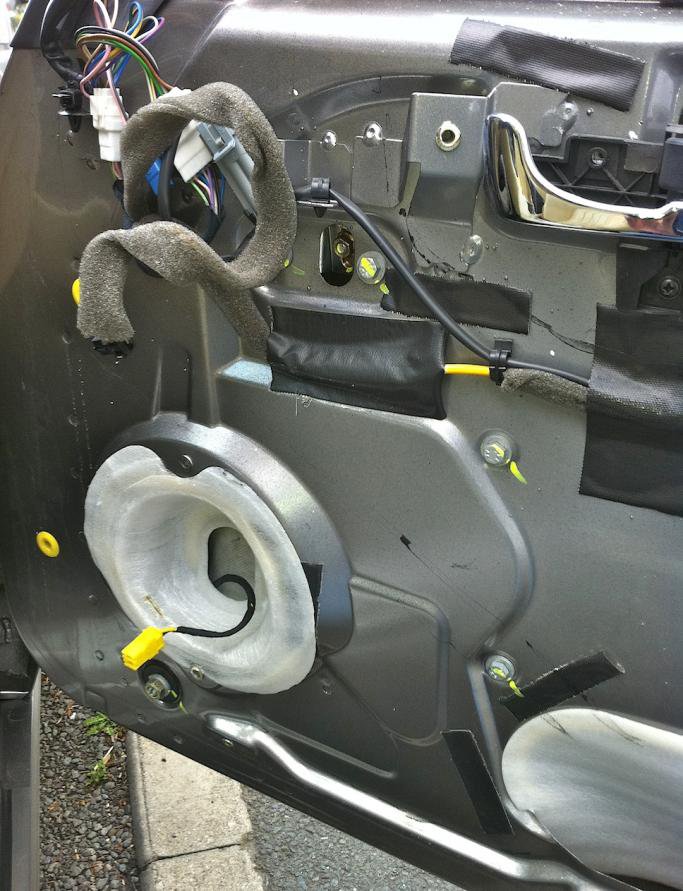
Thought I'd take some photo's to supplement Loz's whilst I was in there.

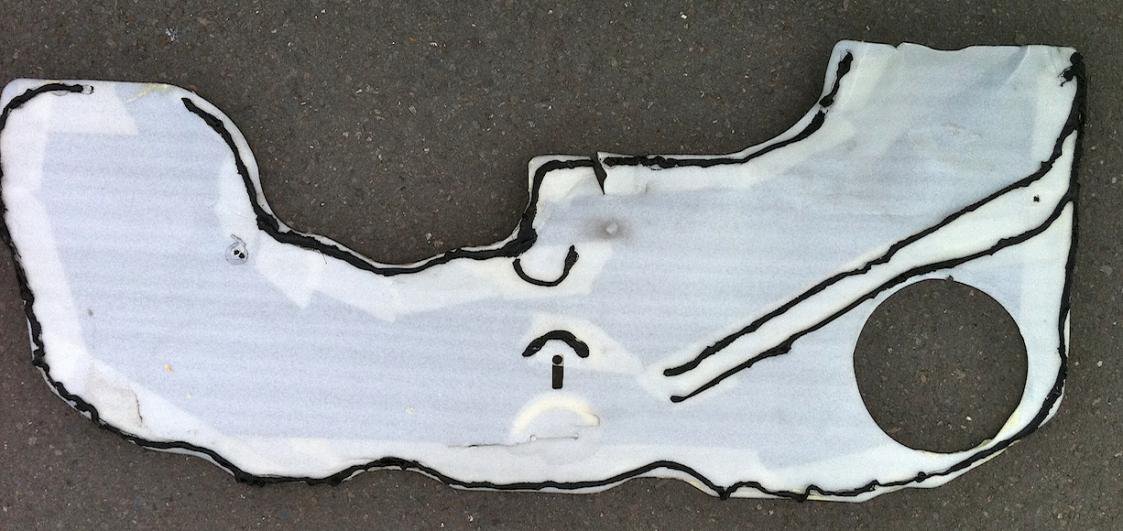
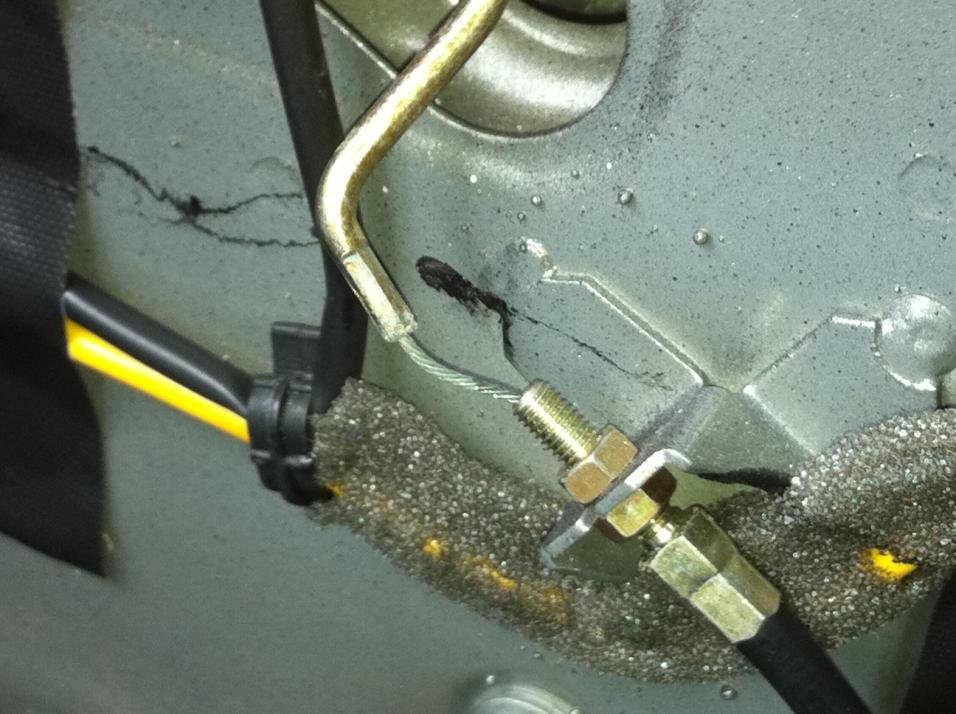
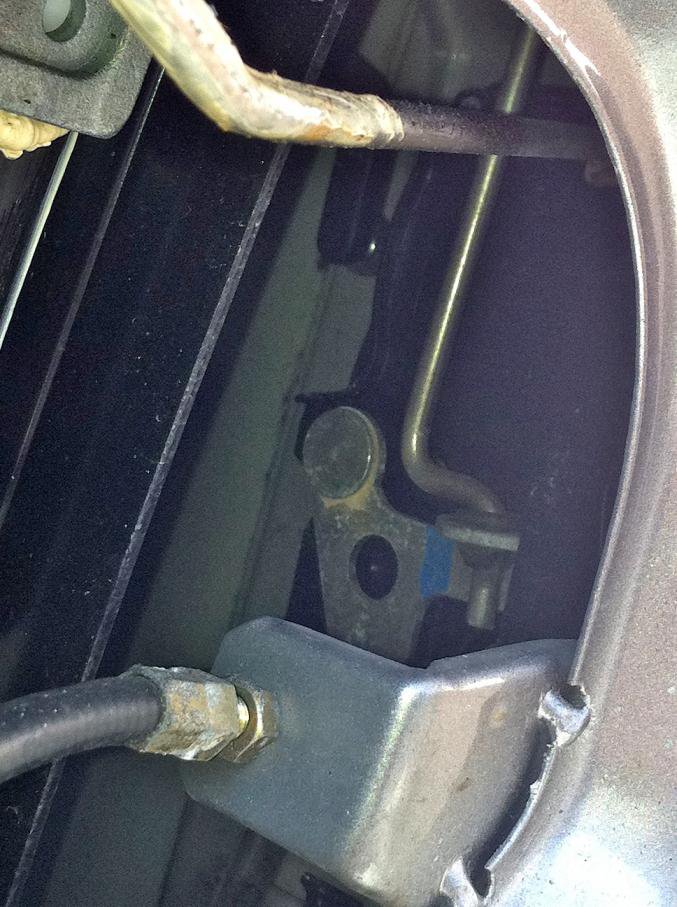
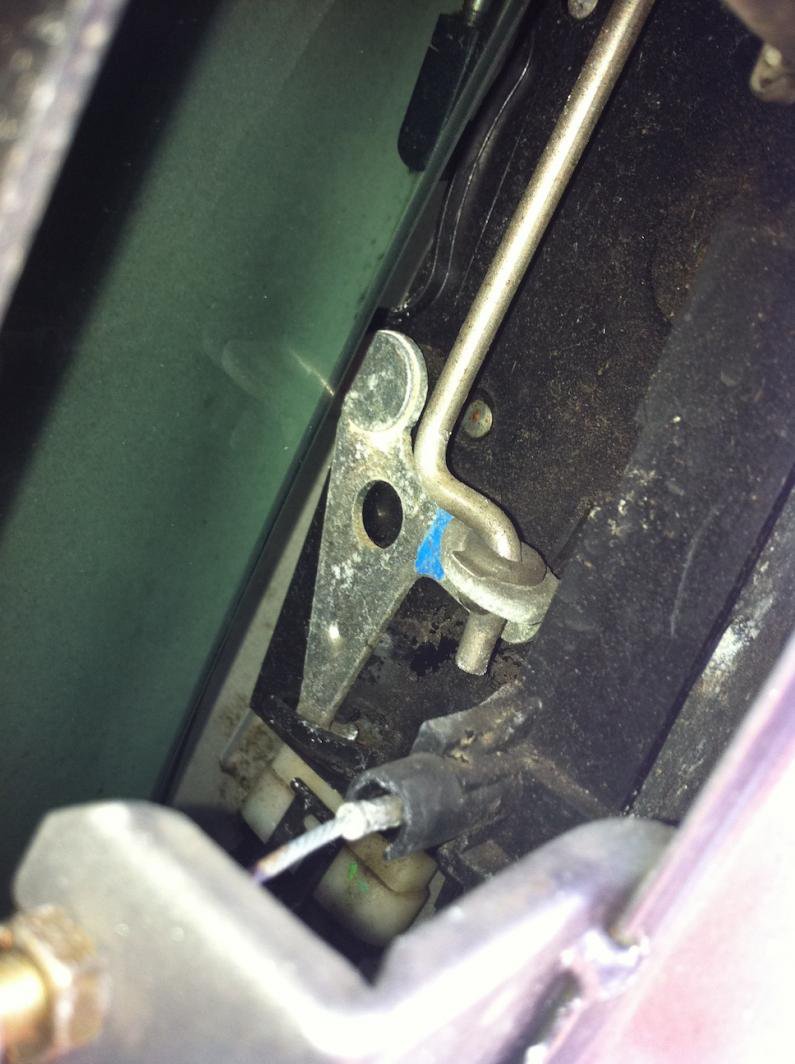
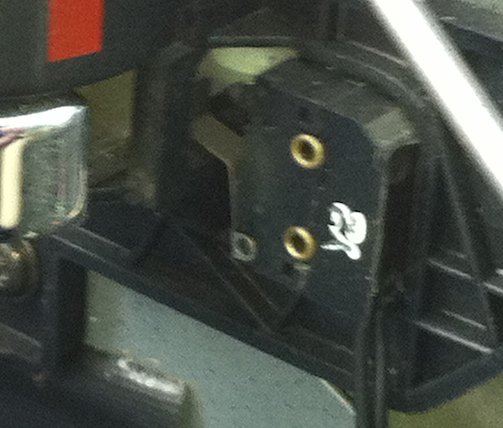
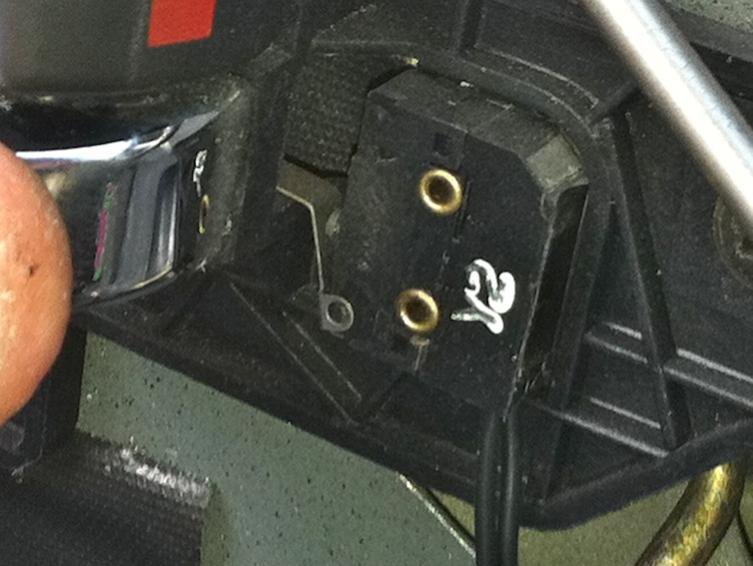
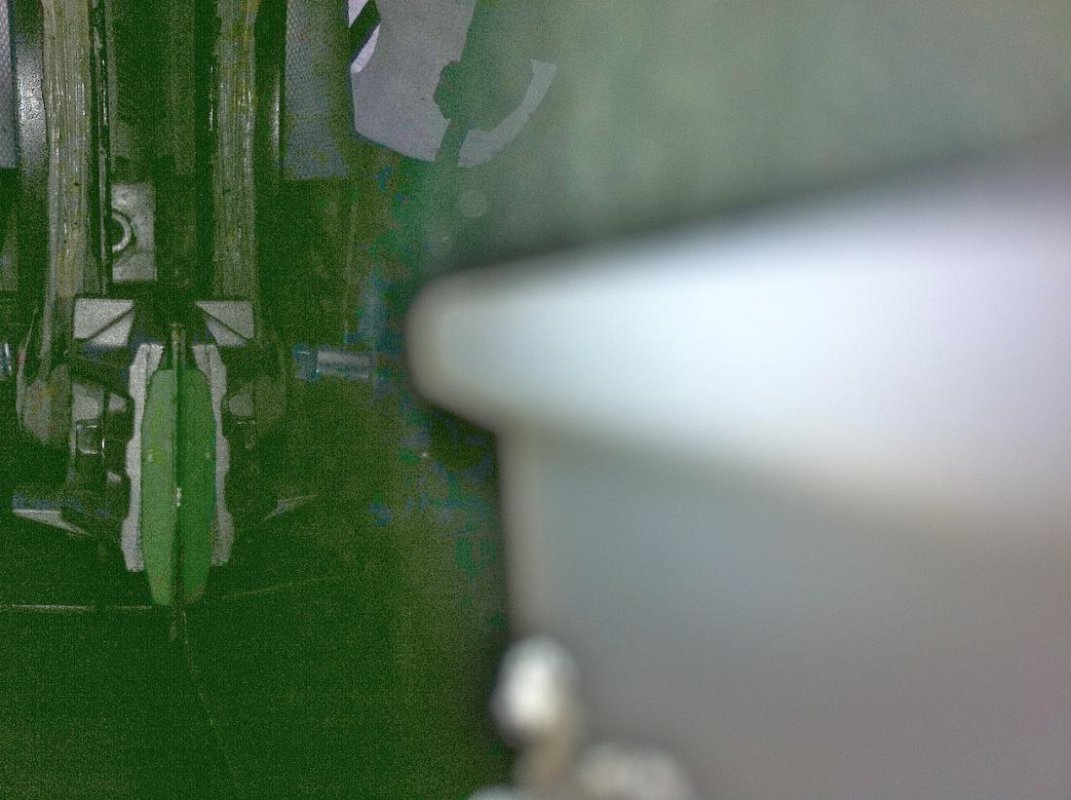
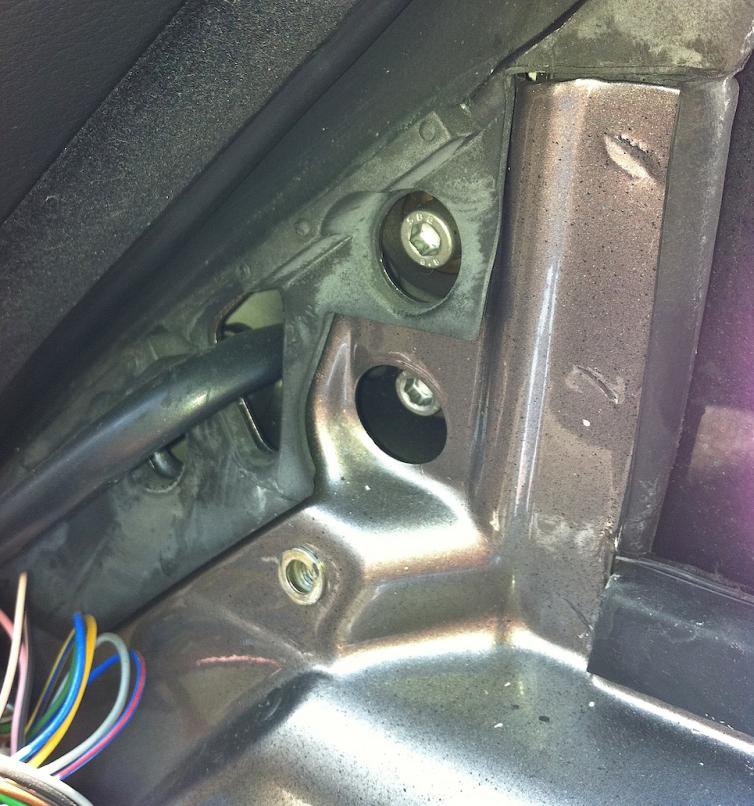
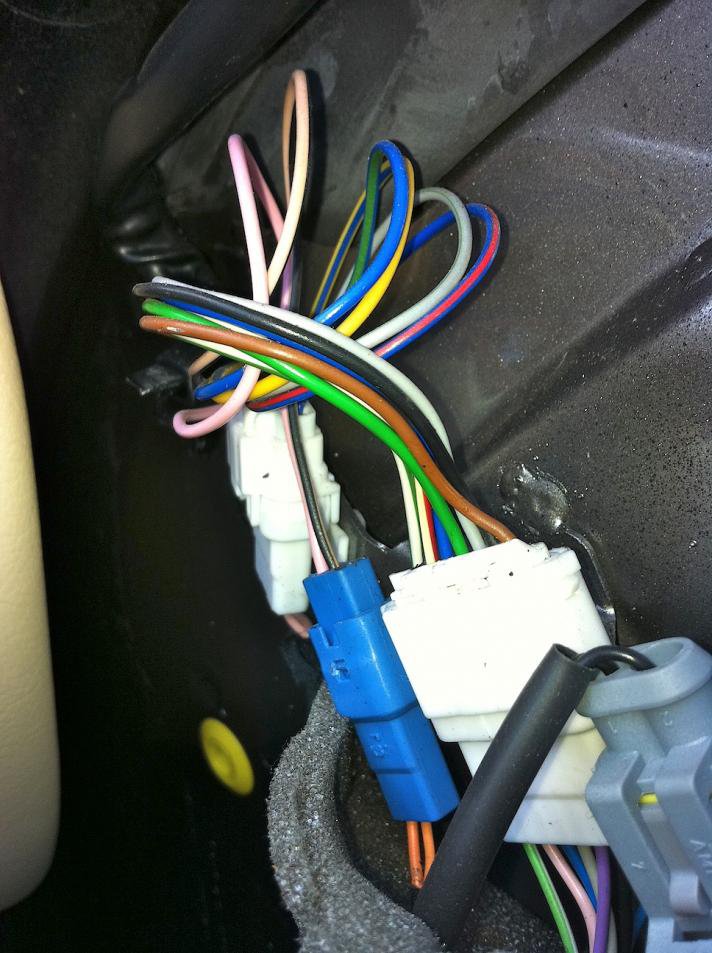
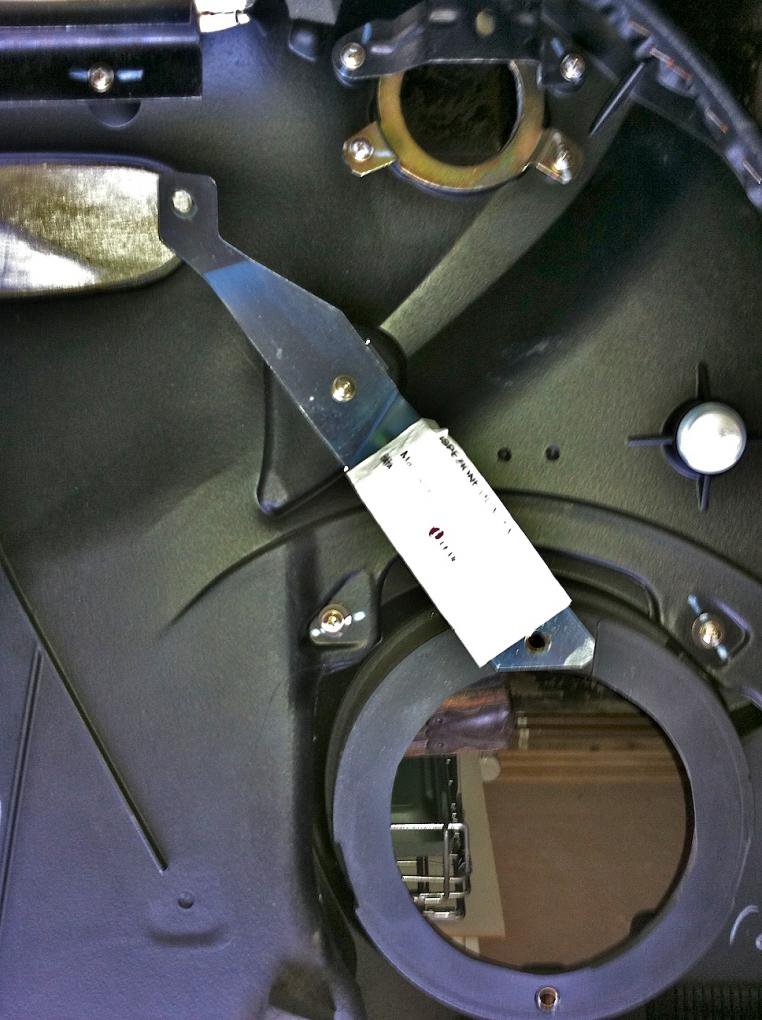
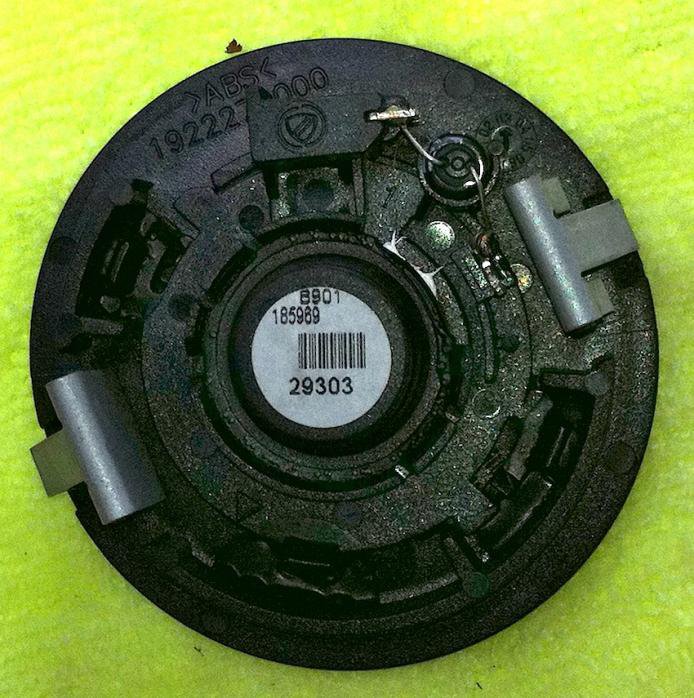
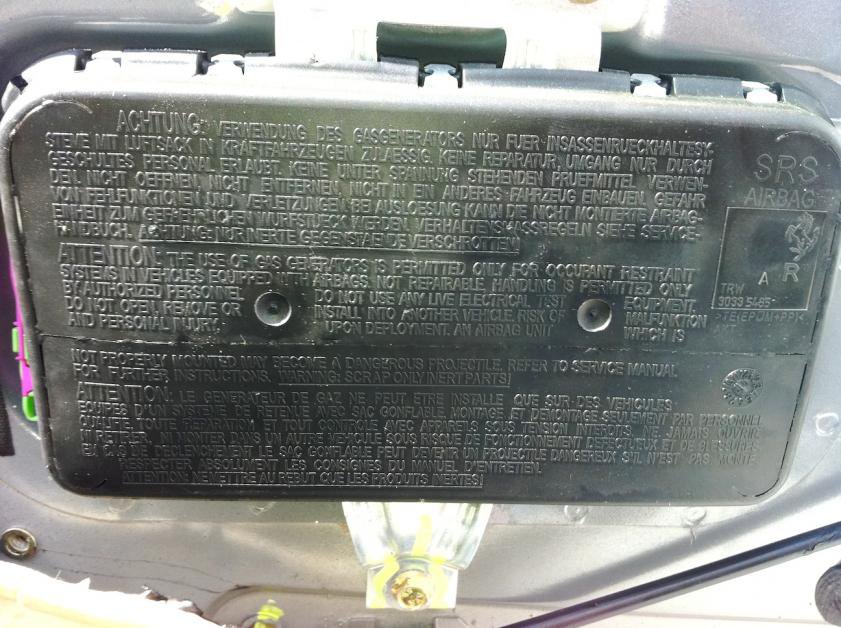
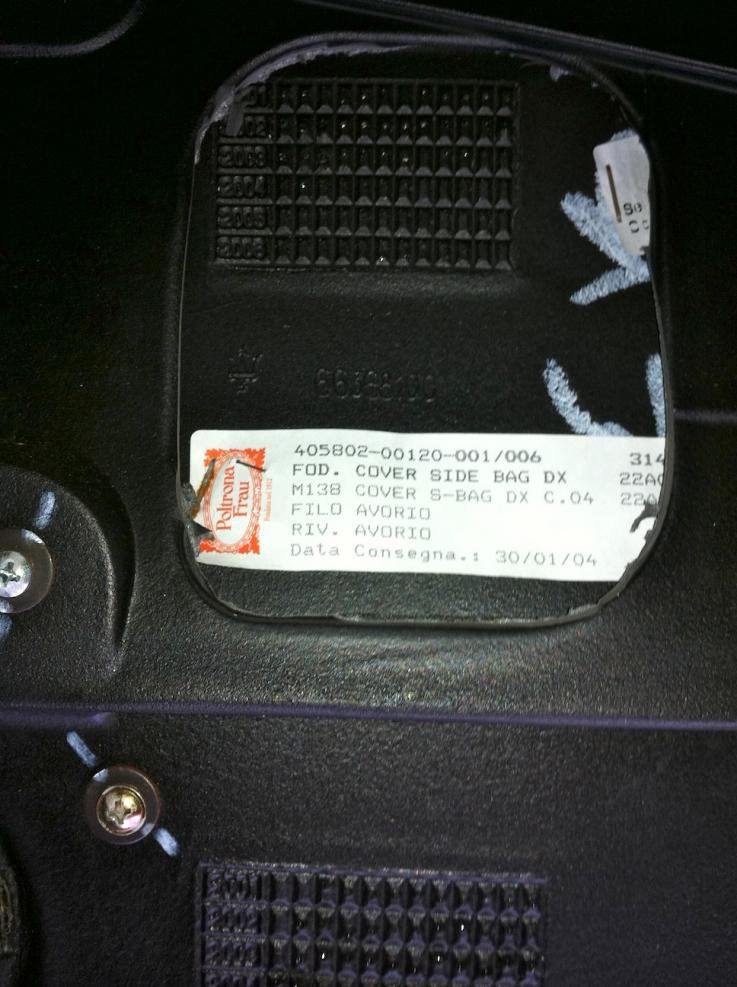
Tried to put them in a logical order showing the removal on the inner covering, the inner door lever cable (both ends), the inner door lever micro-switch (closed and open), the window lifter mechanism (before re-greasing), wing mirror fittings (three bolts) and removal, side airbag, door card from the back and finally the speaker references.

Hope they prove helpful..........

IMG_0112.jpg
IMG_0119.jpg
IMG_0116.jpg
IMG_0161.jpg
IMG_0123.jpg
IMG_0120.jpg

IMG_0126.jpg
IMG_0127.jpg
IMG_0141.jpg
IMG_0124.jpg
IMG_0125.jpg

IMG_0132.jpg
IMG_0131.jpg
IMG_0133.jpg
IMG_0137.jpg
IMG_0135.jpg
IMG_0142.jpg


IMG_0145.jpg
IMG_0144.jpg
IMG_0151.jpg
IMG_0150.jpg

IMG_0114.jpg

IMG_0149.jpg
IMG_0146.jpg

IMG_0164.jpg
IMG_0163.jpg
 

Parisien

Moderator
Messages
34,927
An awful lot going on in there Miles.........spot anything else amiss whilst in there?!!

Did the re-greasing improve things?

Thanks again!


P
 

Emtee

New Member
Messages
8,446
An awful lot going on in there Miles.........spot anything else amiss whilst in there?!!

Did the re-greasing improve things?

Thanks again!


P

Yes it's certainly a fairly complex area of the car.

Nothing else untoward other than the splined pin holding the inner door release had dropped (picture 3), but this just needed pushing back up again.

My lazy window lift is weather related. When wet (or still damp from previous wet weather) it doesn't lift completely. Pictures 12 and 14 show the results of previous water ingress that inevitably happens over time.

I cleaned, lubricated and reset the outer window rubber with silicone spray to improve the seal between it and the glass, then stripped and re-greased all the pivot points with white lithium grease. Certainly on repeated testing it was sharper and much more 'deliberate', but I'll wait for tomorrows rain to know for sure.

Em.
 
Last edited:
Klive

Junior Member
Messages
724
6 photos up from the bottom was the part I replaced. It was a little difficult to replace in the seal shown in the photo above.
These photos will always help someone to do this work as it's always good to be able to see what you're going to do before you do it.

Just a little side issue. Mauve mochasins!! You must be in Marketing ;-)
 

Emtee

New Member
Messages
8,446
Just a little side issue. Mauve mochasins!! You must be in Marketing ;-)

Ooooooooopppppsssssss...was that you Miles or a well meaning assistants feet sporting the non standard Maseratisiti footwear......?!....;)


P


Mauvists, the pair for you! :D

I'll have you know they're the most comfortable pair of driving shoes I've ever had! And when they're worn out, I'll be buying another pair, but next time they'll be drab olive!

(okay I admit they also double up as a really comfortable pair of slippers, but that's besides the point!)
 

themunz2003

New Member
Messages
1
2000 Maserati 3200 GT door trim removal

I just wish to add that the door trim is a little different on the 3200 (well mine anyway - Sep 2000 model). It comes in two pieces, three if you count the oval panel as well. When you remove the top half it will reveal a few more screws underneath the top section, half way up the door above the arm rest. Learnt this the hard way as I thought they were plastic clips as explained above.
The reason I was removing the trim was to get to the window motor as the passenger side stopped working all together. Also, co-incidentally, airbag/pretensioner light came on the dash which I noticed on the drive back home , 2 hrs after the window problem. I hadn't started the car yet but was stationary using the windows when I discovered the window issue. I could hear an electronic click around the passenger kick panel which I can just hear with the drivers side as well. Hardwired the window motor to reveal that it actually does work. That was 5min ago and now both are working whilst connected as normal. Have not checked the air bag/pretension error light as yet and am about to reassemble the door trim.
Thank you to the Maserati community for all input. There is a lack of support and information on cars like these and it is always appreciated.
 
Last edited:
hodroyd

Member
Messages
14,150
OK Chaps,
This thread is great and very helpfull, but does anyone know which is the window glass adjuster for lift angle..?? I have a slight issue where the window glass lifts fine, but moves slightly forward when at the top..!! This means the glass when fully closed, does not seat fully to the window seal on the rear edge of the door. I want to adjust the lifter so that it moves back very slightly when fully closed..!! It could be a bolt that is slightly loose maybe, but where to look would be a time saver..!!
Cheers
R
 

Simonfryan

New Member
Messages
248
Robert, I have exactly the same issue on the drivers side window on my car.

If anyone can post any advice as to how to resolve this I'd also be keen to know.

Simon


Sent from my iPhone using Tapatalk
 

hodroyd

Member
Messages
14,150
Mine is on the passenger side and after taking everything off, I would imagine it's an easy fix, but it would be good to hear if anyone has actually done and how..!!
 

Simonfryan

New Member
Messages
248
Have you managed to find out any more about this Robert or had a go at resolving the issue as yet?


Sent from my iPhone using Tapatalk
 

hodroyd

Member
Messages
14,150
Not yet Simon, I have had my hands full with the weather and I am loathed to open the garage doors at the minute, just in case the wind get's in and rips the roof off..!! I will try and get round to it shortly..!!
 

Simonfryan

New Member
Messages
248
I know the feeling. Mine hasn't been out of the garage for over 3 weeks now I think.

I haven't even reconnected the battery yet after charging it upon returning from from Yorkshire at the end of last month.


Sent from my iPhone using Tapatalk
 

dgmx5

Member
Messages
1,142
6 photos up from the bottom was the part I replaced. It was a little difficult to replace in the seal shown in the photo above.
These photos will always help someone to do this work as it's always good to be able to see what you're going to do before you do it.

Just a little side issue. Mauve mochasins!! You must be in Marketing ;-)

Hi @Klive

I know this was some time ago.

I also have a problem with the mirror mounting having corroded and the black paint bubbling up. The wing mirror housing itself is fine.

Did you replace the mirror mounting (triangular shaped metal) or could you separate from the rest of the unit and re-paint it?

From your post above, did you have trouble when you came to putting it back inside the seal?

Thanks