Subframe Overhaul problems.... Advise needed!

Gp79

Member
Messages
1,398
Good work, I look forward to doing the same this winter.

Keep the photos / updates coming.
 

Fat Arnie

New Member
Messages
428
Be aware that unless you have this level of garage equipment at your disposal, and are pretty mechanically experienced, and have some physical help, the job would not really be possible. Its a massive task to undertake.

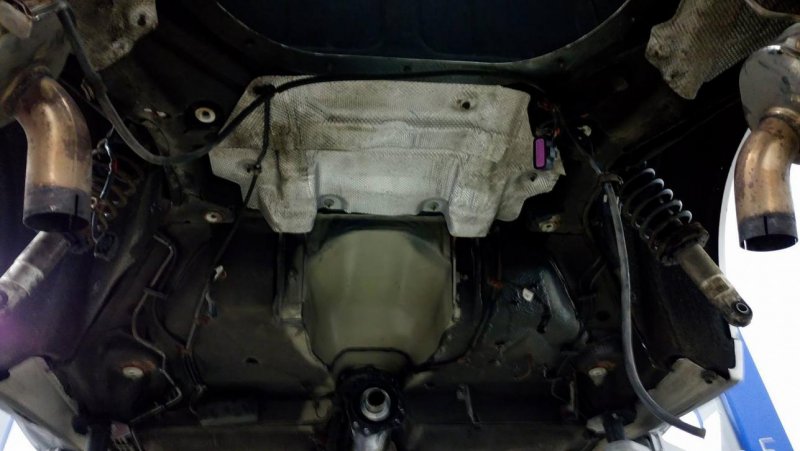
All the front end coming off next Saturday.

View attachment 39370
 

Fat Arnie

New Member
Messages
428
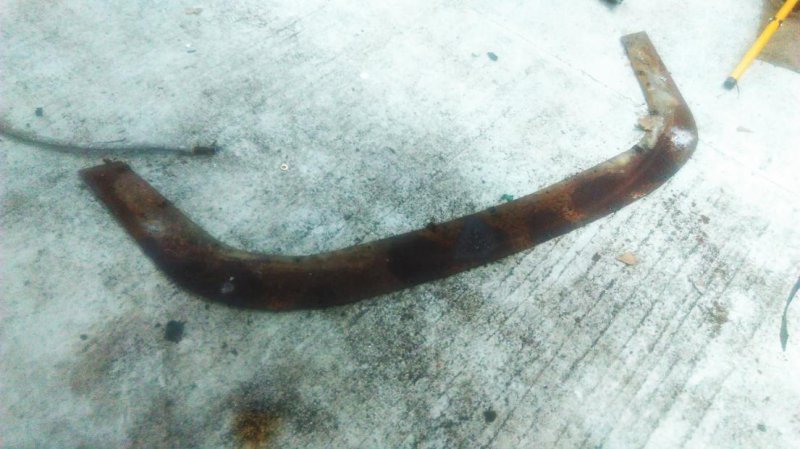
Shockingly poor build quality - this piece of rusty steel is under the front valance. Shall have to make a new one as its part of the front bumper, not a separate part.

IMAG0489.jpg
 

CraigWaterman11

Sponsor
Messages
762
How flexible is it? Wondering if you can use sheet aluminum intead or diamond plate aluminum, and use stainless steel pop rivets? Wouldn't have to worry about rust this way.

Glad you have it out! On a side note would you believe I usually do these clutch jobs alone....lol. Not saying it's easy but.....
 

Fat Arnie

New Member
Messages
428
I have some big sheets of 1mm sheet carbon surplus here - I was thinking maybe to use that. Ali would be fine though as it attaches to plastic not steel, and the fixings can be coated in Duralac to prevent corrosion.

I don't envy you doing this alone. I'm sure its easier after you have done a few, but my issue has largely been hampered by corroded fixings.
 

CraigWaterman11

Sponsor
Messages
762
I have some big sheets of 1mm sheet carbon surplus here - I was thinking maybe to use that. Ali would be fine though as it attaches to plastic not steel, and the fixings can be coated in Duralac to prevent corrosion.

I don't envy you doing this alone. I'm sure its easier after you have done a few, but my issue has largely been hampered by corroded fixings.

Okay, that would definitely work. You know I see the corrosion your fighting there. To be honest I live in the salt belt. I see this all the time with trucks, and regular cars but never have I seen this in the exotics. There are a few that might actually drive an exotic out here in the winter, but that's very few. That really looks like it's taken some salt baths. I hope you get it sorted.
 

Fat Arnie

New Member
Messages
428
Craig,

I think only the GS has this panel. Strangely its not available separately, but easy enough to make. The main body of the car is rust free, only the subframes and any steel parts near the wheels are corroded, so easy to replace it all. Seems the factory zinc plating on all the bolts was no better than the powder coating. All the expensive bits are actually in good condition. The bushes don't look too bad in fact, the balljoints are all fine, and no cracks in any wishbones.

Just about to drop the front subframe off, then its refurb/replace/refit and she'll be better than new.

Thanks for your help.


Okay, that would definitely work. You know I see the corrosion your fighting there. To be honest I live in the salt belt. I see this all the time with trucks, and regular cars but never have I seen this in the exotics. There are a few that might actually drive an exotic out here in the winter, but that's very few. That really looks like it's taken some salt baths. I hope you get it sorted.
 

DPS20K

Junior Member
Messages
168
Shockingly poor build quality - this piece of rusty steel is under the front valance. Shall have to make a new one as its part of the front bumper, not a separate part.

View attachment 39371

Where exactly was this piece of metal? I had the entire front off my GS earlier this year following a run in with a badger. Replaced the lower part of the bumper and under tray and didn't see anything like this on mine.
 

Fat Arnie

New Member
Messages
428
Where exactly was this piece of metal? I had the entire front off my GS earlier this year following a run in with a badger. Replaced the lower part of the bumper and under tray and didn't see anything like this on mine.

Between the trailing edge of the scoops under the bumper, and the leading edge of the undertray (9) in the diagram here http://www.eurospares.co.uk/parts/maserati/4200-gransport-2005/bodywork-lighting/front-bumper-28209

I think it is an included part of the bumper assy, but you cannot see it in this drawing as it is under the front edge of the lower spoiler.

Attaches to (9) with the 13 screws (10)
 

Fat Arnie

New Member
Messages
428
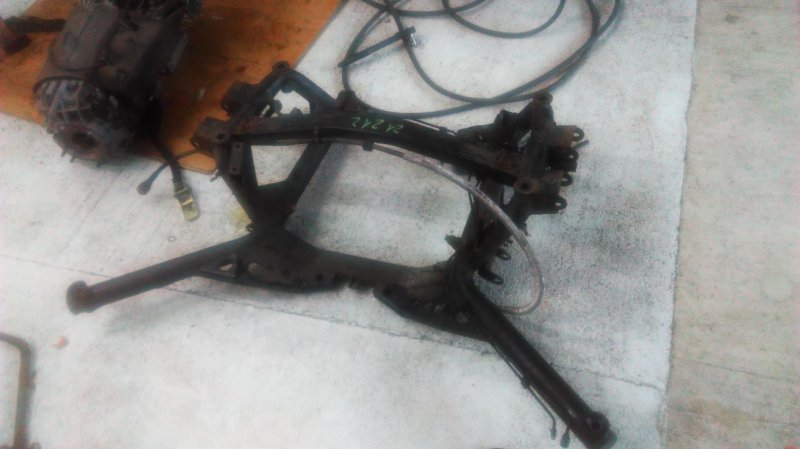
Well I'm stuck again.

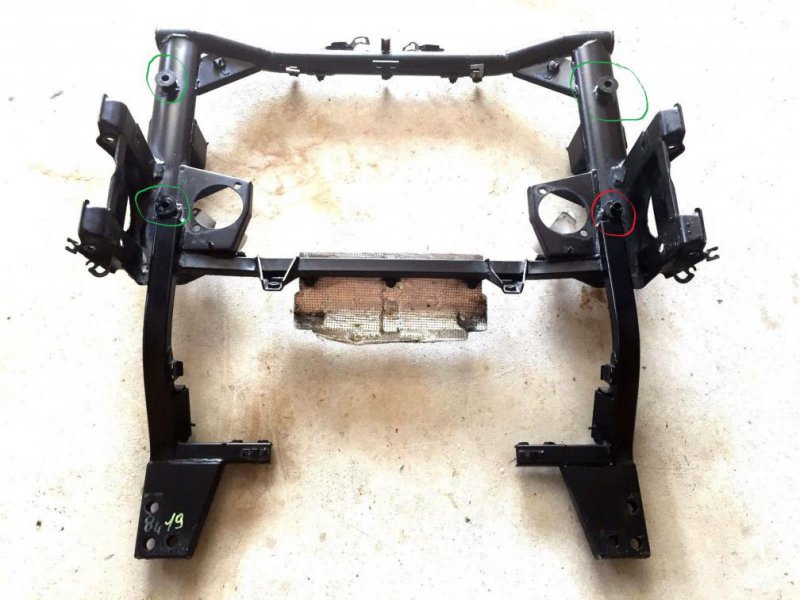
The front subframe is free on the nearside, but is stuck fast on the drivers side (RHD car).

Its dropped an inch on the nearside, but drivers side will not move up where the two bolts are(item 4 in this drawing) on the drivers side. A pry bar get the frame to drop 1/4" at the front and rear but the section the top wishbone attaches too does not move relative to the shell at all.

Of course:
The 8 bolts holding the subframe from below are removed, as are the 2 bolts each side near the top of the damper on each side.
Engine mounts are loose and engine is free of subframe.
All electrical connections and brake hoses are disconnected, steering rack and exhaust are all off. Dry sump scavenge hose disconnnected.
Top and bottom of dampers are loose, though cannot be removed as bolts through the inner lower wishbone bushes are seized in the bushes.

Its as if it was stuck on with PU adhesive or something.

Can someone who has removed a subframe confirm I have not missed a mounting bolt - is there an extra one on the drivers side? I cannot see anything!

Frustrated as ****......

Craig - Help!!!
 

CraigWaterman11

Sponsor
Messages
762
Well I'm stuck again.

The front subframe is free on the nearside, but is stuck fast on the drivers side (RHD car).

Its dropped an inch on the nearside, but drivers side will not move up where the two bolts are(item 4 in this drawing) on the drivers side. A pry bar get the frame to drop 1/4" at the front and rear but the section the top wishbone attaches too does not move relative to the shell at all.

Of course:
The 8 bolts holding the subframe from below are removed, as are the 2 bolts each side near the top of the damper on each side.
Engine mounts are loose and engine is free of subframe.
All electrical connections and brake hoses are disconnected, steering rack and exhaust are all off. Dry sump scavenge hose disconnnected.
Top and bottom of dampers are loose, though cannot be removed as bolts through the inner lower wishbone bushes are seized in the bushes.

Its as if it was stuck on with PU adhesive or something.

Can someone who has removed a subframe confirm I have not missed a mounting bolt - is there an extra one on the drivers side? I cannot see anything!

Frustrated as ****......

Craig - Help!!!

Arnie I'm trying to read all the details, and I don't see anything you missed with one caveat. It's going to be hard internet wise to see what you are saying it's doing or where it's catching brother. When I read what you wrote I follow what you're saying, and cannot think of what you might of missed, which unfortunately helps you absolutely none. Very sorry I can not be there to help on this one. Chances are it will be something simple in the end, can't count the number of times this has been true. Keep us updated, and take your time, this is a marathon run, much like a chess match. Getting frustrated really only makes it worse. Many times I've had to step away or I would of had a few very expensive BBQ grills. Chris can tell you how much Texas people love BBQ!
 

Fat Arnie

New Member
Messages
428
Hi Craig,

Though it is hard to confirm as I am not with the car, so late night research suggests that where the subframe bolts to the chassis from underneath between the f&R wishbone mounts, that fixing could be a bush that presses into a cup in the chassis. BMW's use a similar method to locate the rear subframes and their removal is fraught with the same issues. People suggest use of a large slide hammer as the remedy, so I will try to confirm with an endoscope that such a bush exists (no chance getting my head in there), then off to Amazon for the slide hammer.

Sadly none of the pics on google of the 4200 subframe have enough detail to really confirm.

Thx

Arnie


Arnie I'm trying to read all the details, and I don't see anything you missed with one caveat. It's going to be hard internet wise to see what you are saying it's doing or where it's catching brother. When I read what you wrote I follow what you're saying, and cannot think of what you might of missed, which unfortunately helps you absolutely none. Very sorry I can not be there to help on this one. Chances are it will be something simple in the end, can't count the number of times this has been true. Keep us updated, and take your time, this is a marathon run, much like a chess match. Getting frustrated really only makes it worse. Many times I've had to step away or I would of had a few very expensive BBQ grills. Chris can tell you how much Texas people love BBQ!
 

CraigWaterman11

Sponsor
Messages
762
Behind the motor mounts? At least where they would be? But how did you get the other side to drop if you didn't remove that mounting point? Anyways, I'm at least glad you got it sorted.
 

Billy3200

Junior Member
Messages
60
Arnie - having read through this thread, two thoughts come to mind: your level of commitment and determination to get over the issues you have faced is impressive to say the least and secondly the help/advice/ideas and support given my other members of the forum is equally impressive. I have nothing useful to add in terms of technical knowledge - I am just rooting for you to get to the successful conclusion you deserve!
Mark