


JAGPURR
New Member
- Messages
- 91
4200 Exhaust manifold removal
If you require access to either the Air Con compressor or the Starter motor, you will need to remove the engine heat shield and the only way to do this is firstly to remove the exhaust manifolds.
Definitely a pig of a job so you will be relieved to know that you can just manage with removing one side.
Remove the front exhaust pipes/Cats, for instruction see ( 4200 front pipes/cat removal )
Remove the engine bay covers, then the Air flow meter and throttle body, see (auxiliary drive belt change on 4200) for details.

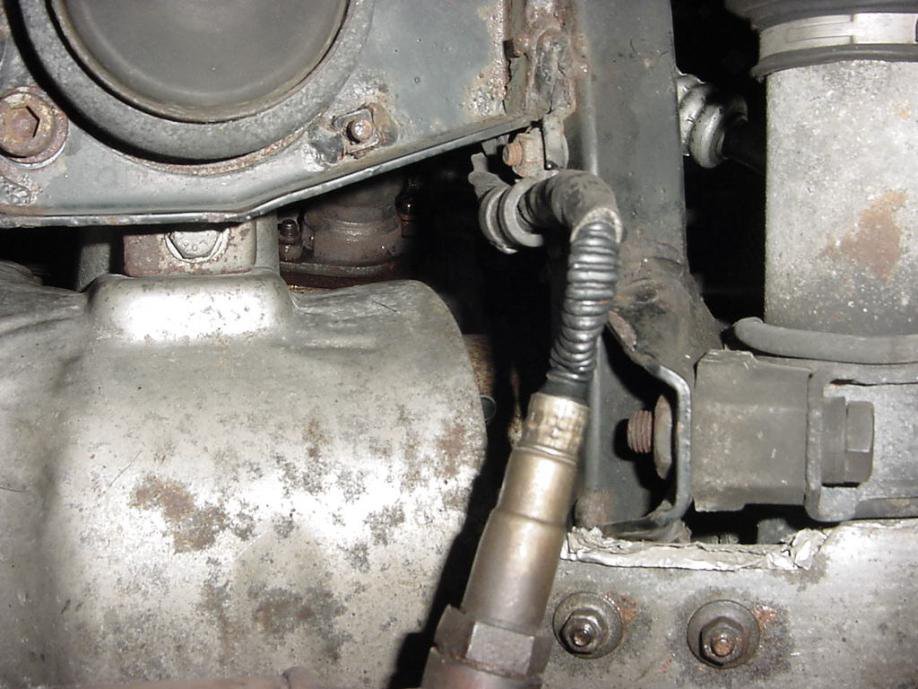
Remove the coil connectors and bracket from the left side of the engine. (These are numbered so don't panic) If you are confused the left or right is always listed as you are sitting in the driver's seat facing forward i.e., Left or Right hand drive. Not as if you are stood in front looking at the engine.

Remove the pipes connected to the aux air valve

The three 5mm Allen bolts holding the steady bracket (the inner bolt is fun, in fact it was dispensed with on later cars I believe)

The two 5mm Allen bolts on the lower flange

Finally remove the valve assembly gently so as not to damage the gasket.

Remove the two blots holding the stiff air pipes

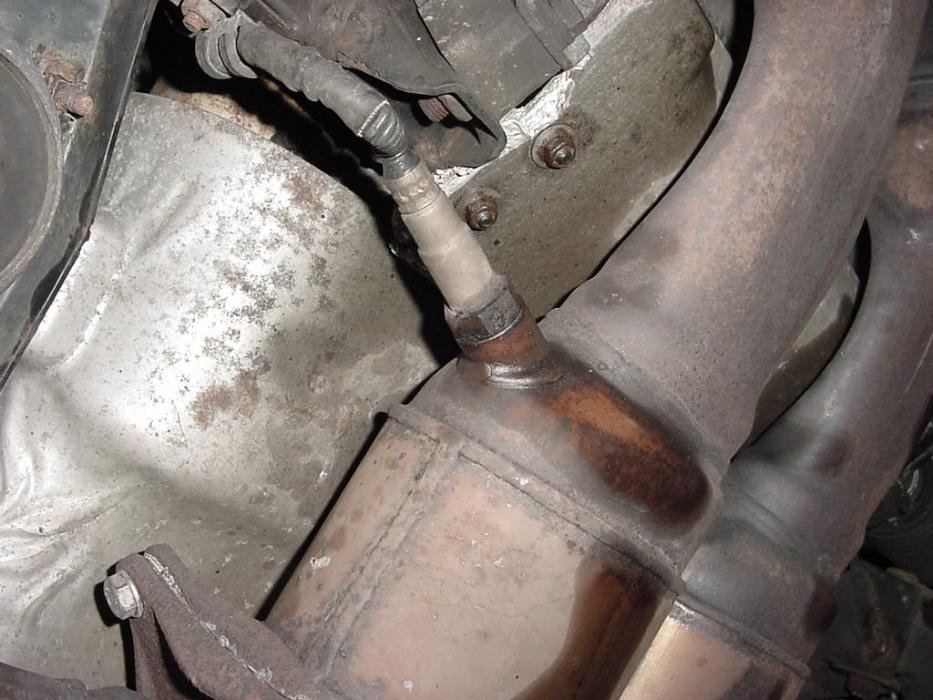
This will allow you to turn it up out of the way I also removed the air pump as it is only held by two 10mm bolts. This will give you more room to get at and remove the eight 13mm nuts holding the manifold in place. Believe me you will need as much space as possible and the patience of a saint! You also need to remove the brass test point cap and the stud from the manifold that you see in this picture as they will get in the way later.

A couple of bolts are easier from below. You may find some of the nuts come out with the studs attached, don't worry but you will need to soak these in easing oil and separate so you can replace the studs first. You need all the studs in place on refitting in order to fit the gaskets

When the manifold is loose in order to remove it you need to raise the engine. The manual says to remove the 18mm nut holding the engine bracket to the rubber mount but I found it much easier to remove the two 8mm Allen bolts holding the mounts to the chassis. Undo both sides as you need to jack up the engine enough to remove the manifolds. You may also need to lever the engine sideways a little to get it out.
Lower the engine back down and remove the four bolts holding the cowl in place two either side of the drain plug and one each side up next to the engine mount. You can now ease the cowling down enough to gat at the starter.
You can of course remove both manifolds to give you full access but you will probably find after one you will not relish the other unless absolutely necessary.
Re-fitting is a reversal of the above ensuring you replace all gaskets, with new if required. Note the manifold gaskets are fitted with the raised centre part facing out. Check the cowling doesn't rattle against the manifold or the engine and adjust if necessary, a wooden hammer shaft is just the job.
Keith
If you require access to either the Air Con compressor or the Starter motor, you will need to remove the engine heat shield and the only way to do this is firstly to remove the exhaust manifolds.
Definitely a pig of a job so you will be relieved to know that you can just manage with removing one side.
Remove the front exhaust pipes/Cats, for instruction see ( 4200 front pipes/cat removal )
Remove the engine bay covers, then the Air flow meter and throttle body, see (auxiliary drive belt change on 4200) for details.
Remove the coil connectors and bracket from the left side of the engine. (These are numbered so don't panic) If you are confused the left or right is always listed as you are sitting in the driver's seat facing forward i.e., Left or Right hand drive. Not as if you are stood in front looking at the engine.
Remove the pipes connected to the aux air valve
The three 5mm Allen bolts holding the steady bracket (the inner bolt is fun, in fact it was dispensed with on later cars I believe)
The two 5mm Allen bolts on the lower flange
Finally remove the valve assembly gently so as not to damage the gasket.
Remove the two blots holding the stiff air pipes
This will allow you to turn it up out of the way I also removed the air pump as it is only held by two 10mm bolts. This will give you more room to get at and remove the eight 13mm nuts holding the manifold in place. Believe me you will need as much space as possible and the patience of a saint! You also need to remove the brass test point cap and the stud from the manifold that you see in this picture as they will get in the way later.
A couple of bolts are easier from below. You may find some of the nuts come out with the studs attached, don't worry but you will need to soak these in easing oil and separate so you can replace the studs first. You need all the studs in place on refitting in order to fit the gaskets
When the manifold is loose in order to remove it you need to raise the engine. The manual says to remove the 18mm nut holding the engine bracket to the rubber mount but I found it much easier to remove the two 8mm Allen bolts holding the mounts to the chassis. Undo both sides as you need to jack up the engine enough to remove the manifolds. You may also need to lever the engine sideways a little to get it out.
Lower the engine back down and remove the four bolts holding the cowl in place two either side of the drain plug and one each side up next to the engine mount. You can now ease the cowling down enough to gat at the starter.
You can of course remove both manifolds to give you full access but you will probably find after one you will not relish the other unless absolutely necessary.
Re-fitting is a reversal of the above ensuring you replace all gaskets, with new if required. Note the manifold gaskets are fitted with the raised centre part facing out. Check the cowling doesn't rattle against the manifold or the engine and adjust if necessary, a wooden hammer shaft is just the job.
Keith
")