QP5 bumper removal

Dhanj

Junior Member
Messages
408
QP5 Front bumper removal

Guys,

For those of you who have seen my QP5 (2004 QP) , you may have noticed that I have a little something to address when it comes to the front plastic bumper (lower right area). I hit a grouse at around 60mph on a dual carriageway. Damage was minimal but the impact did crack the bumper. The poor bird on the other hand snuffed it - if there was any consolation it died instantly so it hopefully didn't have any time to feel anything.

I am contemplating getting a used bumper (should cost around £300) as opposed to repairing it. Excuse my naivety when it comes to paintwork but I assume the bumper can be spray painted before mounting to the car? I appreciate the guys doing the painting may need the car there in order to match the paint of course.

Anyway, have any of you seen any instructions for removing the front bumper on a QP5 or maybe one of you have undergone such an exercise before and can offer a brief guide.

Any help/advice appreciated.

Cheers, Dhanj
 
Last edited:

conaero

Forum Owner
Messages
34,632
Sorry not done one of those.

If you do end up doing it can you do a how to guide with pics for out tech fixes section?
 

Dhanj

Junior Member
Messages
408
OK so I finally got around to removing the front bumper on my 2004 QP. If any of you are attempting doing it be warned it's not the easiest of jobs and there are a heck of a lot of bolts and nuts that connect the darn thing to the rest of the car! To put it into perspective there are only 4-6 bolts you need to remove on a 7 series E38 Beema!

You'll need to remove:

- the engine compartment central cover (found under the bonnet/hood) of course!).
- the front wheels.
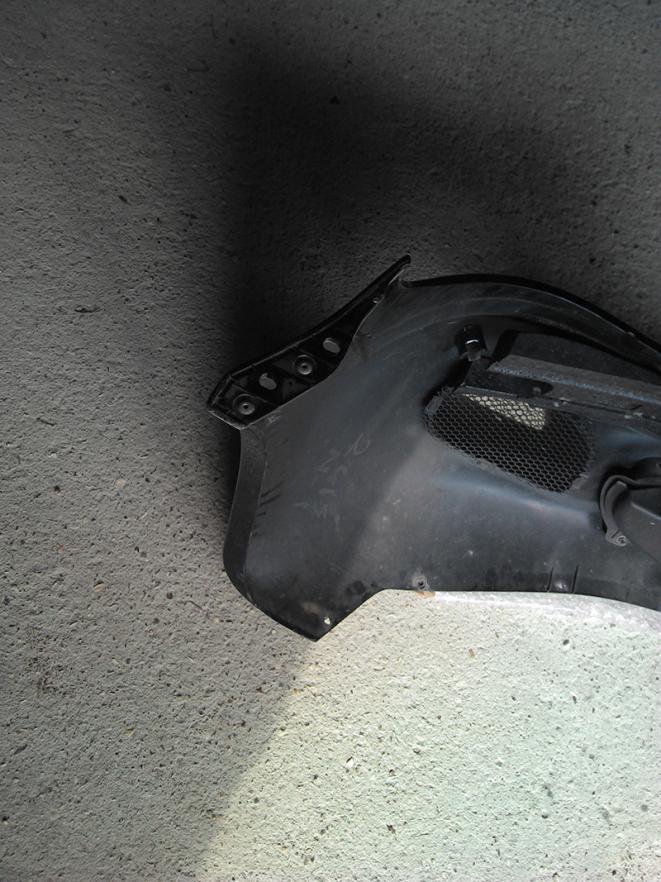
- front wheelhouse covers on both sides (that's the only way you'll access the 2 bolts in the far corners - see last pic below - access being via the naked wheel arch devoid of wheelhouse cover) .
- removing the front underbody floor shield (or front undertray) is also advisable otherwise it will end up hanging on a few bolts which may damage it.

Due to the area of the car you'll be dismantling, you'll no doubt encounter your fair share of rusty and/or stiff/seized bolts so tread carefully and take your time.

On the plus side the feed wire for the front parking sensors wiring loom clips off easy. The bumper is also very light so its a one person job to finally lift it off once all bolts are undone.

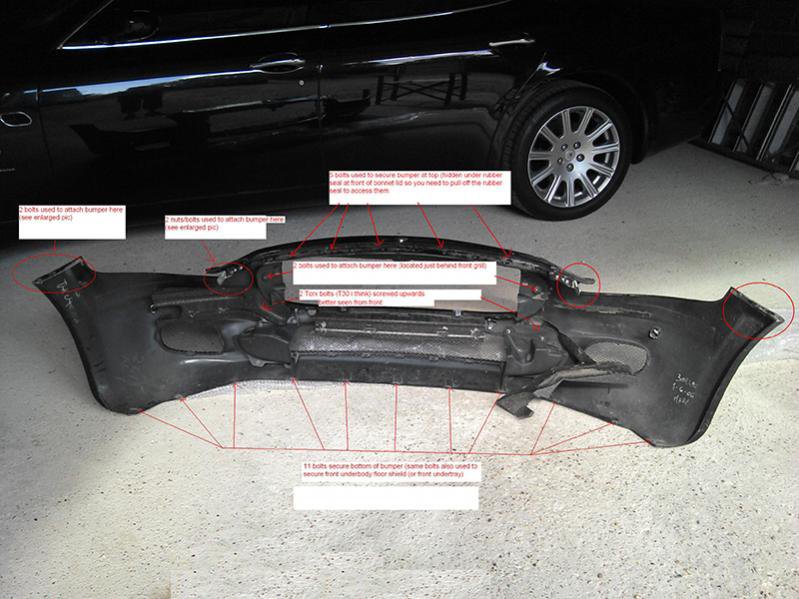
I'll try and pad out with more detail later if I have time but the first image (showing the back of the front bumper) should give you most of what you need to know.
i.e. where to locate the connecting bolts/nuts. I have marked out the locations in red - hopefully you can zoom in on the image and read the annotations.

rear of QP5 bumper.jpg

Most are easy to get to but I've included some pics of the harder ones.


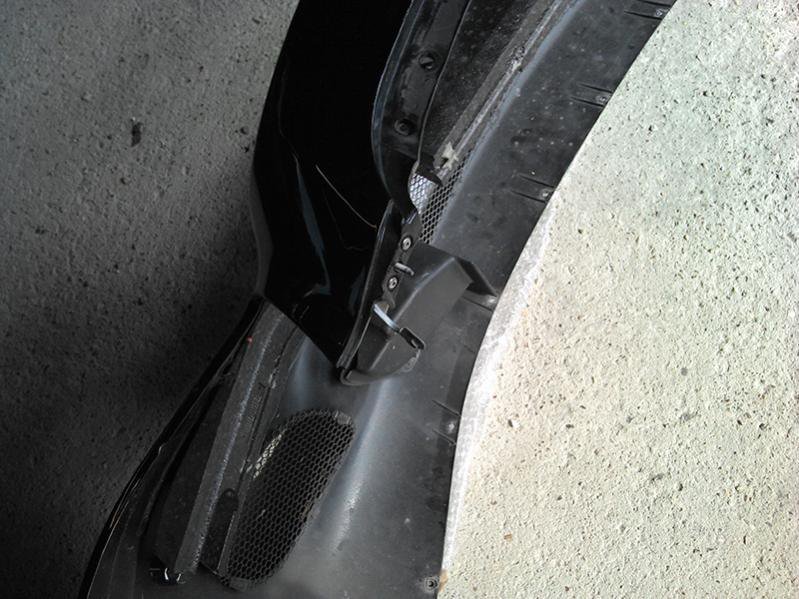
For example, you may need some small fingers to get at these (access possible only once engine compartment central cover is removed) :

QP5 bumper top left and right fixings.jpg


And space is seriously tight trying to remove these (which are accessed via inside of naked wheel arch once it is devoid of wheelhouse cover):

QP5 bumper end fixings.jpg


One thing you will discover when performing this task is how much effort it takes to change the headlight bulb on a QP5, access to which is hidden behind the wheelhouse covers. What were they thinking! Bet the main dealer charges at least 30 mins labour just to change a headlight bulb! I would imagine it's a similar headache on a GT too. Don't even think of trying to ask those juniors at Halfords to try that stunt! ;)


Dhanj

EDIT: Hopefully Matt has now fixed the pictures not appearing issue

EDIT2: I have also edited the above detail a bit - should make it a bit easier to follow now
 
Last edited:

rs48635

Member
Messages
3,181
Need to change my headlight bulb (xenon) on driver's side.
Seems access is via the wheel arch. Can it be done with wheel still fitted?


Sent from my iPhone using Tapatalk
 

rs48635

Member
Messages
3,181
Answer my own question - wheel needs to come off :)
Access is still tight, but I have left the liner half fitted and just bent it back.