You are using an out of date browser. It may not display this or other websites correctly.
You should upgrade or use an alternative browser.
You should upgrade or use an alternative browser.
GranSport Giallo Granturismo thread
- Thread starter gotcha
- Start date
gotcha
Member
- Messages
- 78
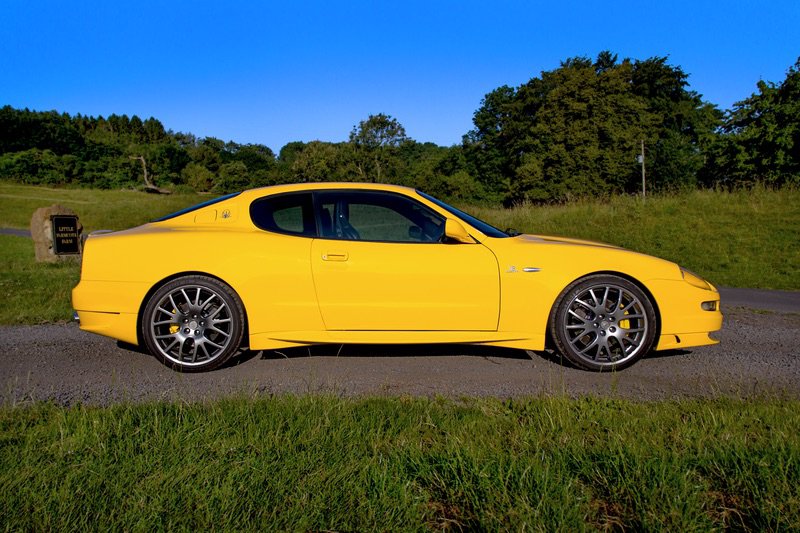
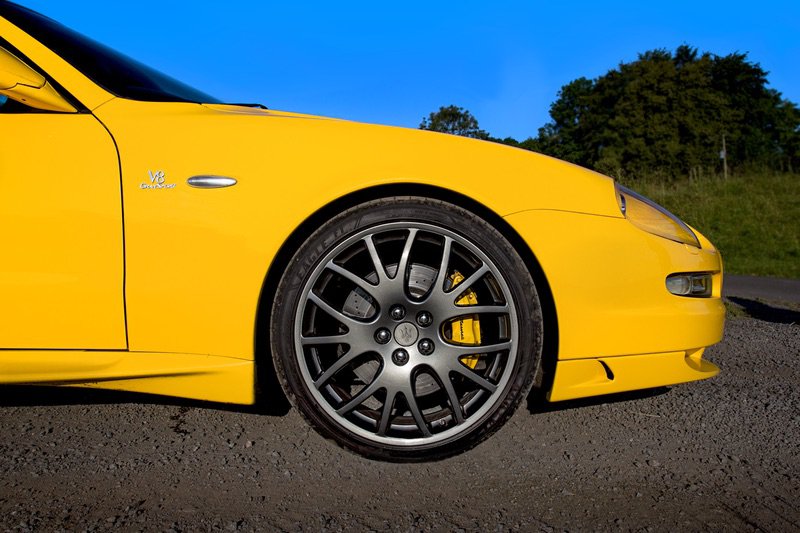
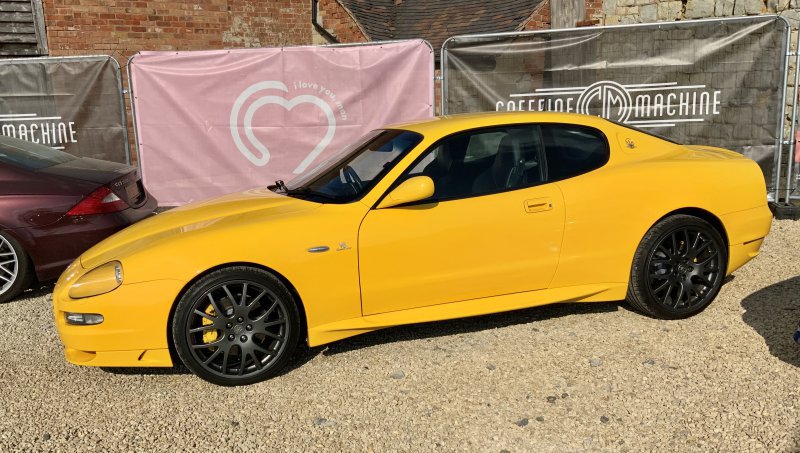
The contrast does work well against the Giallo paint, but I’m a little biased.
Yellow calipers are optional…..
They do look great indeed. For me they are a bit on the limit of darkness. In direct light like on your first two pictures I love them. On the third picture where the light is from different angle and the rear one is almost black I like them less. Generally I don't like black wheels and grigio mercury is probably a limit of darkness where I would be OK to go. I will probably give it more time, it is not urgent. I love them both in silver and grey. I cannot choose like a woman
Regarding calipers I will be probably more controversial, because here I am fully decided to go for red ones. I know this will probably split opinions more than wheels and it is more rare combination than yellow calipers on yellow car ones but I have seen some cars like this, Porsches, Megane RS, Camaro etc with red calipers and I like it.
Last edited:
gotcha
Member
- Messages
- 78
Time flies so fast. I realized it is already half a year since I posted some update. There are so many projects I was neglecting the GranSport a little. I didn’t really drive it much, nor worked on it a lot, however I kept buying bits and parts all the time with many future plans.
The main thing taking all my time (expect job and family of course) was that I was working ******* my new garage construction to have it closed and partially furnished before winter. And I succeeded and even though there is still a lot of work to do I finally started to use my new garage as intended and before Christmas I managed to move my GTA and GS inside.
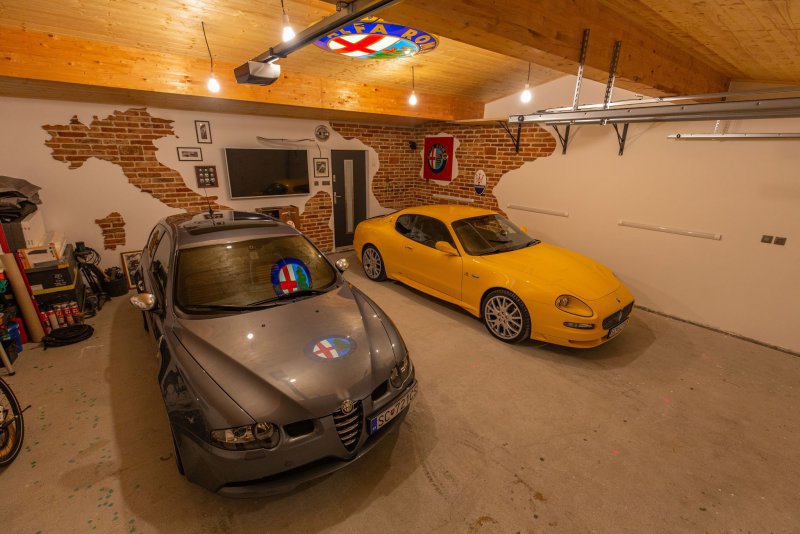
Due to the missing pavement and difficult access, they will probably stay closed there for the coming few months until I sort out the driveway, but they are already in their new home what also cleared for me the yard and the olded 1-car garage for other things.
Nevertheless, in the last months I did some jobs on GS as well.
One of the bigger ones was paint restoration and detailing. Generally, the car looks great for almost 20 years old paint. Maybe it was even resprayed, who knows, but I am certainly happy with it. Of course, it had some scratches and some stone chips, but still amazing for its age.
First, I sorted the stone chips. Except a dozen of small “usual” ones, the only significant issue was one bumper location where the paint peeled off in the size of two fingernails. I decided to give a go to this repair system:
https://colorndrive.com/
Here is the big chip.
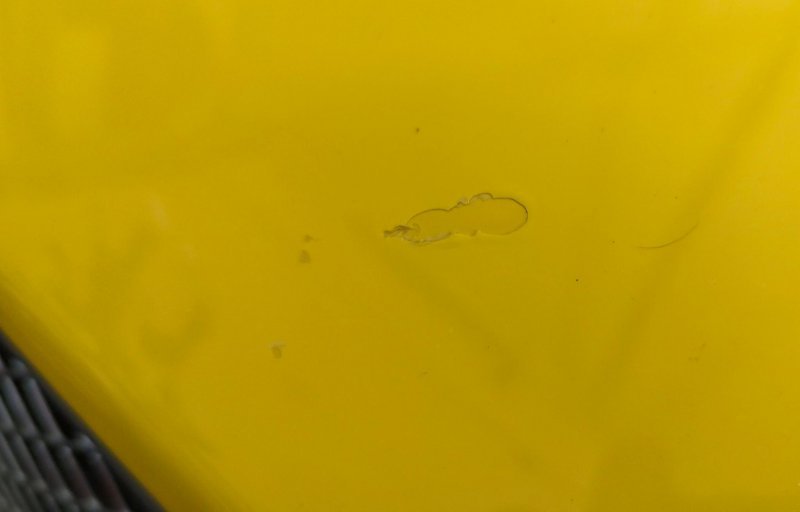
The paint fills the hole and preferably stays protruding from the paint.
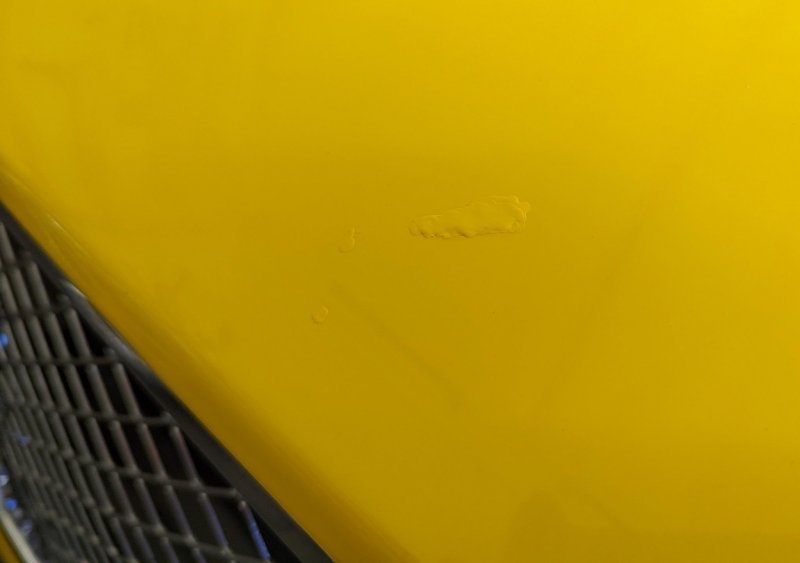
Then with a special liquid and sponge is flattened to become smooth with the rest of the surface like if it was sanded down.
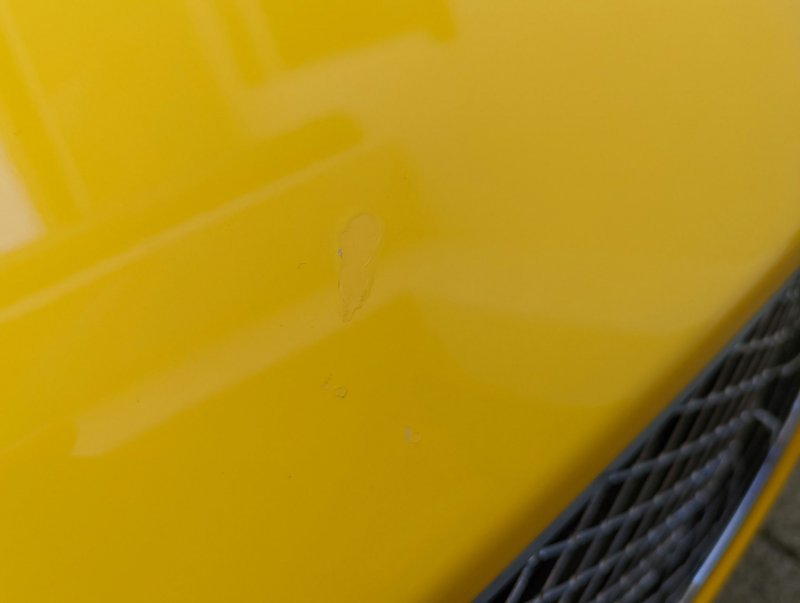
Of course it is not absolutely perfect, but with some polish it will do.
After sorting the stone chips I detailed the paint. It took me about a month, but I worked only 1-2 hours a day and only evenings. All together it took me about 30-35h of work. This were my steps:
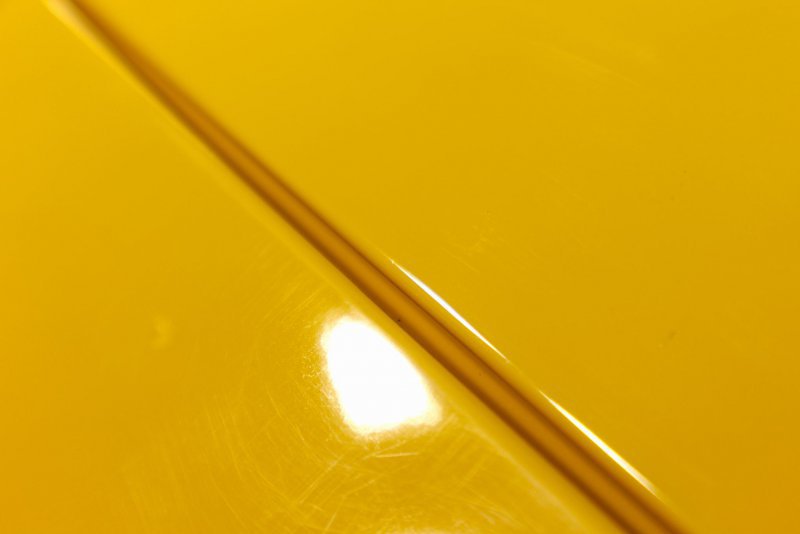
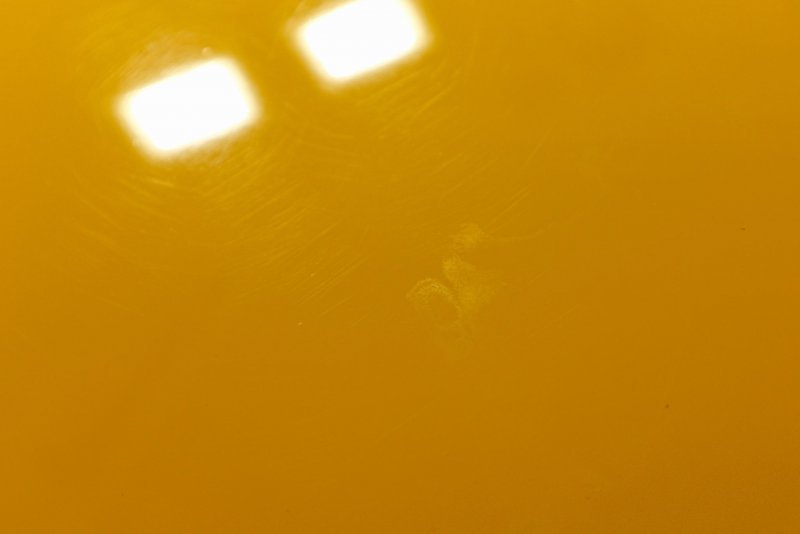
Here is the paint condition before the polish:
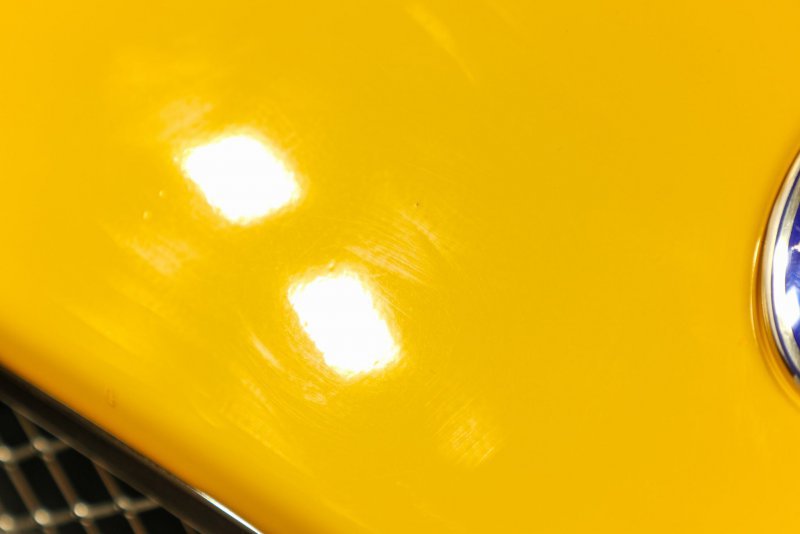
And here is the polished body, but still before the final clean and ceramic coating:
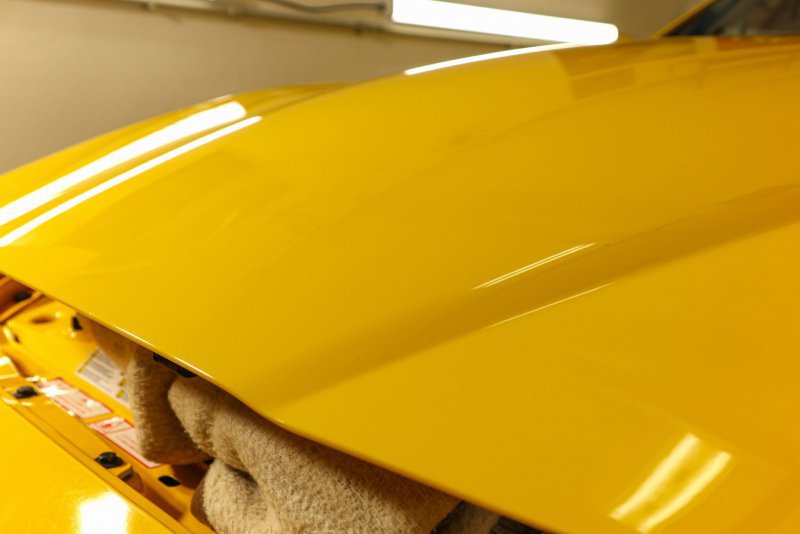
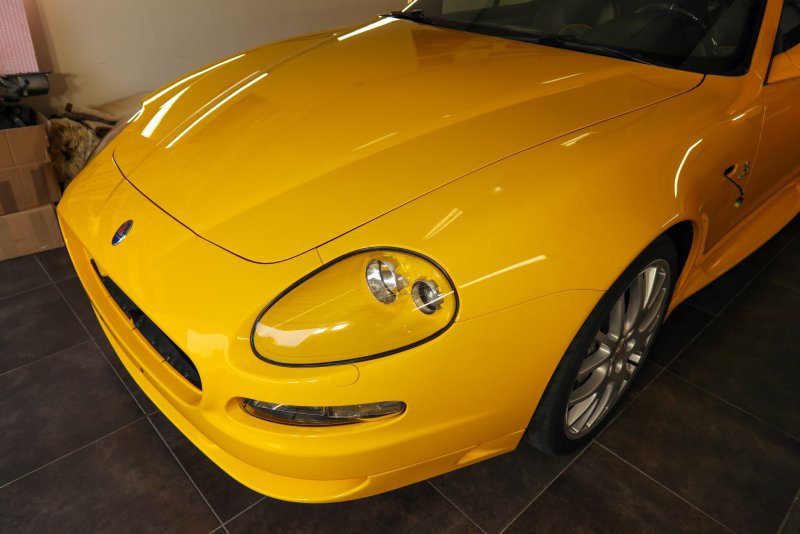
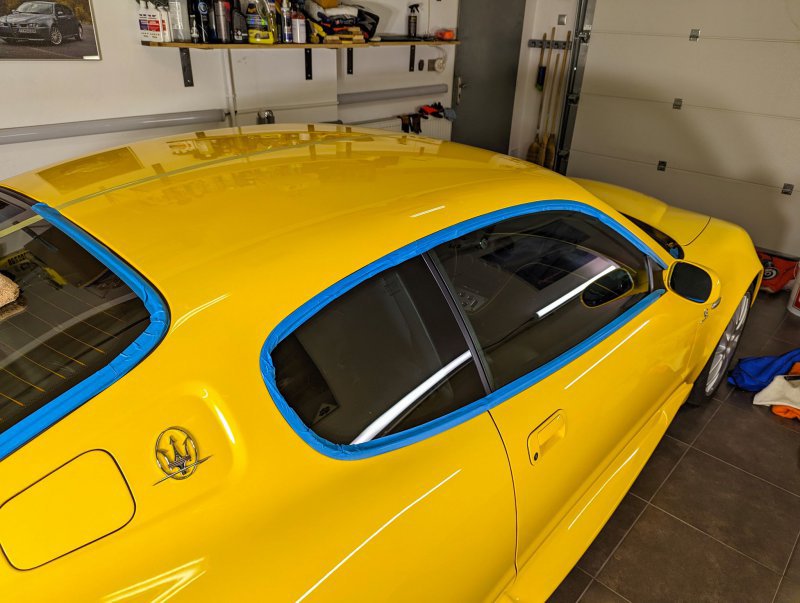
I just realized, I have not really driven the car since. I have no pictures in the sunlight, only in the garages but it looks great to me. It is also probably at the limit of detailing what can I do. Probably some professional detailer could get more of it, but I am fine with my job. And so far, I just did the paint, I didn’t have time to detail the glass, trim or interior at all…
The main thing taking all my time (expect job and family of course) was that I was working ******* my new garage construction to have it closed and partially furnished before winter. And I succeeded and even though there is still a lot of work to do I finally started to use my new garage as intended and before Christmas I managed to move my GTA and GS inside.

Due to the missing pavement and difficult access, they will probably stay closed there for the coming few months until I sort out the driveway, but they are already in their new home what also cleared for me the yard and the olded 1-car garage for other things.
Nevertheless, in the last months I did some jobs on GS as well.
One of the bigger ones was paint restoration and detailing. Generally, the car looks great for almost 20 years old paint. Maybe it was even resprayed, who knows, but I am certainly happy with it. Of course, it had some scratches and some stone chips, but still amazing for its age.
First, I sorted the stone chips. Except a dozen of small “usual” ones, the only significant issue was one bumper location where the paint peeled off in the size of two fingernails. I decided to give a go to this repair system:
https://colorndrive.com/
Here is the big chip.

The paint fills the hole and preferably stays protruding from the paint.

Then with a special liquid and sponge is flattened to become smooth with the rest of the surface like if it was sanded down.

Of course it is not absolutely perfect, but with some polish it will do.
After sorting the stone chips I detailed the paint. It took me about a month, but I worked only 1-2 hours a day and only evenings. All together it took me about 30-35h of work. This were my steps:
- Good wash
- Cleaning the body with clay bar
- Polishing. This was the most time-consuming step. I use Rupes DA polishers, pads and compounds. Each body panel was polished 3 times, with medium, fine and ultrafine combination of pads and compounds while some heavily scratched areas like doorsills had to be polished with a coarse pad/compound first as well to get rid of deeper scratches.
- After polishing I cleaned al the body with 3M Isopropyl alcohol
- I applied 2 layers of my favorite ceramic coating as a base:
- https://www.carboncollective.com/product/molecule-9h-ceramic-coating/
- Finally, a top ceramic coating layer that has less durability but more shine
- https://www.carboncollective.com/product/nero-ceramic-coating/
Here is the paint condition before the polish:


And here is the polished body, but still before the final clean and ceramic coating:


I just realized, I have not really driven the car since. I have no pictures in the sunlight, only in the garages but it looks great to me. It is also probably at the limit of detailing what can I do. Probably some professional detailer could get more of it, but I am fine with my job. And so far, I just did the paint, I didn’t have time to detail the glass, trim or interior at all…
gotcha
Member
- Messages
- 78
One of the other smaller jobs was replacing the charcoal canister on the side of the fuel tank. I understand with Maserati it is supposed to be a regular service item. When I pulled mine, it had 2004 date code, so I guess it was still original.
I weighted the old vs new. The old one had 2,3kg
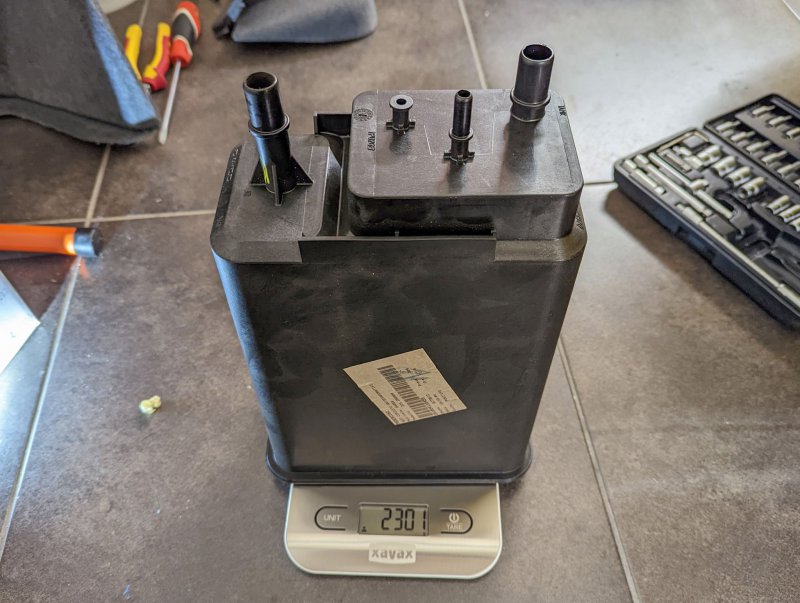
The new one 1,9kg
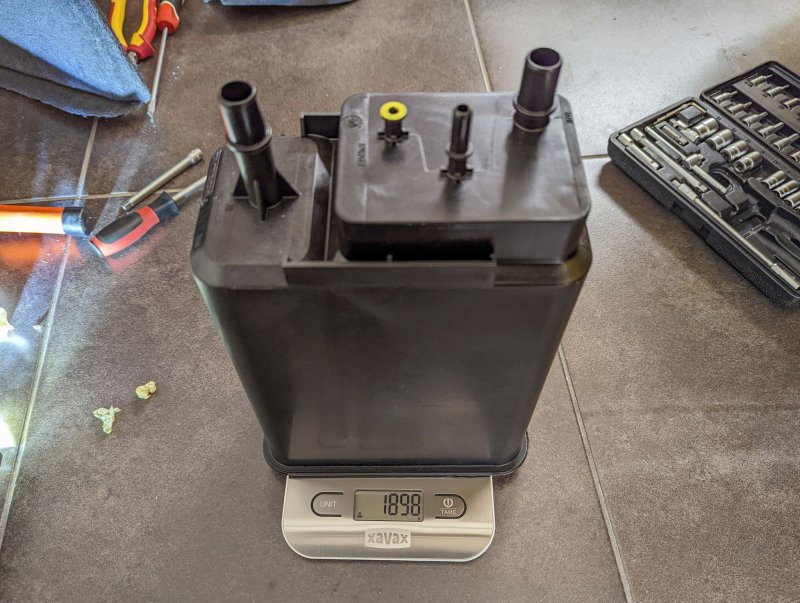
This means the old one had about 0,4kg or 0,5 liter of petrol fumes trapped inside.
However, there are other things that were more interesting to me around it.
First, I found a weird cable. See under the canister, on the steel bracket holding it. There is a cable with blue plastic isolation crimped on the connector. This is not automotive wiring for sure but some homemade addition. Obviously, grounding cable. Leads somewhere to the car’s body/parcel shelf area above the fuel tank. Maybe I will find where it goes one day when removing the parcel shelf behind the rear sets.
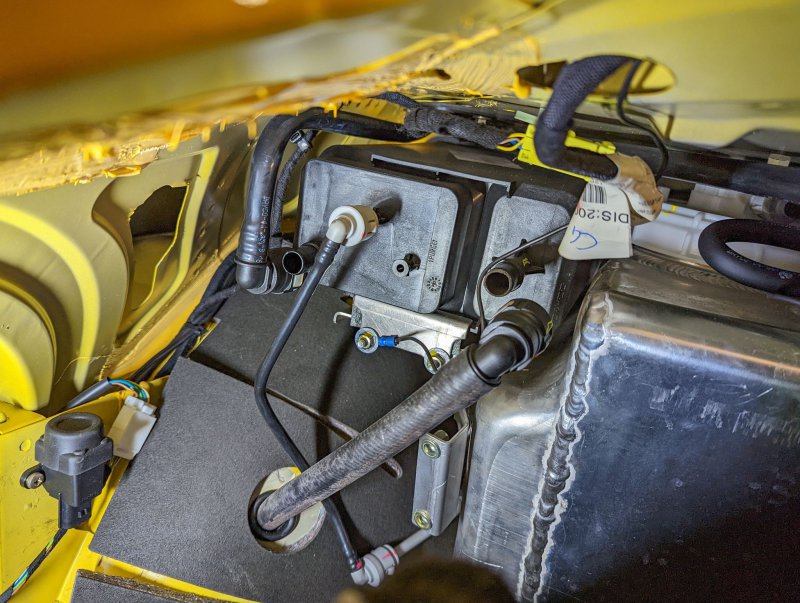
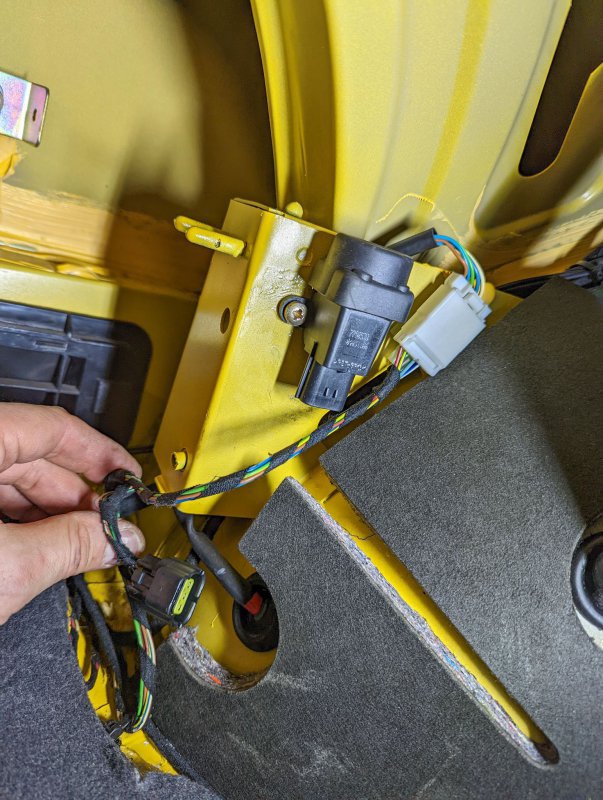
Second, I found out that the fuel cutoff switch is connected to nothing. I found the connector on the wiring tucked below. How comes? The car is not supposed to start without this connected. Do I have some issue? Did somebody mess with wiring or disconnect it intentionally? I tried few times to start the car with this connector plugged or unplugged, always started perfectly. So I left it connected but it does not seem to matter.
I did also find wiring for a CD changer and one 4 pin connector with 3 wires that I cannot identify.
I weighted the old vs new. The old one had 2,3kg

The new one 1,9kg

This means the old one had about 0,4kg or 0,5 liter of petrol fumes trapped inside.
However, there are other things that were more interesting to me around it.
First, I found a weird cable. See under the canister, on the steel bracket holding it. There is a cable with blue plastic isolation crimped on the connector. This is not automotive wiring for sure but some homemade addition. Obviously, grounding cable. Leads somewhere to the car’s body/parcel shelf area above the fuel tank. Maybe I will find where it goes one day when removing the parcel shelf behind the rear sets.

Second, I found out that the fuel cutoff switch is connected to nothing. I found the connector on the wiring tucked below. How comes? The car is not supposed to start without this connected. Do I have some issue? Did somebody mess with wiring or disconnect it intentionally? I tried few times to start the car with this connector plugged or unplugged, always started perfectly. So I left it connected but it does not seem to matter.
I did also find wiring for a CD changer and one 4 pin connector with 3 wires that I cannot identify.


gotcha
Member
- Messages
- 78
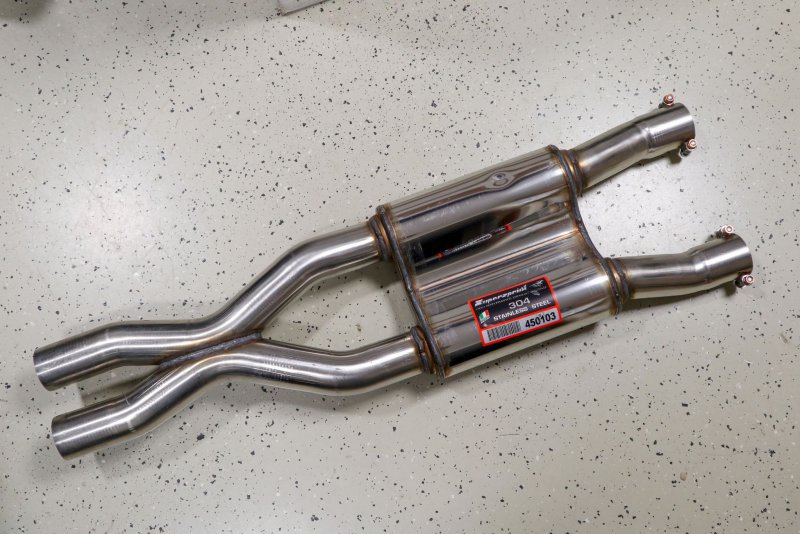
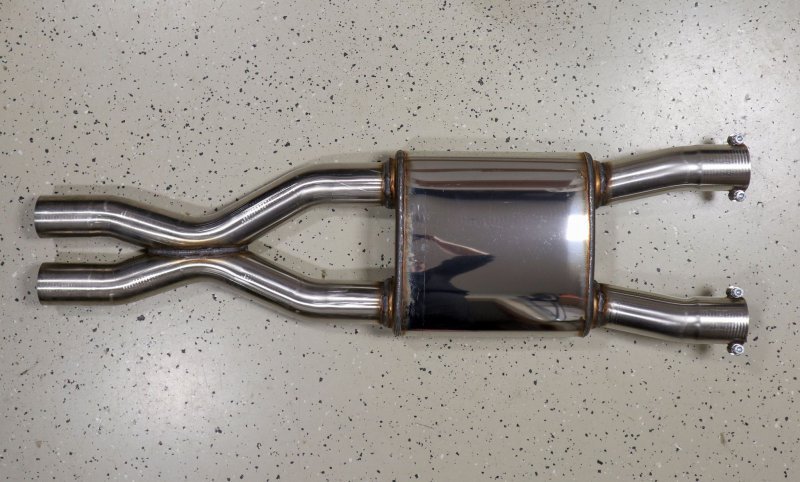
End of November I found out that Supersprint had black Friday deals and offered 30% discount on everything. So I quickly grabbed a resonated X-Pipe that I intended to get anyway. I do have an X-Pipe on the car, but there is a certain drone in sports mode at 2500-3000rpm I don’t like that much and also I plan to get front pipes with one metallic cat instead of two what will make it even louder so I think some extra resonator will be useful for me. I am after a nice sound character, but not too crazy shaking neighbors windows. For the moment I am just putting it in shelf, I will install it sometimes later together with some other jobs as I prefer to cumulate jobs and do more at once.


gotcha
Member
- Messages
- 78
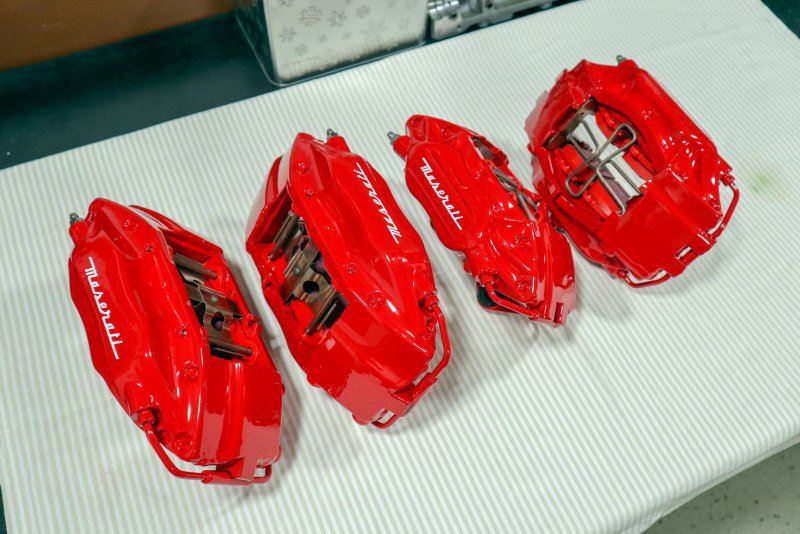
The last job I am just finishing is the brake refurb. I always wanted red brakes, I did always have them on all my cars. For me the calipers just need to be red no matter what the car´s color is. First, I considered spraying my calipers but I found a set of 4 red calipers for the GS in Poland for 400€. So I think even if it was only for spare parts it was worth to get an extra set. I refurbed the purchased set of red calipers and swapped for my sliver ones that I will keep as spares.
The set I got was in very decent condition, had only few hits and chips but the Maserati lettering was yellow and damaged and even through generally nice they were not up to my usual standards.
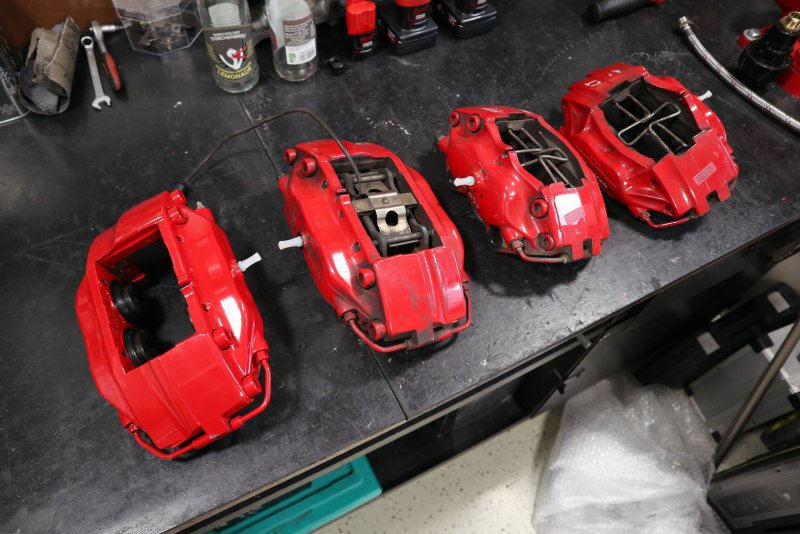
I stripped them completely, sanded, masked and prepared for paint.
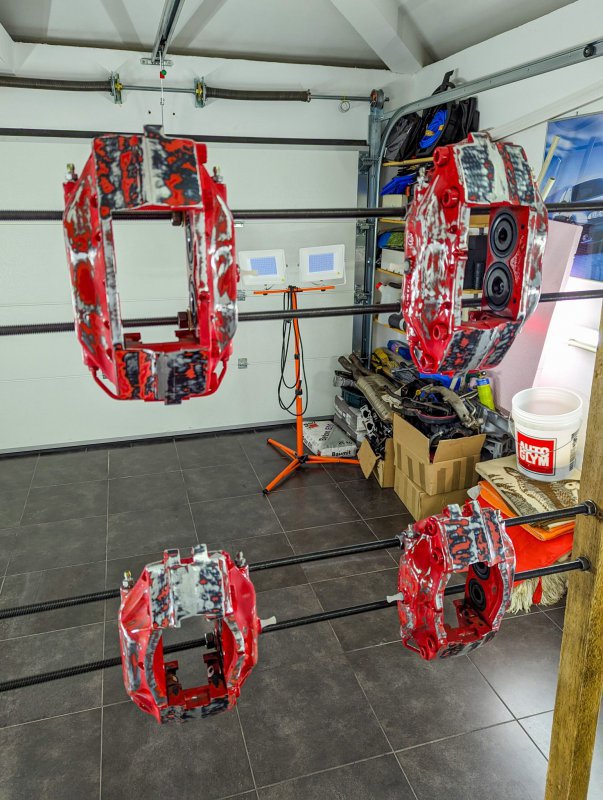
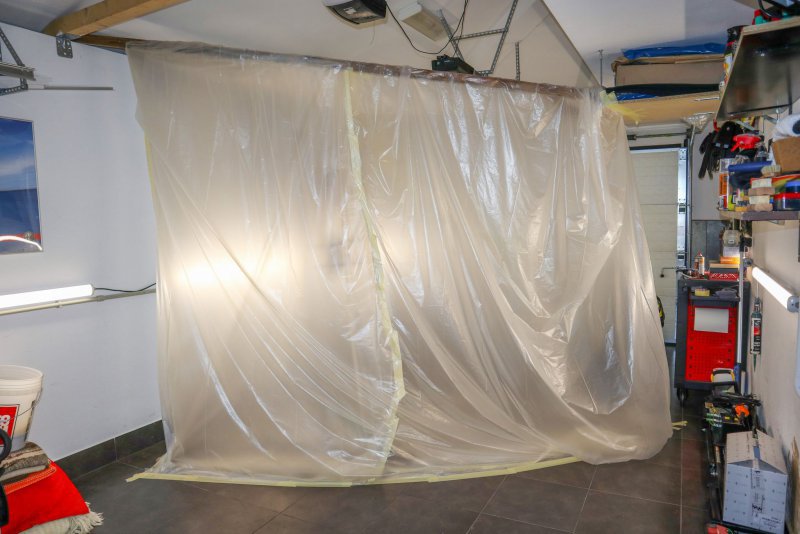
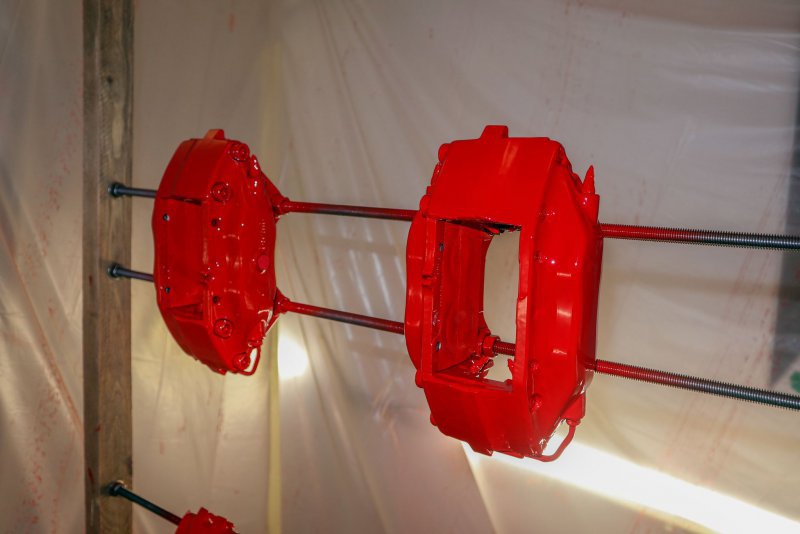
As for the last 2 months outside weather was generally very cold and wet, there was no way to paint them on the yard. So made a temporarily spray booth in my garage. I had few more projects other then brakes, so I used it for about a week. Not perfect, but good enough.
Calipers sprayed, I used Foliatec two component brake paint.
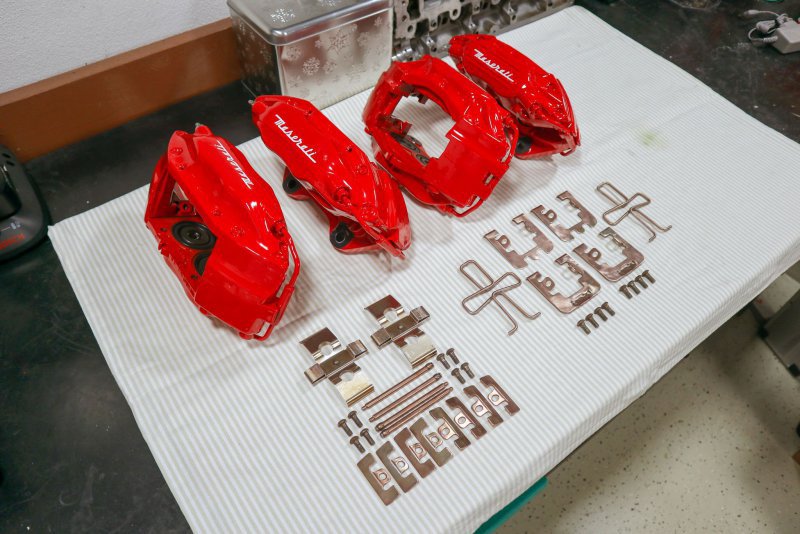
With logos and cleaned bits.
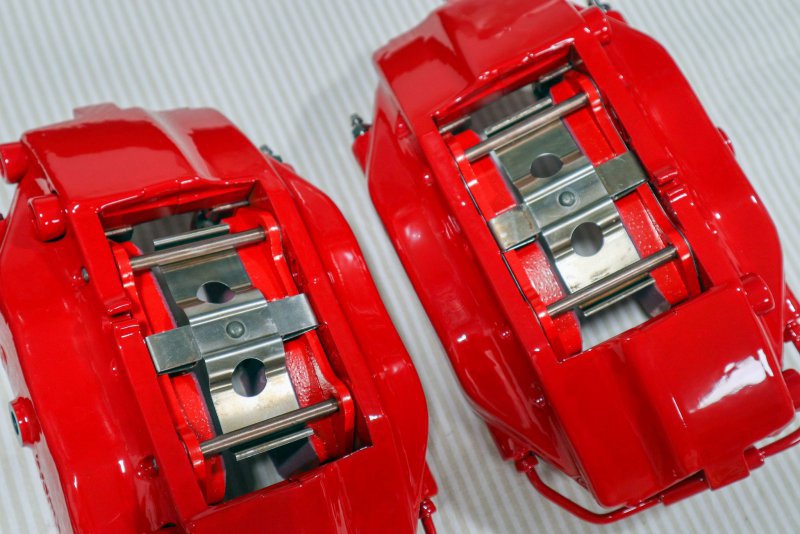
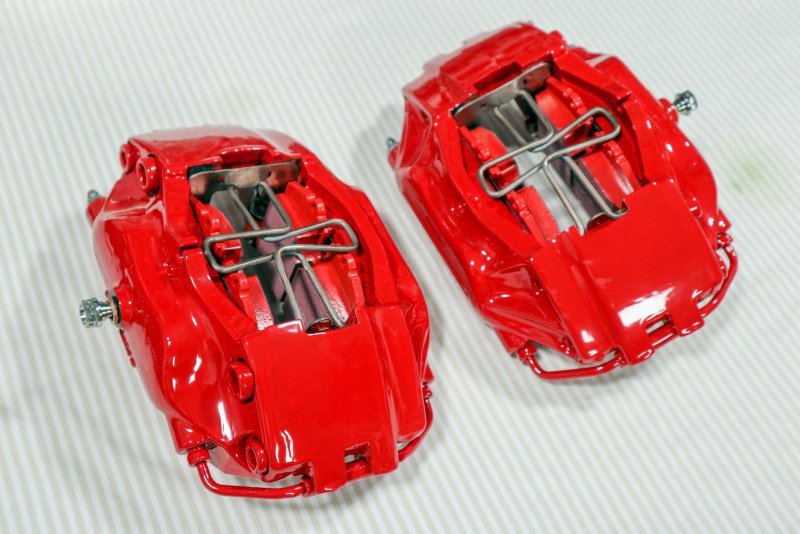
And assembled with EBC redstuff pads. Again, I am used to this compound, I had it on many cars. For spirited road use they are pretty good and release only minimal brake dust. Except a bit of squeal noise at very low speeds at parking’s for example I have nothing bad to say about them. So, let’s see how they work on GS.
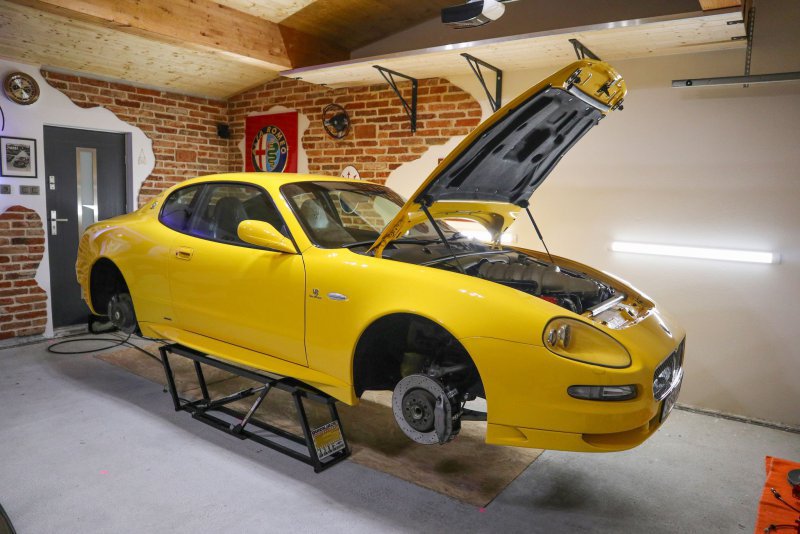
Car ready to receive new brakes at all four corners.
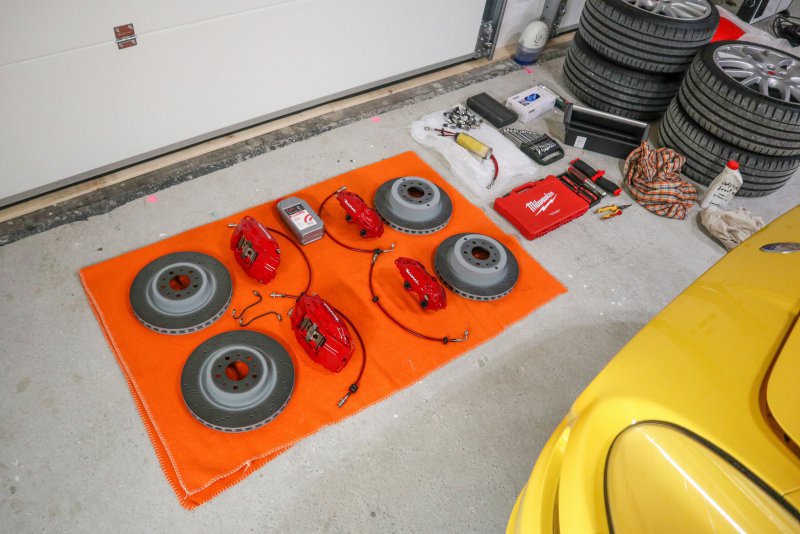
And here are the bits, with new OEM discs front and rear.
The set I got was in very decent condition, had only few hits and chips but the Maserati lettering was yellow and damaged and even through generally nice they were not up to my usual standards.

I stripped them completely, sanded, masked and prepared for paint.

As for the last 2 months outside weather was generally very cold and wet, there was no way to paint them on the yard. So made a temporarily spray booth in my garage. I had few more projects other then brakes, so I used it for about a week. Not perfect, but good enough.

Calipers sprayed, I used Foliatec two component brake paint.

With logos and cleaned bits.

And assembled with EBC redstuff pads. Again, I am used to this compound, I had it on many cars. For spirited road use they are pretty good and release only minimal brake dust. Except a bit of squeal noise at very low speeds at parking’s for example I have nothing bad to say about them. So, let’s see how they work on GS.


Car ready to receive new brakes at all four corners.

And here are the bits, with new OEM discs front and rear.

gotcha
Member
- Messages
- 78
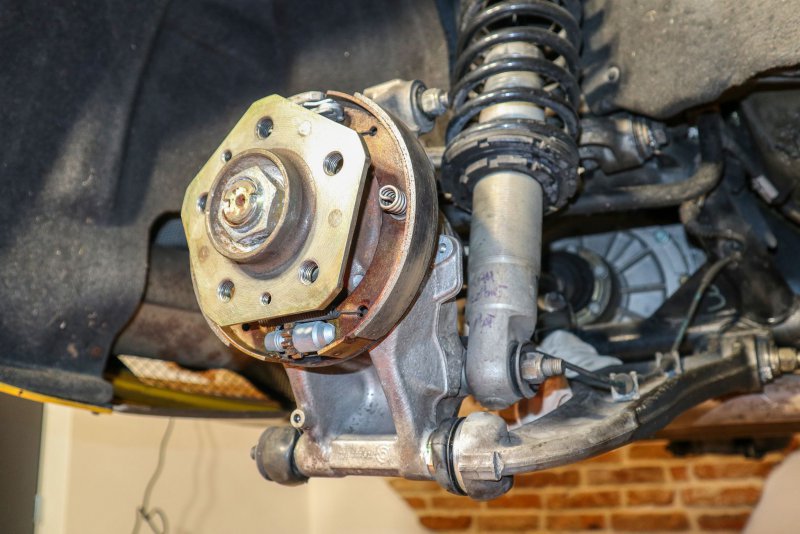
I started at the rear right, furthest from the fluid reservoire. The pads were not that bad, but the disc was a bit wavy and had some grooves.
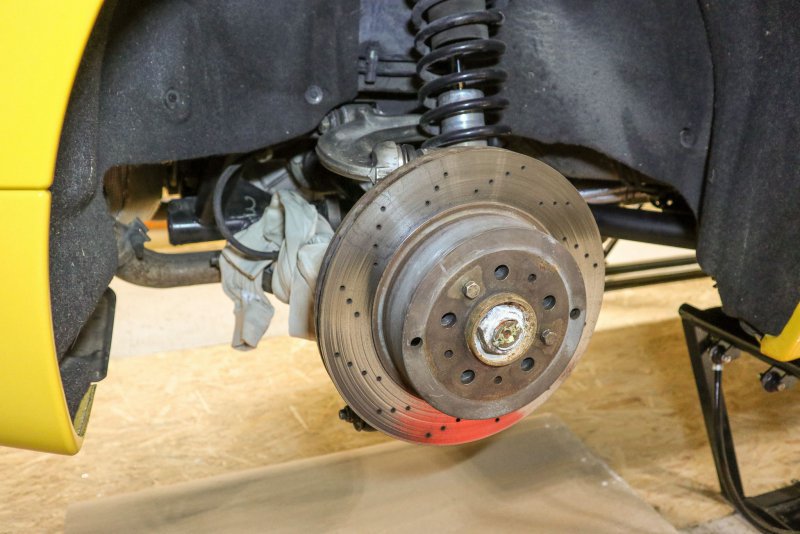
However, after removing the disc and cleaning the drum brake and hub I was pleasantly surprised. No rust, all nice and clean, handbrake adjustment perfectly smooth and brake shoes had a lot of meat and were not delaminating. I did have a set of new ones, but no point in changing them so I keep the existing ones.
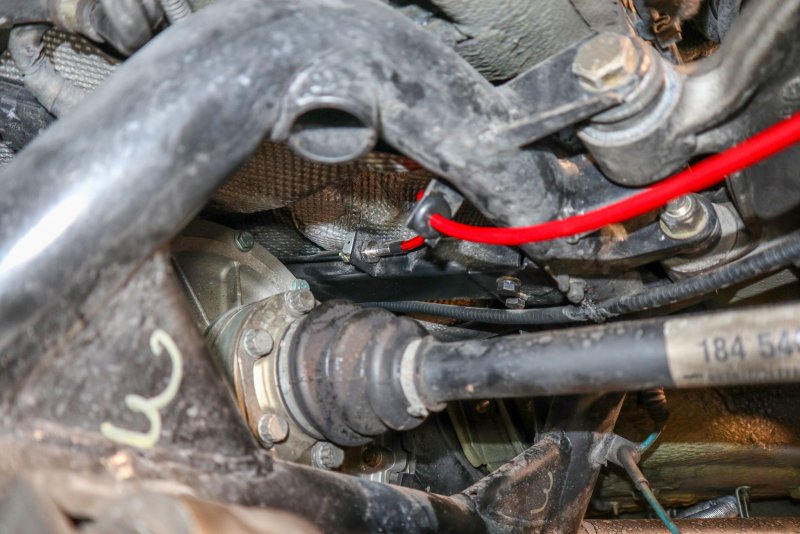
The hose was a bit more tricky, does not attach in the wheel bay, but on the underside, quite close to the center of the car, almost above the gearbox. Fiddly, but I have seen worse.
By the way, I am using Probrake hoses from Germany. They do have a nice configurator so you can spec all the details of the hose as you want to have it, length, fittings grommets, color… exactly as you need:
First corner done.
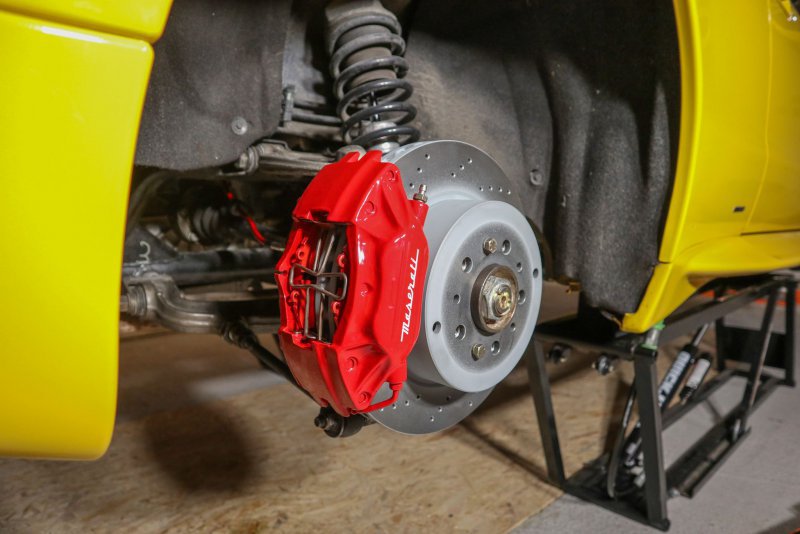
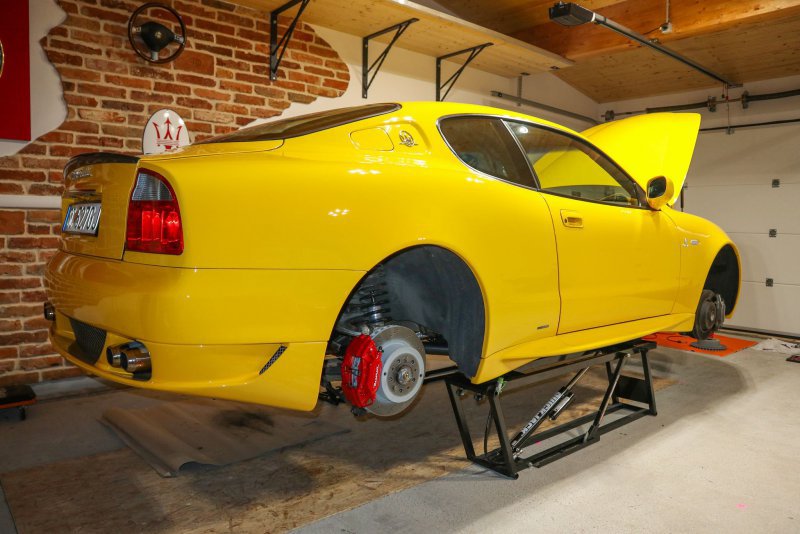
Rear left is the same as right one, only the hose attaches differently. The hoses are the same length and type left/right, they are just differently bent and attached on the car.
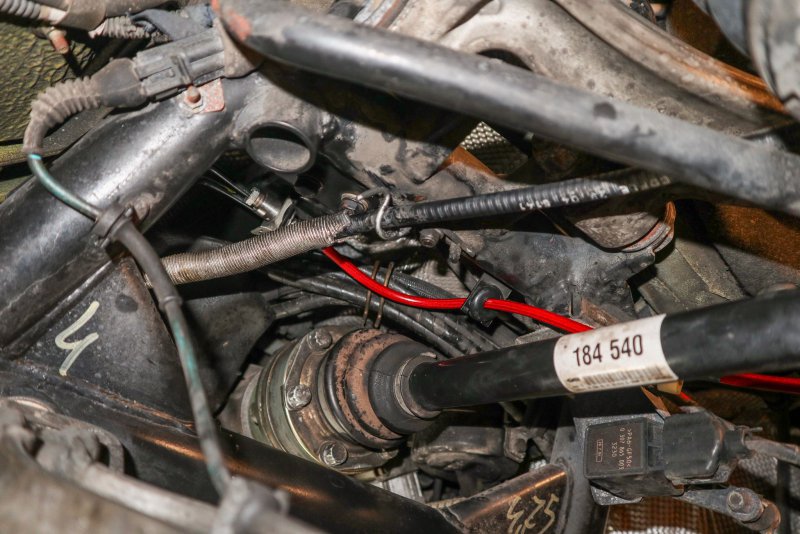
For the hose/caliper attachment I used a fitting for banjo bolt. I do find removing the caliper much easier if needed compared to the screw-in fitting type. You can ignore the rubber grommet on the fitting, I spec the hose with two grommets on it just in case and one is not needed. I could cut it off or keep it there, for the moment I keep it there with no use.
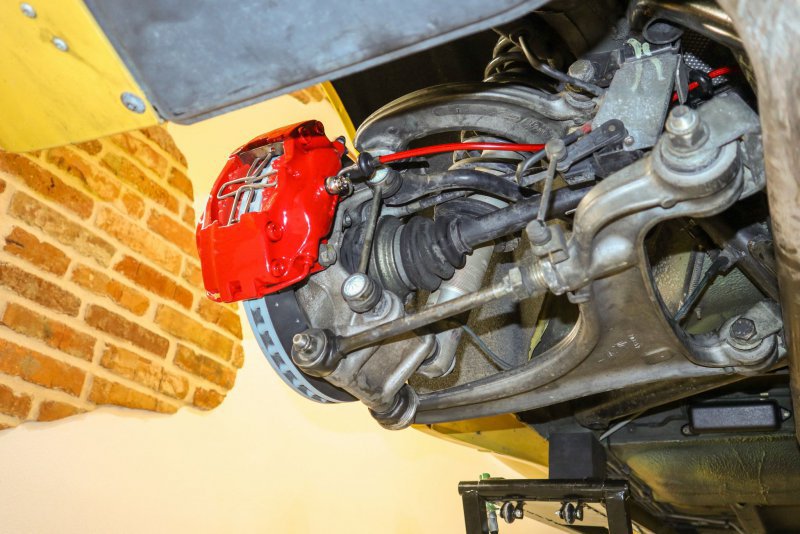
Fronts are supposed to be easier due to no brake drum. But in the end the job is the same.
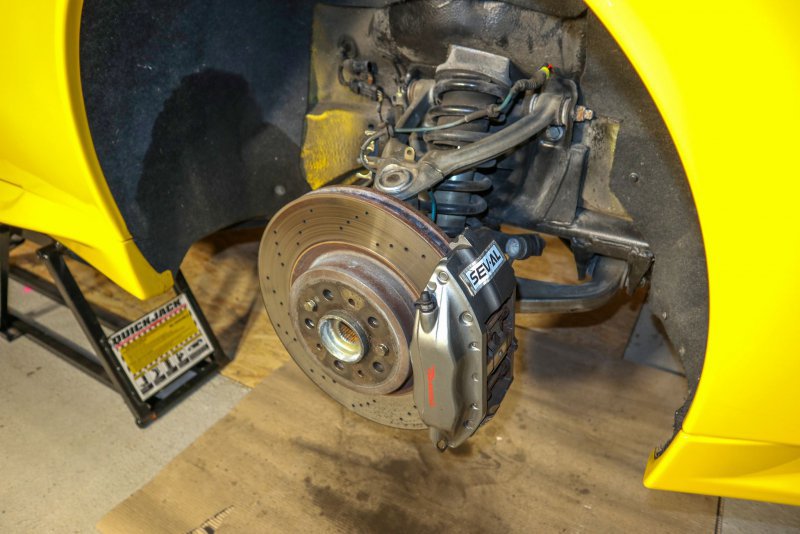
Front pads were much worse than rear ones, very rusty and delaminating from the backing surface. The disc also had a visible lip and had a very pitted surface from rust.
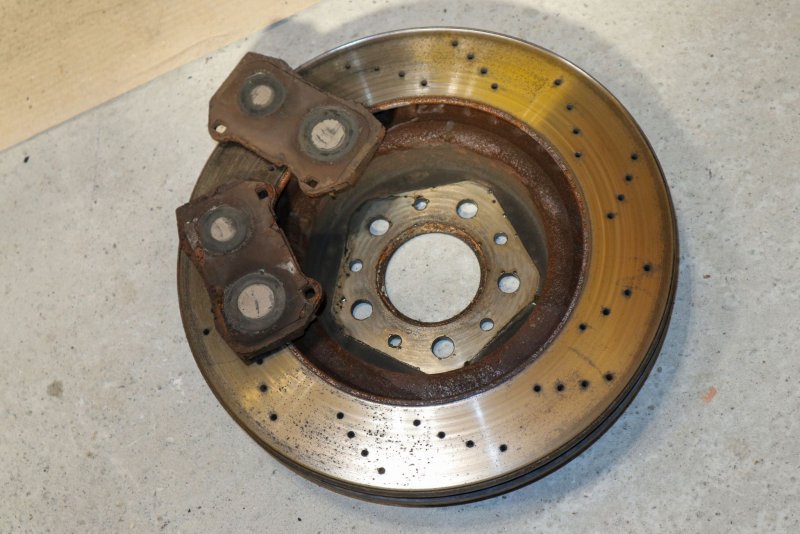
But again, after removing the disc the hub itself was spotless and cleaned nicely.
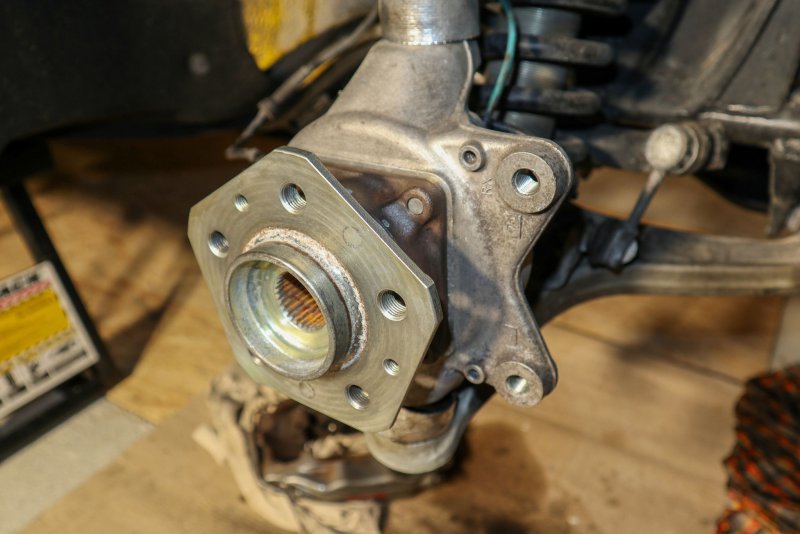

However, after removing the disc and cleaning the drum brake and hub I was pleasantly surprised. No rust, all nice and clean, handbrake adjustment perfectly smooth and brake shoes had a lot of meat and were not delaminating. I did have a set of new ones, but no point in changing them so I keep the existing ones.

The hose was a bit more tricky, does not attach in the wheel bay, but on the underside, quite close to the center of the car, almost above the gearbox. Fiddly, but I have seen worse.

By the way, I am using Probrake hoses from Germany. They do have a nice configurator so you can spec all the details of the hose as you want to have it, length, fittings grommets, color… exactly as you need:
First corner done.


Rear left is the same as right one, only the hose attaches differently. The hoses are the same length and type left/right, they are just differently bent and attached on the car.

For the hose/caliper attachment I used a fitting for banjo bolt. I do find removing the caliper much easier if needed compared to the screw-in fitting type. You can ignore the rubber grommet on the fitting, I spec the hose with two grommets on it just in case and one is not needed. I could cut it off or keep it there, for the moment I keep it there with no use.

Fronts are supposed to be easier due to no brake drum. But in the end the job is the same.

Front pads were much worse than rear ones, very rusty and delaminating from the backing surface. The disc also had a visible lip and had a very pitted surface from rust.

But again, after removing the disc the hub itself was spotless and cleaned nicely.

gotcha
Member
- Messages
- 78
Front one done.
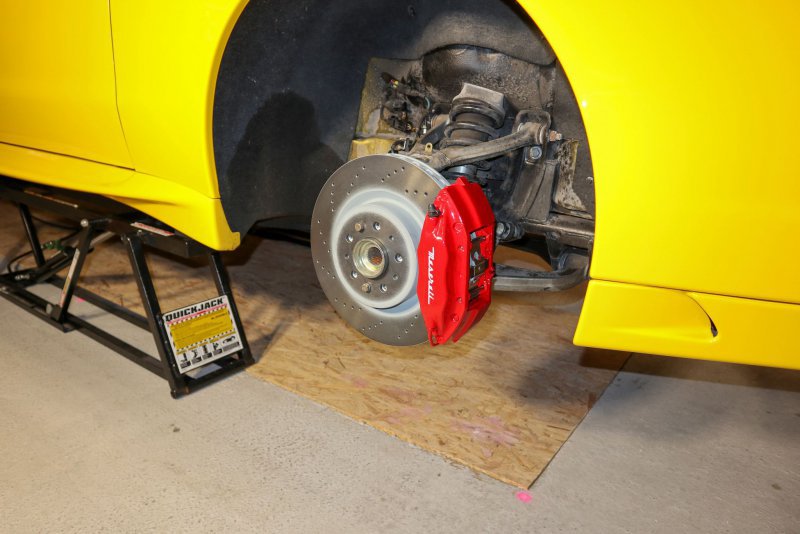
I kept the OEM hose layout and still use the short pipes to attach it to the caliper. I was thinking about not using it, taking a longer hose with banjo fitting and attaching it directly to the caliper, but I didn’t want to invent too much how to safely route the hose just behind the hub. So I use the OEM style connection.
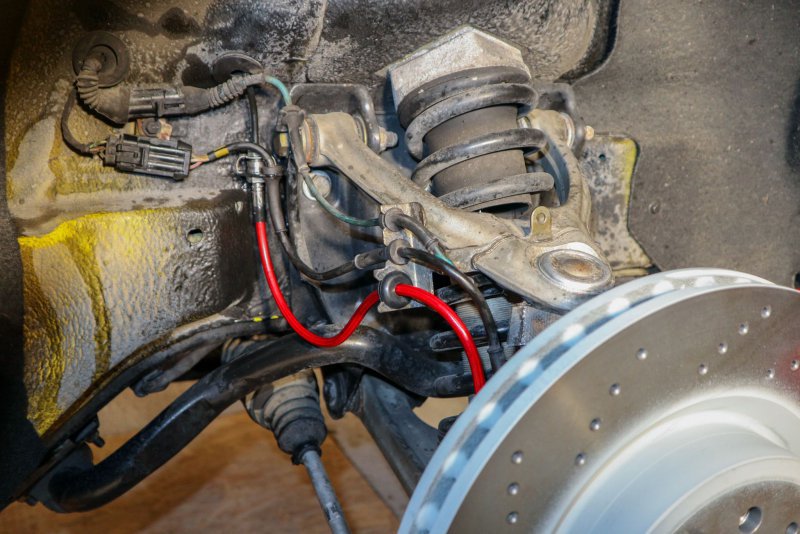
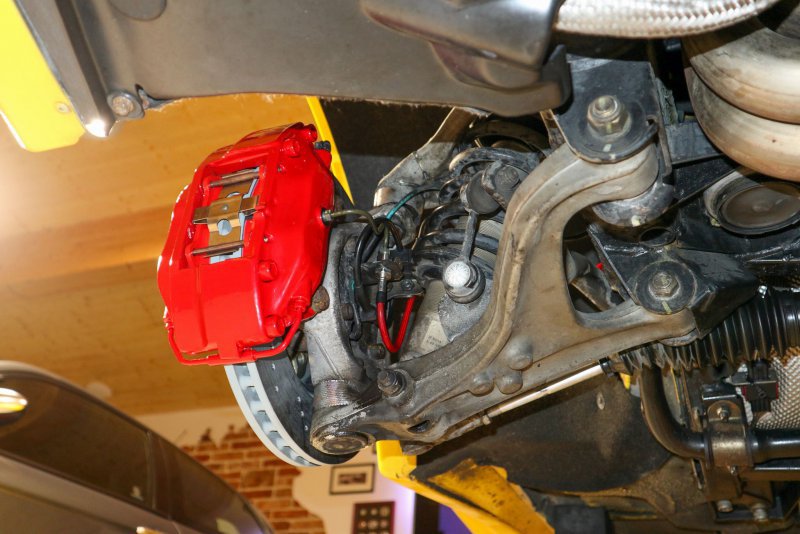
And the car finally with red brakes.
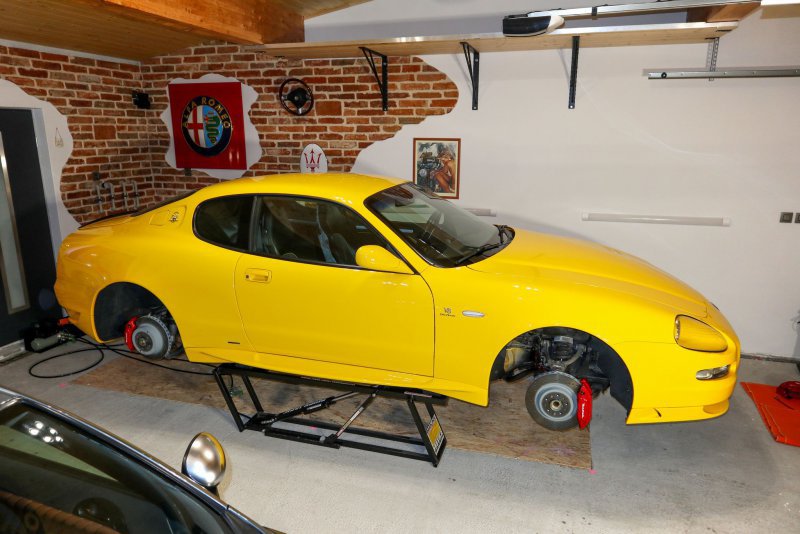
I will remove tyres from the rims tomorrow and next week take them to a shop that will chemically strip them, straighten if necessary and paint them in Grigio Mercury color. I hope to get them back in a few weeks. Looking forward to it already.
I am planning another set of jobs like parking sensors retrofit, cambiocorsa flush and replacement of some hoses that are cracking, sports cat install and the resonated X pipe, I need to sort the aluminum heatshields above the exhaust as some of them do resonate after a cold start and some other tiny jobs. So generally, jobs at the back and underside of the car. But realistically I see it for April – May as now I need to focus on other things.

I kept the OEM hose layout and still use the short pipes to attach it to the caliper. I was thinking about not using it, taking a longer hose with banjo fitting and attaching it directly to the caliper, but I didn’t want to invent too much how to safely route the hose just behind the hub. So I use the OEM style connection.


And the car finally with red brakes.

I will remove tyres from the rims tomorrow and next week take them to a shop that will chemically strip them, straighten if necessary and paint them in Grigio Mercury color. I hope to get them back in a few weeks. Looking forward to it already.
I am planning another set of jobs like parking sensors retrofit, cambiocorsa flush and replacement of some hoses that are cracking, sports cat install and the resonated X pipe, I need to sort the aluminum heatshields above the exhaust as some of them do resonate after a cold start and some other tiny jobs. So generally, jobs at the back and underside of the car. But realistically I see it for April – May as now I need to focus on other things.
BL330
Member
- Messages
- 1,123
Hi Gotcha,
I am late to this thread, but really, really enjoyed reading every step of your journey. I feel we have the same passion, which some call a disease, wanting the car to be perfect.
I have many similiar experiences in my nearly 10 years ownership, though I leave the more mechanical aspects to my factory trained mechanic.
This included him upgrading the clutch to the F430 one which is so much better.
He is about to do an engine change and torque tube change, including fitting new radiator and all hoses, plus engine mounts (badly needed) and gearbox mount (2nd hand from a 16,000 km Japanese car for one quarter the price of Eurospares). My car has now travelled 178,000 km, 88,000 in my ownership and it is more cost effective to fit a second hand 55,000 km engine than replace the cam lifters and do timing chains, and anything else he finds on my current engine.
One job for your future ( at some point ), I had to change the water heater due to a leak and replace a faulty fan motor - big job.
Another horrid job was replacing the headlight lenses, which had faded on the inside so exterior buffing didn't help.
Here is a link to an article I wrote on my ownership experience, hope you enjoy. - Maserati GranSport Ownership Experience (maseraticlub.com.au)
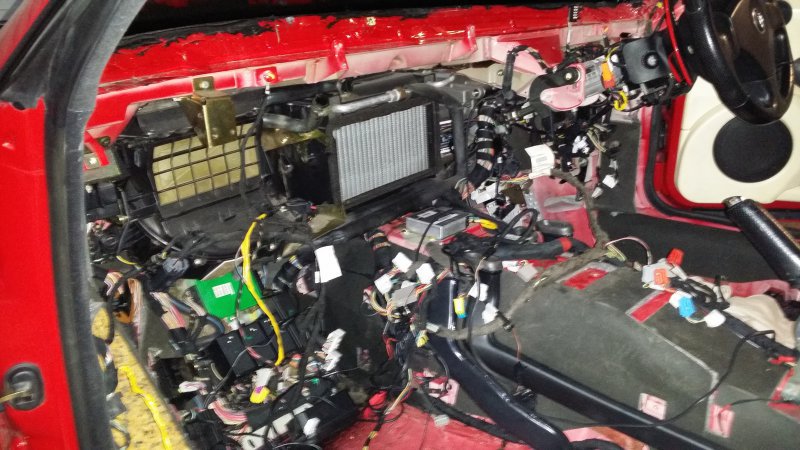
Since then, I had the car professionally paint corrected and ceramic coated and won the club concours again after 5 years of second and third places.
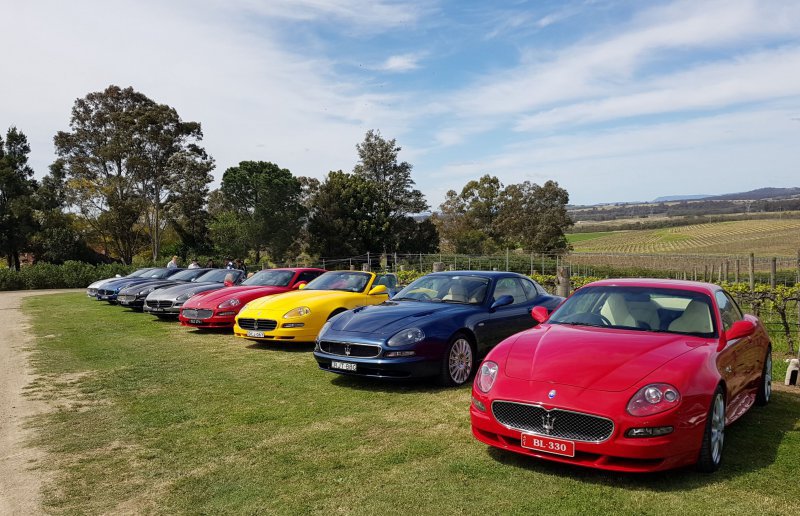
PS - I totally agree about calipers needing to be red!
I am late to this thread, but really, really enjoyed reading every step of your journey. I feel we have the same passion, which some call a disease, wanting the car to be perfect.
I have many similiar experiences in my nearly 10 years ownership, though I leave the more mechanical aspects to my factory trained mechanic.
This included him upgrading the clutch to the F430 one which is so much better.
He is about to do an engine change and torque tube change, including fitting new radiator and all hoses, plus engine mounts (badly needed) and gearbox mount (2nd hand from a 16,000 km Japanese car for one quarter the price of Eurospares). My car has now travelled 178,000 km, 88,000 in my ownership and it is more cost effective to fit a second hand 55,000 km engine than replace the cam lifters and do timing chains, and anything else he finds on my current engine.
One job for your future ( at some point ), I had to change the water heater due to a leak and replace a faulty fan motor - big job.
Another horrid job was replacing the headlight lenses, which had faded on the inside so exterior buffing didn't help.
Here is a link to an article I wrote on my ownership experience, hope you enjoy. - Maserati GranSport Ownership Experience (maseraticlub.com.au)

Since then, I had the car professionally paint corrected and ceramic coated and won the club concours again after 5 years of second and third places.

PS - I totally agree about calipers needing to be red!
gotcha
Member
- Messages
- 78
Hi BL330,
Thanks for the comments. And you are right, looking for perfection is a disease
I love your red GS. I would just be scared to sit in those seats in jeans, you have a very sensitive interior color
When I searched for one, I wanted a bright/vivid color. Red, pearl white, even grey. I was looking at these cars when I didn’t have the funds to buy. And once I was ready, suddenly a yellow popped up and I grabbed it. But about 6 months earlier I viewed a red one in Germany. I loved it as well, just was not ready to buy in that time.
I think I saw your article in the past during my browsing but I will read it again. I love these driver/car ownership journeys.
I am curious about the F430 clutch upgrade, I have not heard about it yet. My clutch is good now and with my amount of driving will be still OK for some years hopefully, but this topic comes one day for sure to every Cambiocorsa owner. Did you use the F430 friction plate? Or complete clutch? Do some things need to be modified? I understand that 430 Scuderia is probably the peak of F1/Cambiocorsa development and no robotized manual single clutch box shifts better. So every tiny step in this direction is welcome. If you have more details, I am interested.
As you can see above in my thread, the gearbox mount fits from QP/GT with a modification of the upper plate. So there is option for a reasonably priced new one as well.
Sorry to hear about the heater core, again one of the job nobody wants to do but every owner has to expect it may happen one day. I have no issues (yet) but I did already buy a copper/brass upgraded heater core. I just considered it as precaution. I thought that by Murphy´s laws if I have a replacement ready on the shelf, the original one will never fail If I don’t have the spare part, the one on the car will fail suddenly
 By this logic I should probably buy also the parts for the complete clutch job, this will be a guarantee that my current clutch will last very long
And similar to you, I will have to do something with headlights as well. They are almost perfect, but being a Japanese car, they are RHD traffic. So, the beam has the cutoff to the wrong side for me. I thought about getting EU LHD lamps and swapping projectors inside but I also found a very reputable company that is upgrading projectors and can install a modern bixenon inside an sort the lenses outside/inside as well. Maybe I will give it a try, but not urgent.
Thanks for the comments. And you are right, looking for perfection is a disease
I love your red GS. I would just be scared to sit in those seats in jeans, you have a very sensitive interior color
When I searched for one, I wanted a bright/vivid color. Red, pearl white, even grey. I was looking at these cars when I didn’t have the funds to buy. And once I was ready, suddenly a yellow popped up and I grabbed it. But about 6 months earlier I viewed a red one in Germany. I loved it as well, just was not ready to buy in that time.
I think I saw your article in the past during my browsing but I will read it again. I love these driver/car ownership journeys.
I am curious about the F430 clutch upgrade, I have not heard about it yet. My clutch is good now and with my amount of driving will be still OK for some years hopefully, but this topic comes one day for sure to every Cambiocorsa owner. Did you use the F430 friction plate? Or complete clutch? Do some things need to be modified? I understand that 430 Scuderia is probably the peak of F1/Cambiocorsa development and no robotized manual single clutch box shifts better. So every tiny step in this direction is welcome. If you have more details, I am interested.
As you can see above in my thread, the gearbox mount fits from QP/GT with a modification of the upper plate. So there is option for a reasonably priced new one as well.
Sorry to hear about the heater core, again one of the job nobody wants to do but every owner has to expect it may happen one day. I have no issues (yet) but I did already buy a copper/brass upgraded heater core. I just considered it as precaution. I thought that by Murphy´s laws if I have a replacement ready on the shelf, the original one will never fail
And similar to you, I will have to do something with headlights as well. They are almost perfect, but being a Japanese car, they are RHD traffic. So, the beam has the cutoff to the wrong side for me. I thought about getting EU LHD lamps and swapping projectors inside but I also found a very reputable company that is upgrading projectors and can install a modern bixenon inside an sort the lenses outside/inside as well. Maybe I will give it a try, but not urgent.
BL330
Member
- Messages
- 1,123
Hi Gotcha,
I have tech cloth inserts so jeans aren't too bad.
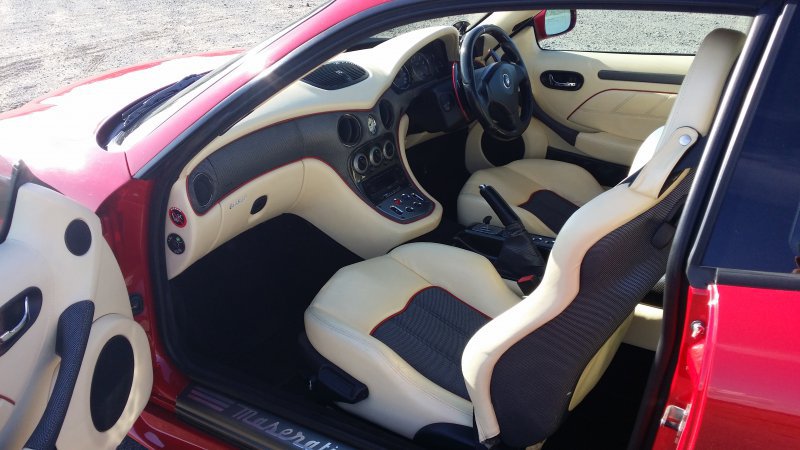
This is an early photo before I had the dash top changed to black. With our strong sunshine, the glare was impossible.
You'll note the carbon fibre paddles from Formula Dynamics, or a copy at least. The red piping matches the interior piping.
Re the clutch, I have told the story before. We had a club member in Melbourne who went through 2 or 3 clutches in his Gransport. From his contacts with a privateer Ferrari racing team, they saw the size of the Maserati Clutch looked identical to the Ferrari F430 one. They measured it and found it was so. He fitted it and convinced me it was the path to follow when mine came up for replacement. I mentioned this to my Ferrari / Maserati trained mechanic in Sydney who took both clutches off the shelf to measure and confirmed the fit. He installed 2 or 3 before mine was needed. He has done more since. He has a secret modification he makes to the thrust bearing, probably similiar to the Hill Engineering one. I find the clutch to be much stronger and confidence inspiring. I had excellent life out of my first clutch and just the same with the new one. Hope this helps.
I have tech cloth inserts so jeans aren't too bad.
This is an early photo before I had the dash top changed to black. With our strong sunshine, the glare was impossible.
You'll note the carbon fibre paddles from Formula Dynamics, or a copy at least. The red piping matches the interior piping.

Re the clutch, I have told the story before. We had a club member in Melbourne who went through 2 or 3 clutches in his Gransport. From his contacts with a privateer Ferrari racing team, they saw the size of the Maserati Clutch looked identical to the Ferrari F430 one. They measured it and found it was so. He fitted it and convinced me it was the path to follow when mine came up for replacement. I mentioned this to my Ferrari / Maserati trained mechanic in Sydney who took both clutches off the shelf to measure and confirmed the fit. He installed 2 or 3 before mine was needed. He has done more since. He has a secret modification he makes to the thrust bearing, probably similiar to the Hill Engineering one. I find the clutch to be much stronger and confidence inspiring. I had excellent life out of my first clutch and just the same with the new one. Hope this helps.
gotcha
Member
- Messages
- 78
Few months have passed since my last update so I thought I would refresh this thread again.
Over that period, I worked a bit on multiple projects. Not all of them are finished yet and I have few (a lot) more in the pipeline but there are already some changes I would like to share.
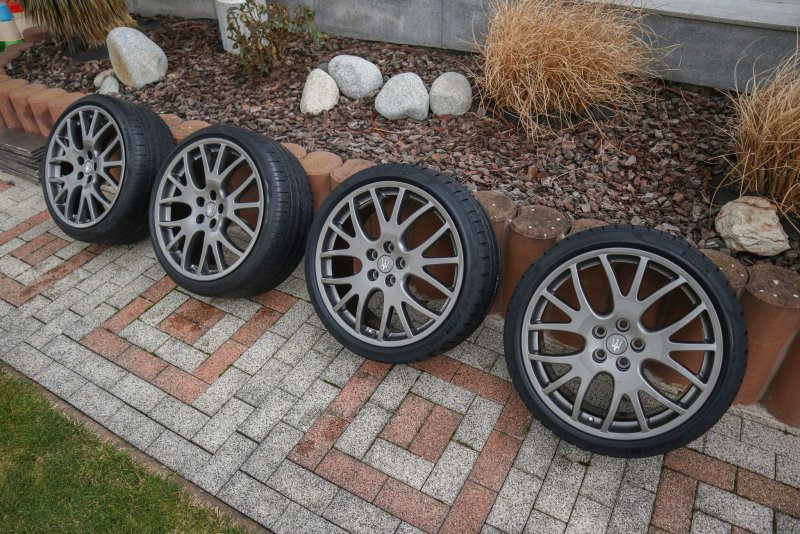
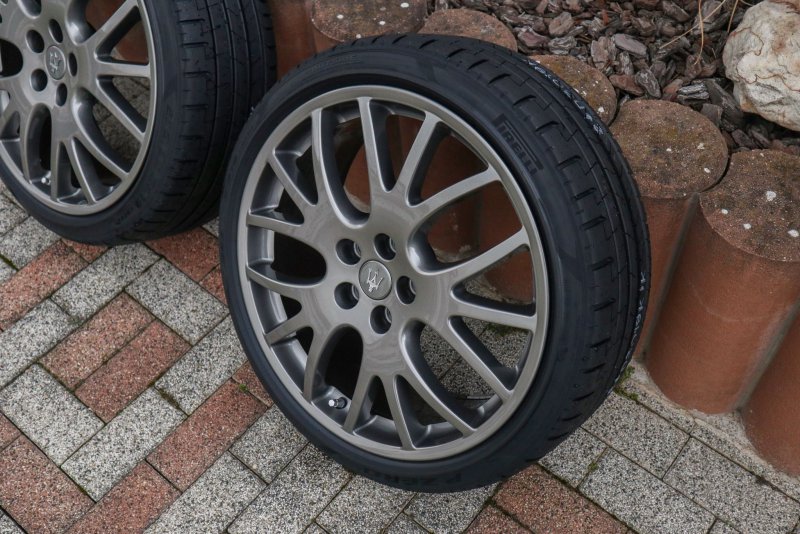
In February I got back the wheels in Grigio Mercury. Took about a month and was not exactly cheap, but the result and finish is amazing:
And here they are on the car:
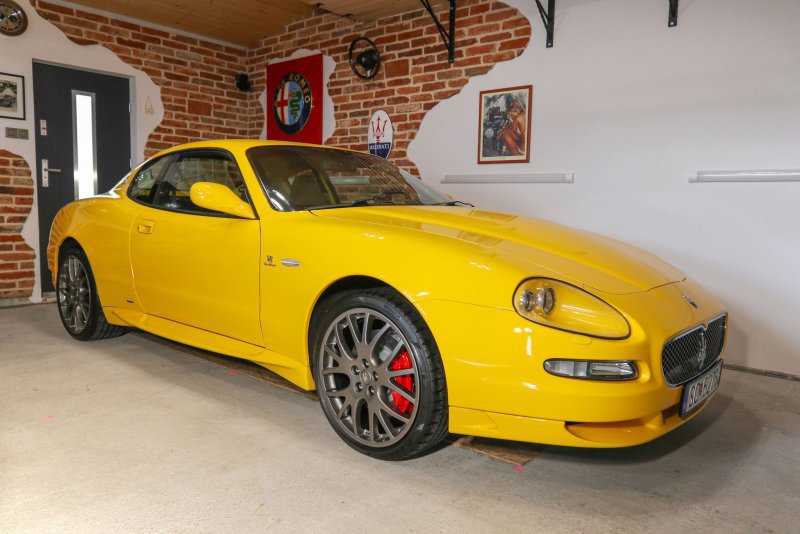
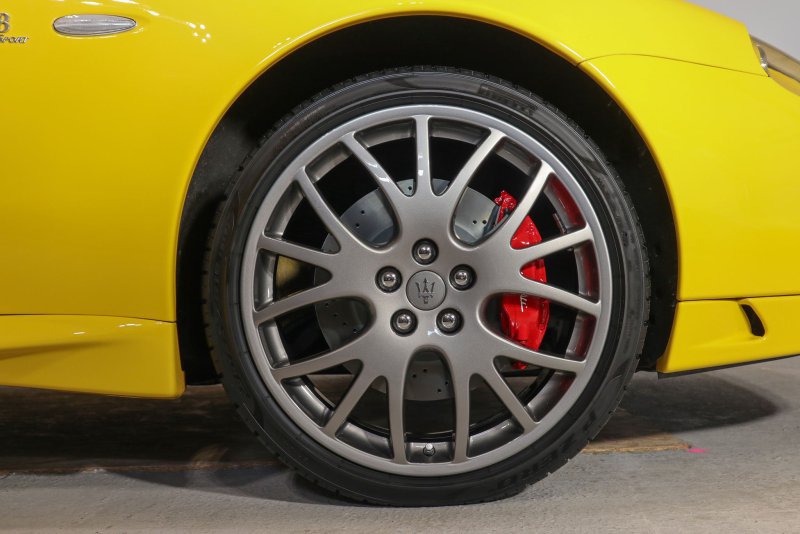
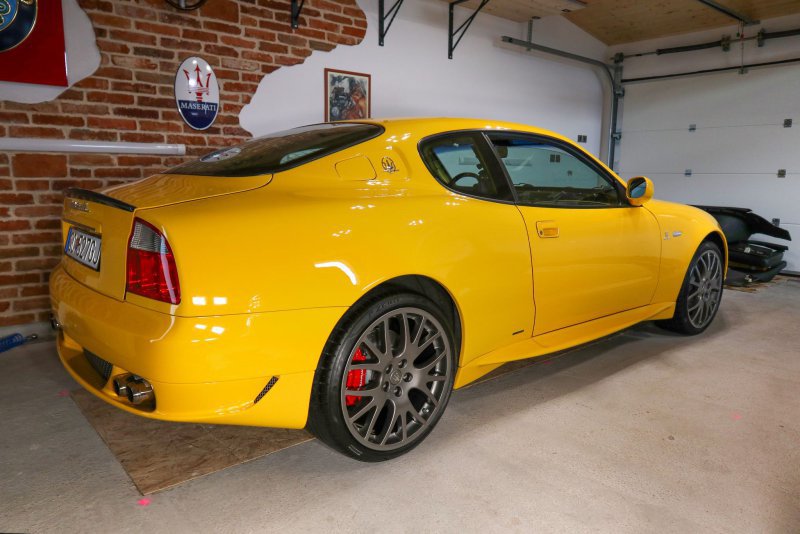
The car sits a bit high, but it was lifted for many weeks, so the suspension has to settle down. I am still not able to drive it due to a pile of construction material in front of the garage
Any of the cars I had in the past, if they came with dark or black rims, I swapped them for silver. GS is the first car in my life where I went darker than I originally had. I was not sure about it, but in the end I do like it.
Over that period, I worked a bit on multiple projects. Not all of them are finished yet and I have few (a lot) more in the pipeline but there are already some changes I would like to share.
In February I got back the wheels in Grigio Mercury. Took about a month and was not exactly cheap, but the result and finish is amazing:


And here they are on the car:


The car sits a bit high, but it was lifted for many weeks, so the suspension has to settle down. I am still not able to drive it due to a pile of construction material in front of the garage
Any of the cars I had in the past, if they came with dark or black rims, I swapped them for silver. GS is the first car in my life where I went darker than I originally had. I was not sure about it, but in the end I do like it.
gotcha
Member
- Messages
- 78
My next step will be a little controversial. Being stuck in the garage and wintertime and saving money for bigger upgrades, I thought I would focus on some interior project. Especially audio.
The controversial part is that I decided to retrofit the Auditorium 200 system. I know the general consensus is that it does not sound that great and is not worth the money but there are four arguments why I decided to do it:
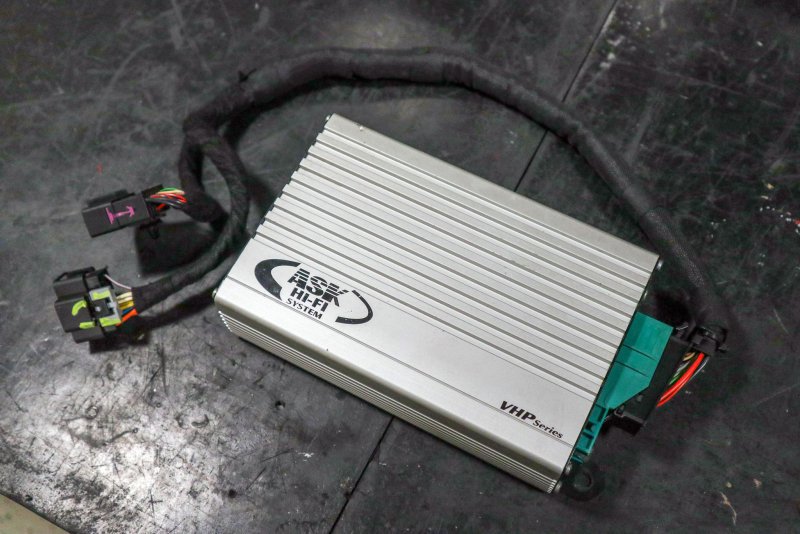
The trigger for all of this was actually the fact that I found Auditorium amplifier at a Polish car breaker for 25€ !!!! I decided to buy it even if it was not working, just because of the boot wiring loom that came with it.
It didn’t look very appealing with rusted alu case and broken latch on the connector but for that price it was a no brainer….
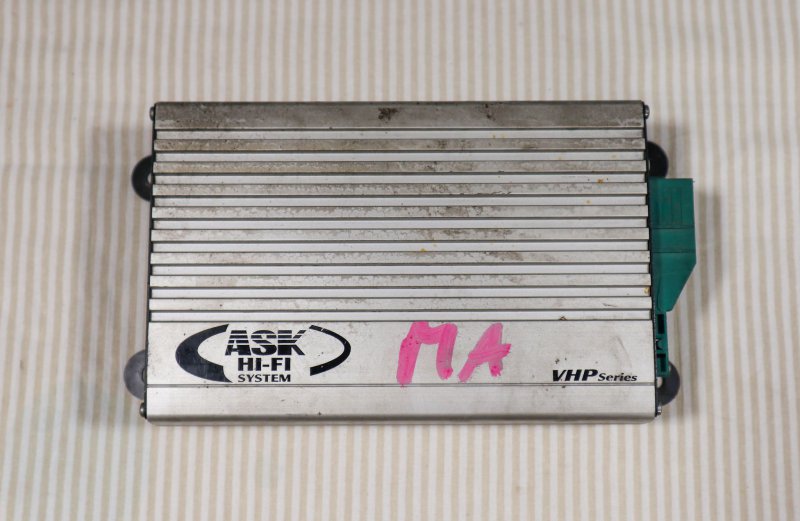
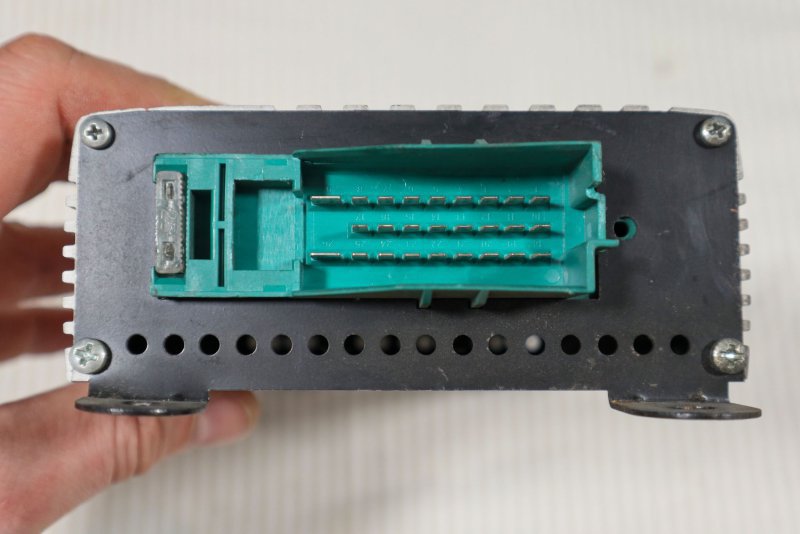
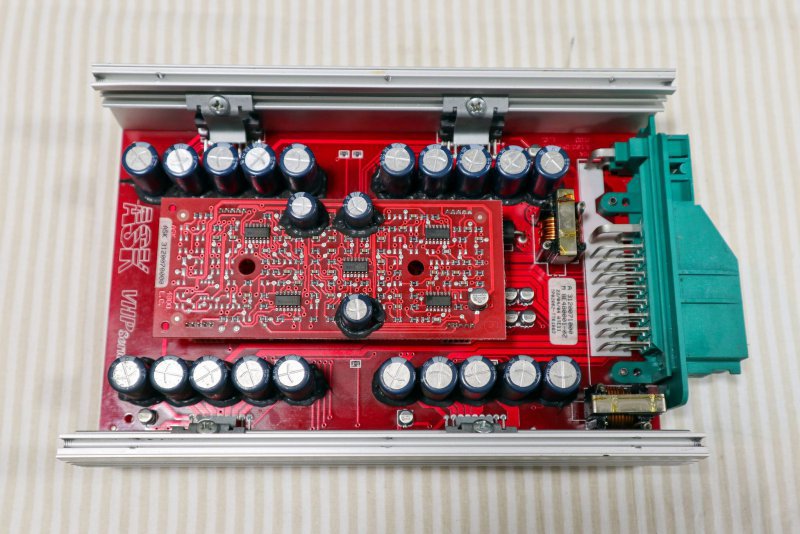
I stripped it and with a small brush I washed all the inside with connector cleaner and isopropyl alcohol and had it properly dried. I lightly cleaned the alu case as well and it turned out nicely too. Also, the connector with so many pins holds pretty solid without the securing latch so I am not worried about it falling out.
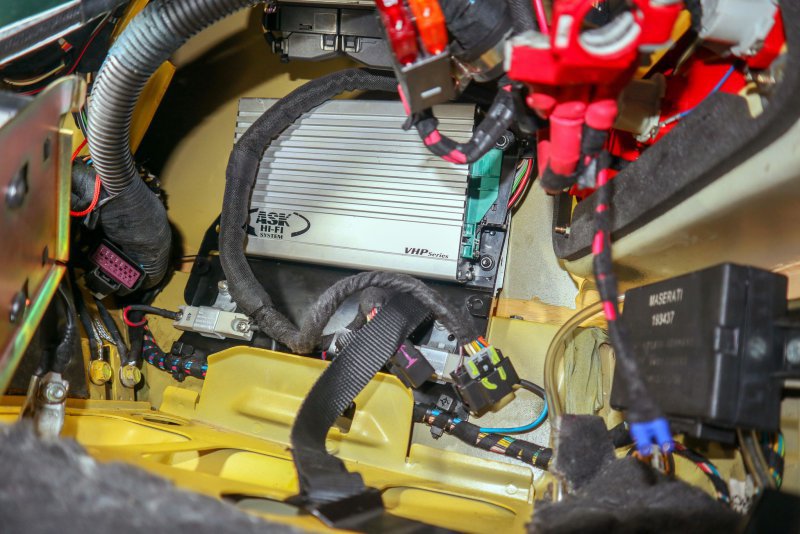
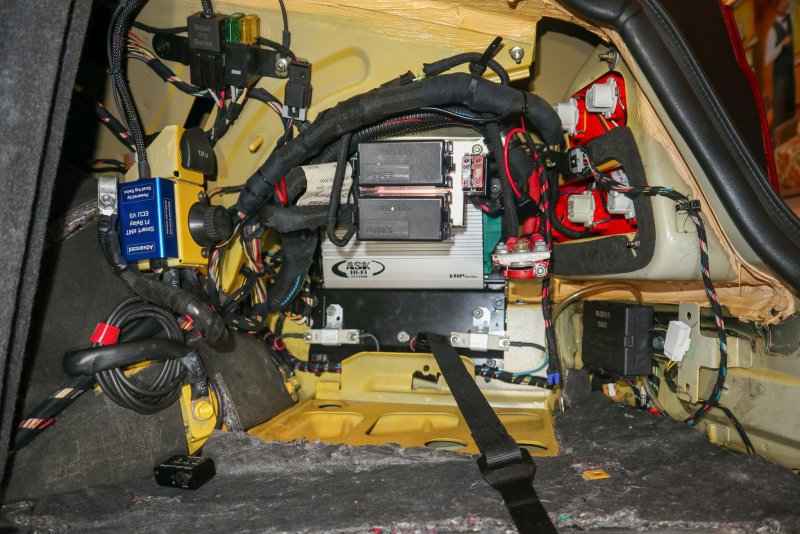
Install was easy as well. I got the bracket that holds the amp from Eurospares, they had a cheap used one from some donor car. Sits nicely behind the battery. The existing wiring can be split by unplugging the connectors in the boot and the amp plugs into the existing wiring to form a loop to speakers via the amp. In principle, it works more like a booster of the headunit signal than a standalone amp. I will be kidding myself that it is doing something more, let’s say some pre-set equalizers set custom for auditorium speakers or speaker time correction but in reality I think the amp is just a booster.
Auditorium speakers were also not that difficult to get, I generally bought them from breakers or Ebay, something from Poland, something from Germany and something from Italy. Only the front door tweeters I was not able to find used ones at all, so I ordered new ones from Eurospares. Ferrari parts being cheaper than Maserati parts with the same part number as usual. I think I paid about 300€ for all the 8 speakers.
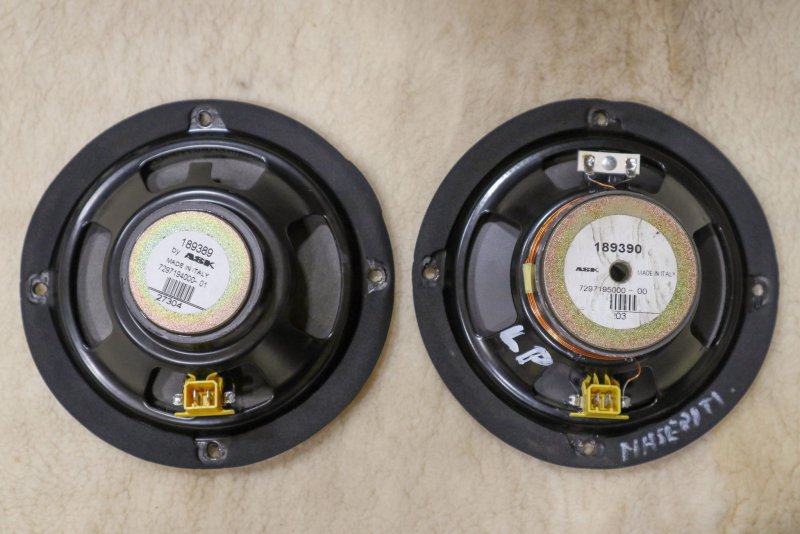
Having them on the table, I did compare their design, weights, and impedance with the base setup:
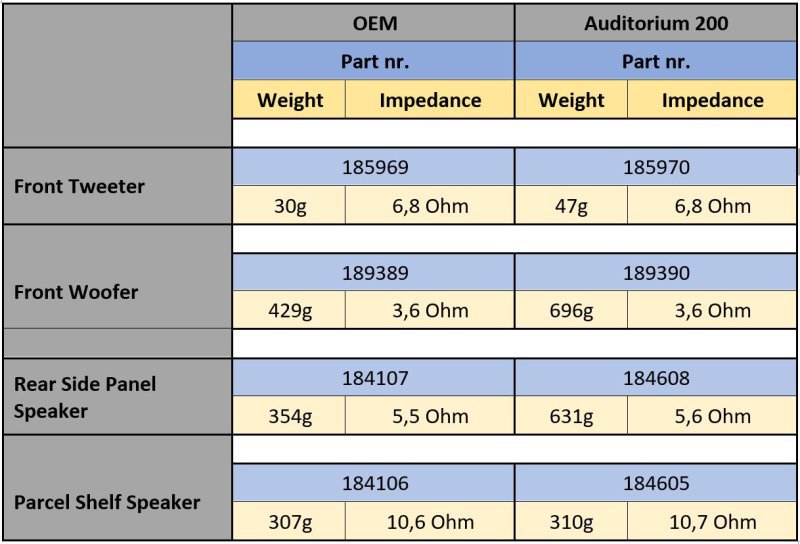
In summary I would say that the front woofers and tweeters are slightly improved design over standard. Same paper membrane in steel pressed frame but with larger magnet drivers. Rear side panel speakers are significantly better than OEM being coaxial speakers with separate tweeter vs the standard wide range woofer. Rear parcel shelf speakers are identical with Auditorium speakers, just with soldered on 100uF 50V capacitors on the positive lead. If anybody was interested in rear Auditorium speakers, you can take the standard one and solder 0,5€ worth capacitor on it and voila, you have Auditorium version.
Speaker impedances are also the same in all the cases so it is safe to use base speakers with Auditorium amp or vice versa or mix Auditorium and non-Auditorium speakers freely with amp or without.
During the install I realized how well I actually did that I started this project. No surprise the sound in my car was worse than poor. Half of my speakers were eaten by mold; the flexible suspension of the speaker cones was rotten or missing in some cases. Seems like if the car was flooded, but no other evidence points to this and speakers were much worse on the left side of the car. Maybe that side was always parked on the sun? Or by a wall? Or it suffered in the container on its way from Japan? Who knows. But here they are:
The controversial part is that I decided to retrofit the Auditorium 200 system. I know the general consensus is that it does not sound that great and is not worth the money but there are four arguments why I decided to do it:
- I could get all the components cheaply, the whole setup cost me about maybe around 400€ “only”
- I like to have the factory optional extra and keep the car original over custom audio setup that I did in my other cars
- The sound quality does not really matter. I use the GS few times in a year for weekend drives, I could live with no audio at all. So even if Auditorium is **** by modern standards, it is certainly better than the base setup what is for sure significantly more than I actually need.
- Factory options retrofits are my hobby, with most of cars I ever owned I did retrofit some equipment options that my cars missed from factory.
The trigger for all of this was actually the fact that I found Auditorium amplifier at a Polish car breaker for 25€ !!!! I decided to buy it even if it was not working, just because of the boot wiring loom that came with it.
It didn’t look very appealing with rusted alu case and broken latch on the connector but for that price it was a no brainer….


I stripped it and with a small brush I washed all the inside with connector cleaner and isopropyl alcohol and had it properly dried. I lightly cleaned the alu case as well and it turned out nicely too. Also, the connector with so many pins holds pretty solid without the securing latch so I am not worried about it falling out.


Install was easy as well. I got the bracket that holds the amp from Eurospares, they had a cheap used one from some donor car. Sits nicely behind the battery. The existing wiring can be split by unplugging the connectors in the boot and the amp plugs into the existing wiring to form a loop to speakers via the amp. In principle, it works more like a booster of the headunit signal than a standalone amp. I will be kidding myself that it is doing something more, let’s say some pre-set equalizers set custom for auditorium speakers or speaker time correction but in reality I think the amp is just a booster.


Auditorium speakers were also not that difficult to get, I generally bought them from breakers or Ebay, something from Poland, something from Germany and something from Italy. Only the front door tweeters I was not able to find used ones at all, so I ordered new ones from Eurospares. Ferrari parts being cheaper than Maserati parts with the same part number as usual. I think I paid about 300€ for all the 8 speakers.
Having them on the table, I did compare their design, weights, and impedance with the base setup:

In summary I would say that the front woofers and tweeters are slightly improved design over standard. Same paper membrane in steel pressed frame but with larger magnet drivers. Rear side panel speakers are significantly better than OEM being coaxial speakers with separate tweeter vs the standard wide range woofer. Rear parcel shelf speakers are identical with Auditorium speakers, just with soldered on 100uF 50V capacitors on the positive lead. If anybody was interested in rear Auditorium speakers, you can take the standard one and solder 0,5€ worth capacitor on it and voila, you have Auditorium version.
Speaker impedances are also the same in all the cases so it is safe to use base speakers with Auditorium amp or vice versa or mix Auditorium and non-Auditorium speakers freely with amp or without.
During the install I realized how well I actually did that I started this project. No surprise the sound in my car was worse than poor. Half of my speakers were eaten by mold; the flexible suspension of the speaker cones was rotten or missing in some cases. Seems like if the car was flooded, but no other evidence points to this and speakers were much worse on the left side of the car. Maybe that side was always parked on the sun? Or by a wall? Or it suffered in the container on its way from Japan? Who knows. But here they are:
gotcha
Member
- Messages
- 78
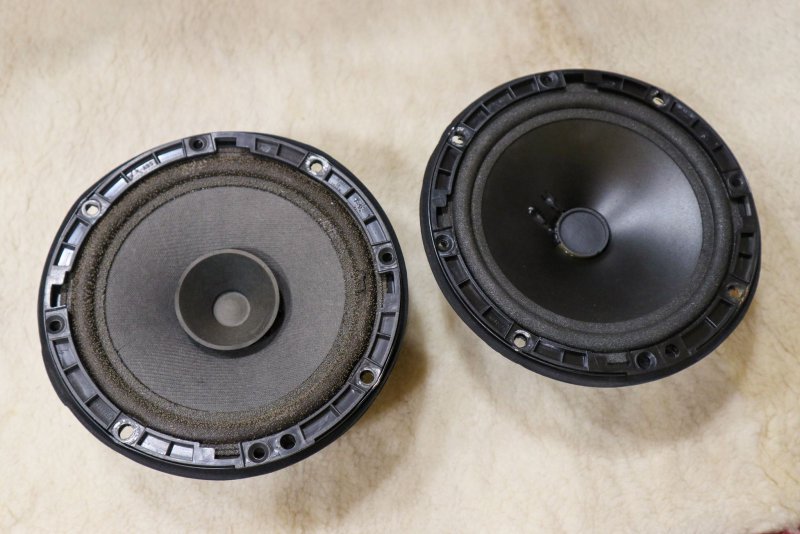
Front woofers
The base one on the left has a lot of mold spots and damaged suspension part. The Auditorium one seems to be made from a bit better materials and with larger magnet/coil:
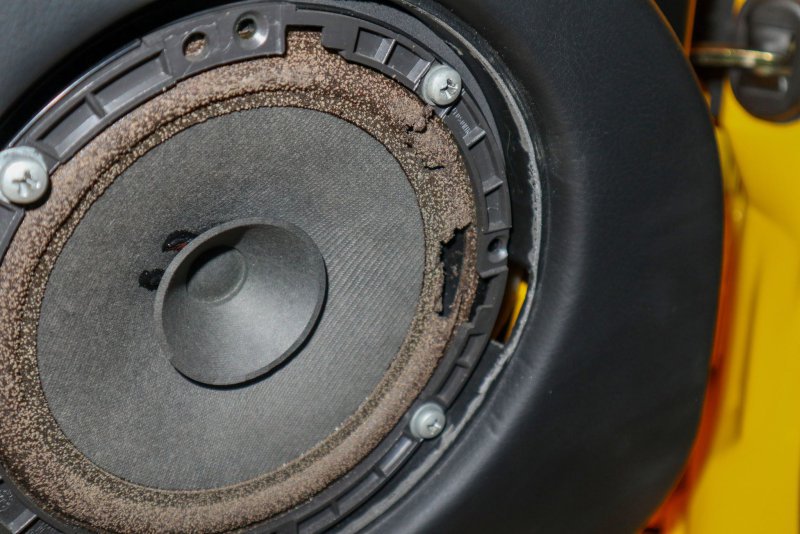
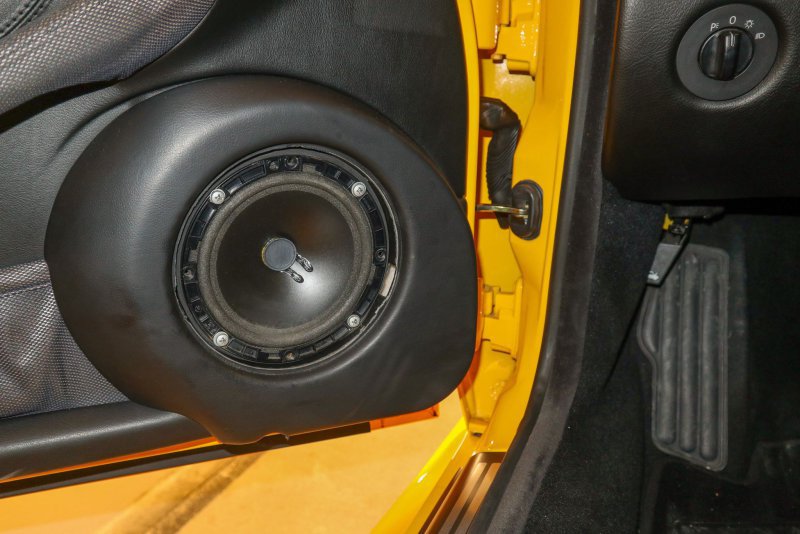
Install is very easy, the speaker grill pops out and the speaker is replaced. As I mentioned, on the left side the speaker was in even worse condition:
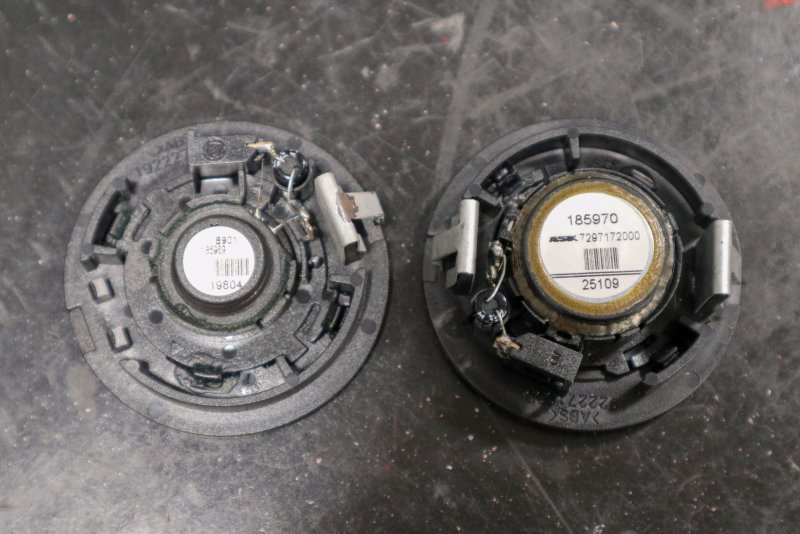
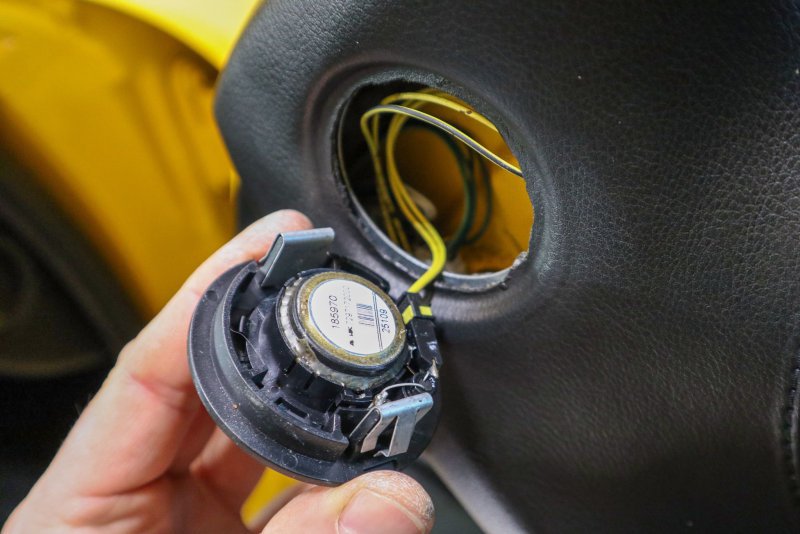
Front tweeters
Not much to write about, Auditorium has a bit bigger coil and heavier magnet. Install is equally easy, just pop the old out and clip the new in:
Rear panel
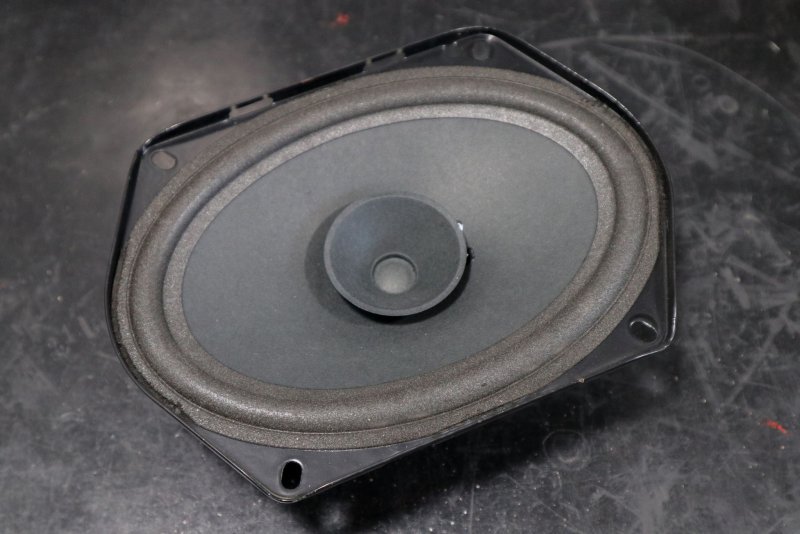
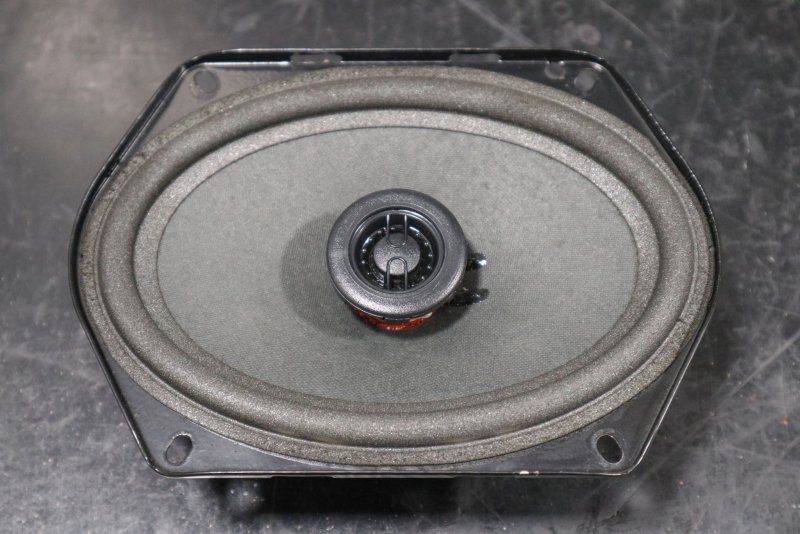
At least rear panel speakers seem like a small improvement, double the weight and they are 2-way with a separate tweeters.
Parcel shelf
Parcel shelf speakers were a total laugh. One was “only” disintegrated in pieces, but with second one somebody already had a go in the past. I am not sure what kind of person was thinking that it was a good idea to strengthen the rotting soft speaker cone suspension with a lot of car body glue or some silicone? Congrats to the guy who glued the speaker membrane solid, for sure had no idea how the speaker works.
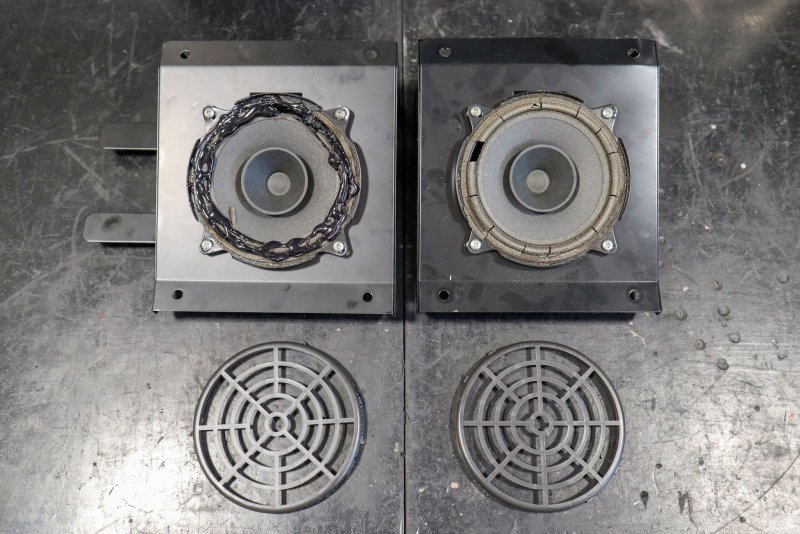
As I mentioned, the Auditorium is identical with the base speaker, just with 100uF 50V capacitor added.
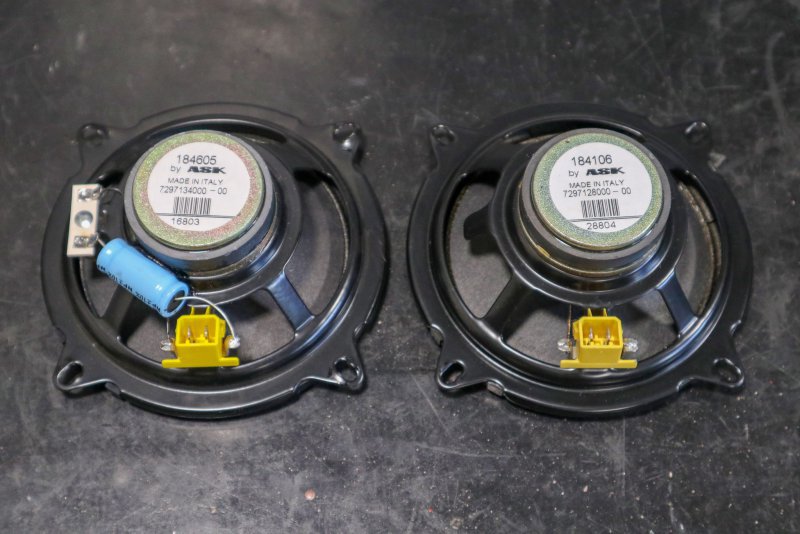
So the only thing I am missing now are the Auditorium badges on the front doorcards. I did source one, but if any of you has a spare one from old/broken doorcard I am interested to buy it. Please let me know. I would install them sometimes in the future on some occasion to remove the doorcards, but I am not doing that just because of the badges.
The base one on the left has a lot of mold spots and damaged suspension part. The Auditorium one seems to be made from a bit better materials and with larger magnet/coil:


Install is very easy, the speaker grill pops out and the speaker is replaced. As I mentioned, on the left side the speaker was in even worse condition:


Front tweeters
Not much to write about, Auditorium has a bit bigger coil and heavier magnet. Install is equally easy, just pop the old out and clip the new in:


Rear panel
At least rear panel speakers seem like a small improvement, double the weight and they are 2-way with a separate tweeters.


Parcel shelf
Parcel shelf speakers were a total laugh. One was “only” disintegrated in pieces, but with second one somebody already had a go in the past. I am not sure what kind of person was thinking that it was a good idea to strengthen the rotting soft speaker cone suspension with a lot of car body glue or some silicone? Congrats to the guy who glued the speaker membrane solid, for sure had no idea how the speaker works.

As I mentioned, the Auditorium is identical with the base speaker, just with 100uF 50V capacitor added.

So the only thing I am missing now are the Auditorium badges on the front doorcards. I did source one, but if any of you has a spare one from old/broken doorcard I am interested to buy it. Please let me know. I would install them sometimes in the future on some occasion to remove the doorcards, but I am not doing that just because of the badges.
gotcha
Member
- Messages
- 78
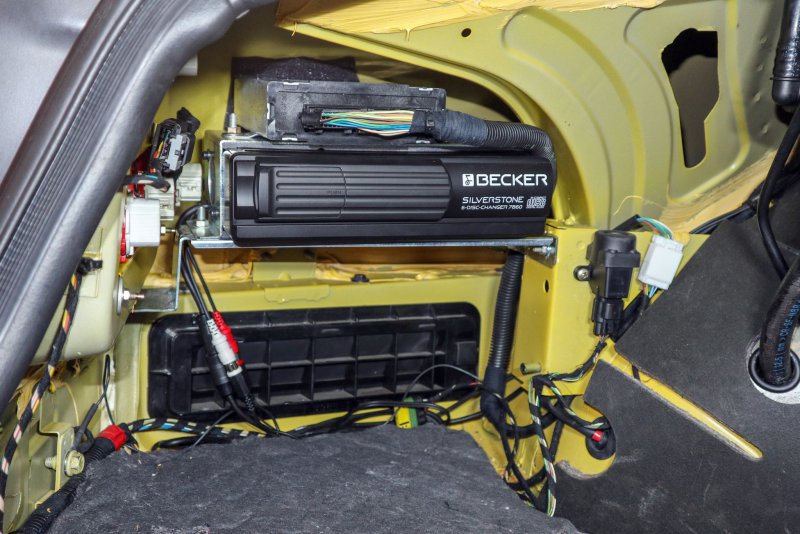
To make my audio retrofit complete, I also managed to source a brand new BE7860 CD changer from Becker vintage trader. Brand new retail packaging with all the accessories for 200€. I find it great deal, even though does anybody still buy and install CD changers today? The market must be close to zero, but I do find it period appropriate for this car and the wiring was alrady in the boot so why not.
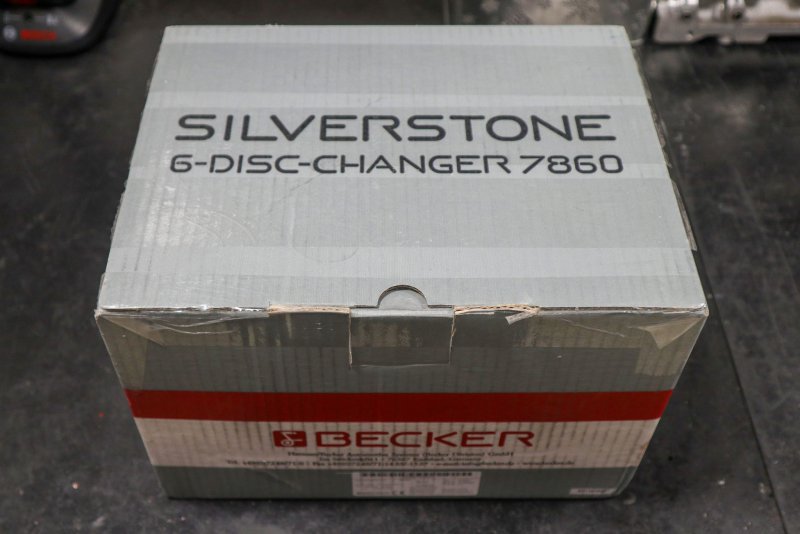
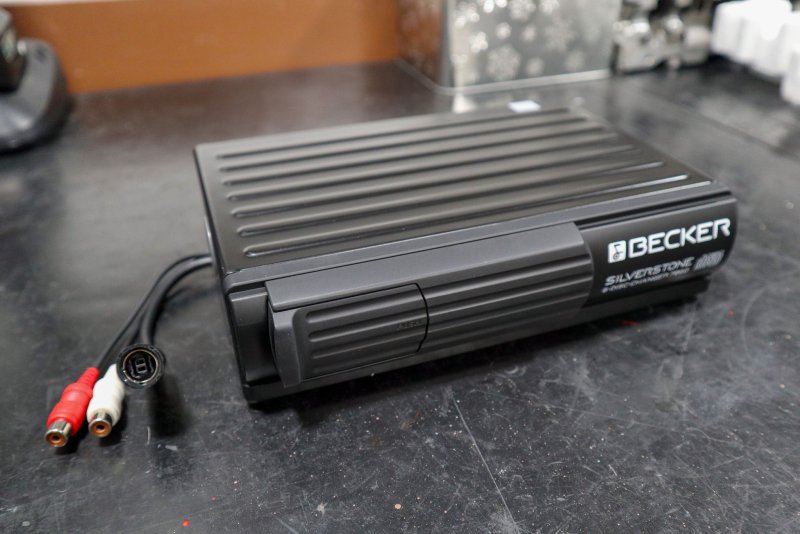
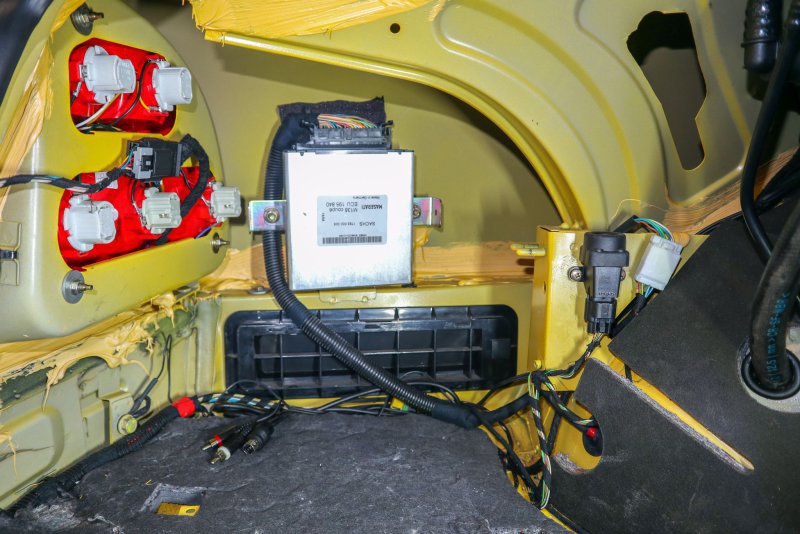
This install is simple. The only thing needed is two brackets that hold the CD changer and relocate the Skyhook ECU from the side panel to the top of the changer. I got them both cheaply used from Eurospares. Again, what is the market for these bits? So the prices are good
This is the old setup with Skyhook ECU:
And this is how it looks with CD changer and ECU on its top:
The only tricky bit is that with CD changer I needed a new boot side trim/carpet. This was not so easy. New one is not available from Maserati anymore. I found one seriously damaged and dirty that I didn’t want. But finally, I found one from a breaker in Sacramento/US. The trim was cheap, but I had to pay significant postage for such a cheap but big item, customs and VAT what made it cost me like a new one. If only it was available.
I have not installed the trim yet as my car is still in pieces due to another project so the boot is not yet finished.


This install is simple. The only thing needed is two brackets that hold the CD changer and relocate the Skyhook ECU from the side panel to the top of the changer. I got them both cheaply used from Eurospares. Again, what is the market for these bits? So the prices are good
This is the old setup with Skyhook ECU:

And this is how it looks with CD changer and ECU on its top:

The only tricky bit is that with CD changer I needed a new boot side trim/carpet. This was not so easy. New one is not available from Maserati anymore. I found one seriously damaged and dirty that I didn’t want. But finally, I found one from a breaker in Sacramento/US. The trim was cheap, but I had to pay significant postage for such a cheap but big item, customs and VAT what made it cost me like a new one. If only it was available.
I have not installed the trim yet as my car is still in pieces due to another project so the boot is not yet finished.
gotcha
Member
- Messages
- 78
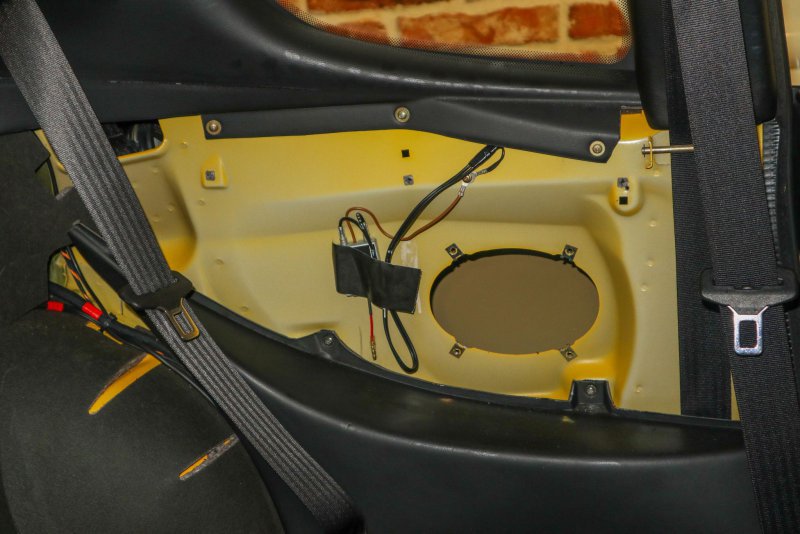
As usual with older cars, one project usually leads to another. With the idea of simple speaker replacement, when I removed the rear side panels and rear parcel shelf I did find some weird boxes and wiring on both sides:
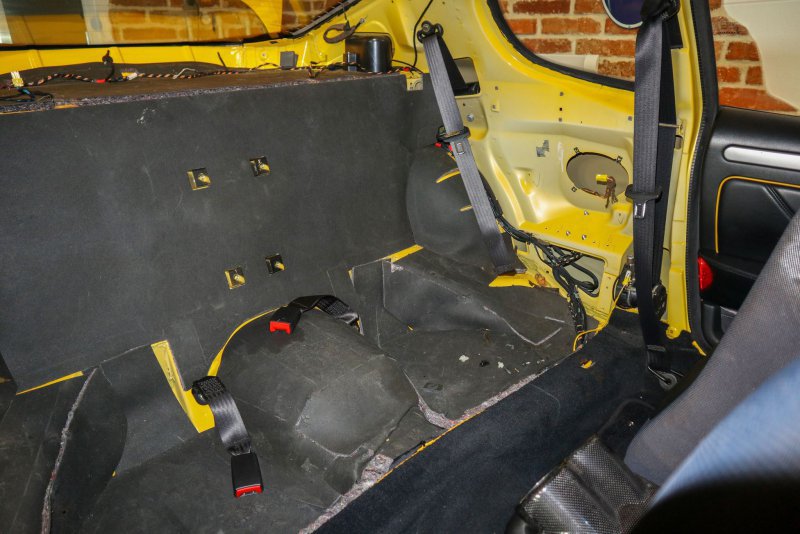
Being curious, I stated to remove more and more trim tracking the wires and I ended with serious part of the interior out of the car:
And I pulled out this:
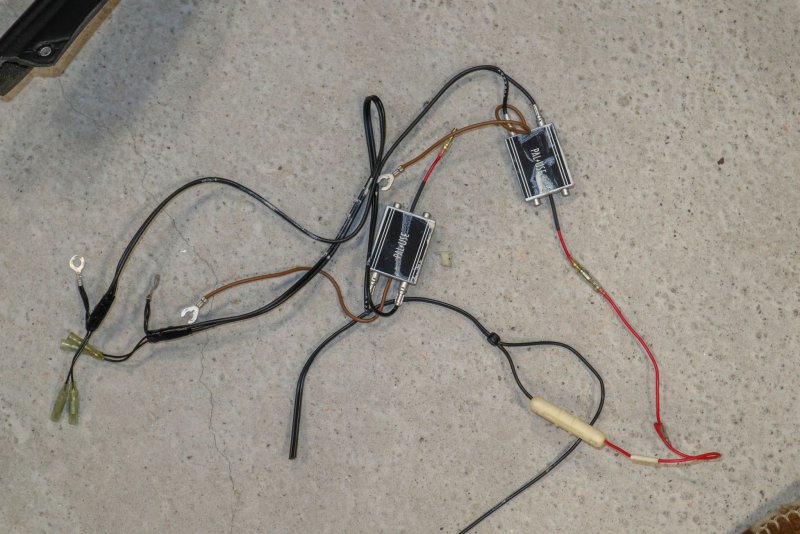
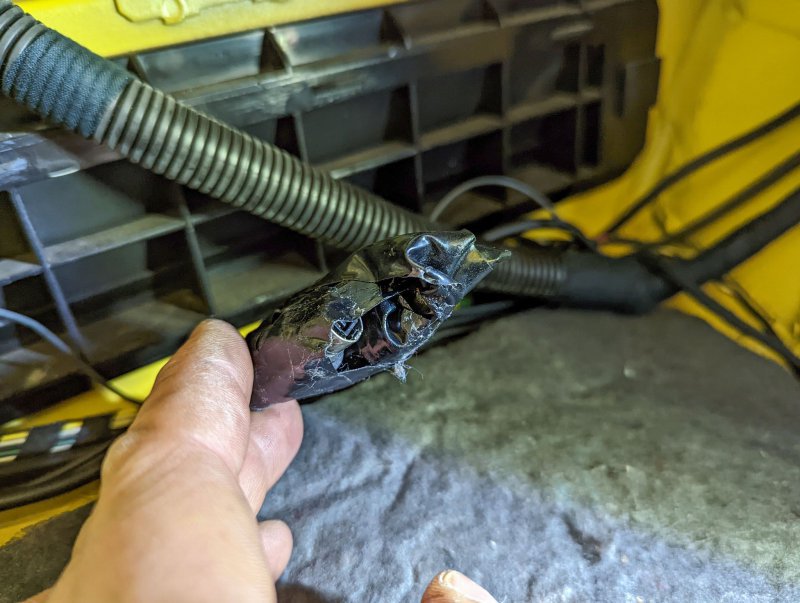
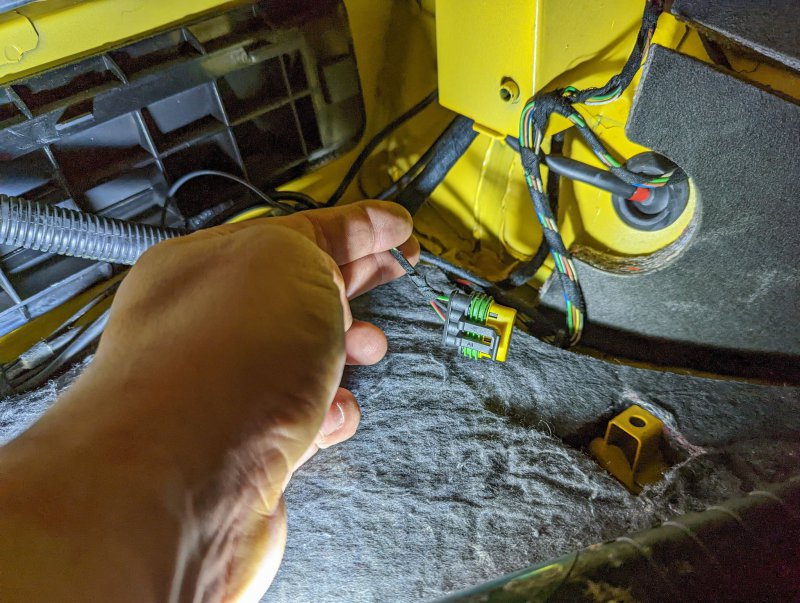
I still have no idea what it was. GPS tracker remains? Some sort of signal amplifier for something? Letters PAL can also suggest old analogue TV signal… who knows. The wires were not connected to anything, historically they seem to have been connected to 12V, ground and something more but I have not found any more traces. I also found out that a wire from the alarm/central locking leads to rear screen / parcel shelf area and has exposed copper wiring at its end. Seems like an antenna for the key remote, but I am not sure. What I am sure the end of wire is not supposed to be exposed metal and hanging under the parcel shelf. Somebody has also cut the connector to the parking sensors beeper under the parcel shelf. I have no idea what could have been the reason. My car had no parking sensors so somebody probably just found a connector not connected to anything, so he cut it off. Well, there are signs somebody was in the past behind every panel from some reason, fortunately I am not finding any irreversible changes or damage.
With significant portion of the trim already removed, I decided to go forward and remove the headliner as well. I was planning to retrim that sometimes in the future, just removing the interior trim from the above reasons did push this project forward.
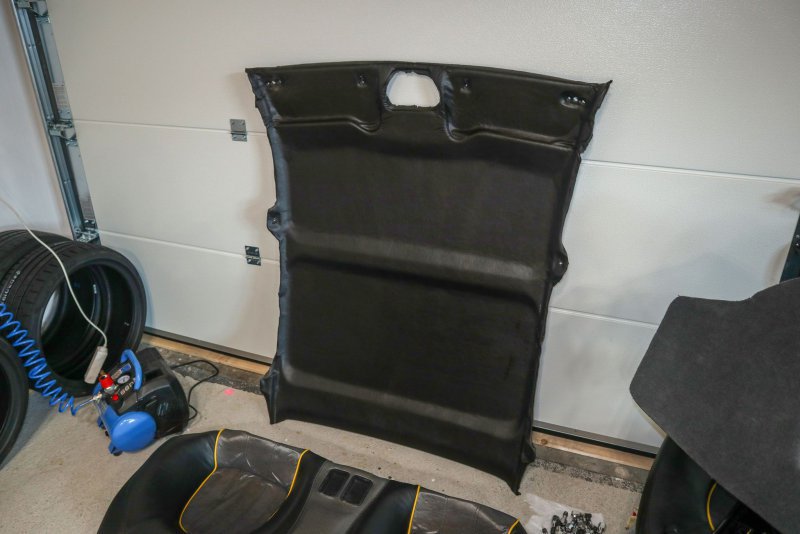
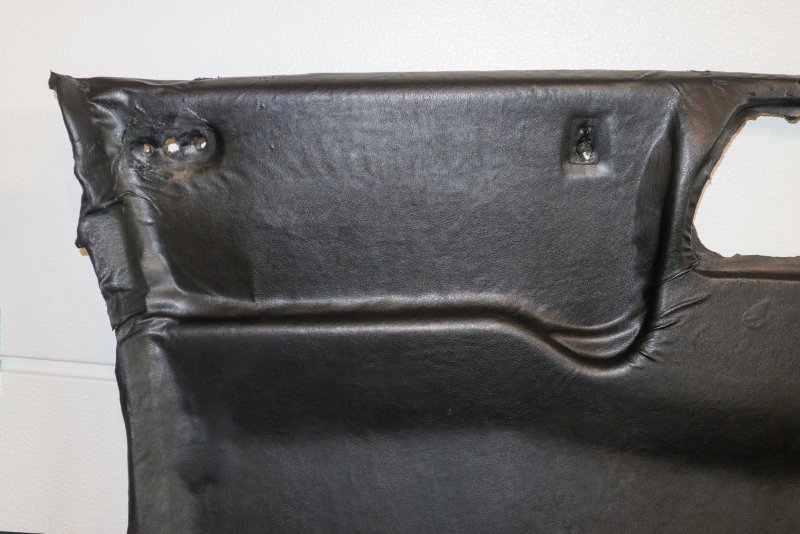
My car probably had the standard textile headliner, but the previous owner in Japan decided to retrim it in leather. Idea was good, execution poor. Firstly, I am sure this was not leather but some fake vinyl like stuff and its surface is now peeling on touch. Secondly, the trimming was done extremely poorly, somebody just took a piece of it and glued it on the roof liner with wrinkles at every corner.
From distance it may still have looked so-so:
But getting close, this job was ridiculous, and I suggest this person does not touch trimming anymore:
I took the roof liner to my leather trimmer with pictures of the Maserati leather stitched roofliners and asked for a copy. That was back in February…. But hopefully it should be ready in few weeks. First, we waited few weeks for the leather as the trimmer said he cannot use leather for seats. That one is thick, heavy, and not flexible enough. So he had to order a skimmed leather where the back side is ground off and only the soft flexible leather surface layer stays. This way it can be done nicely and will not sag by its own weight.
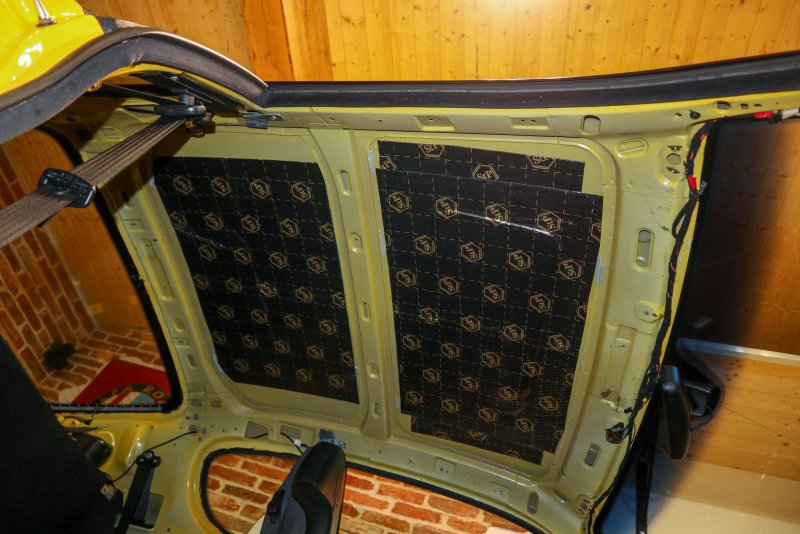
In the meantime, I put some Dynamat – like butyl panels on the exposed steel surfaces to reduce vibration and make the car sound more “solid”. Here is the roof:
Or the rear side panels:
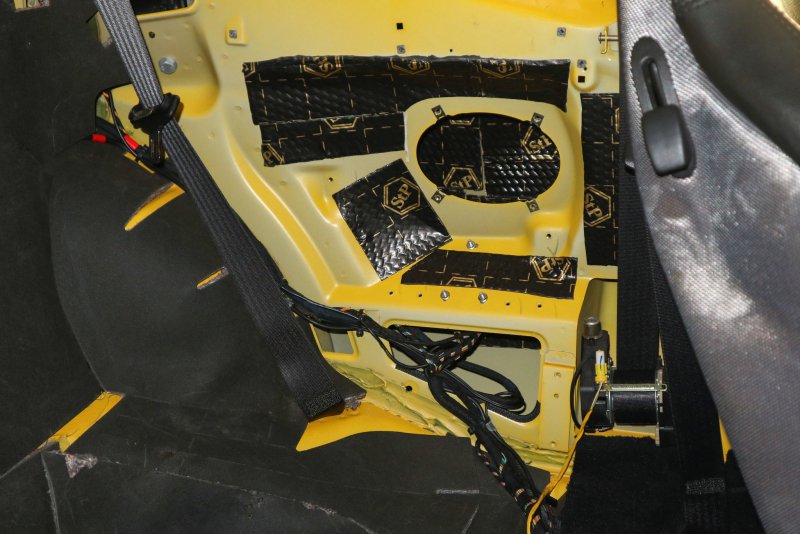
I am not after any professional sound deadening, I don’t want to add additional 25kg to the interior or target any professional install, I just do have these materials at home and if I see exposed steel interior metal I like to improve things a bit.
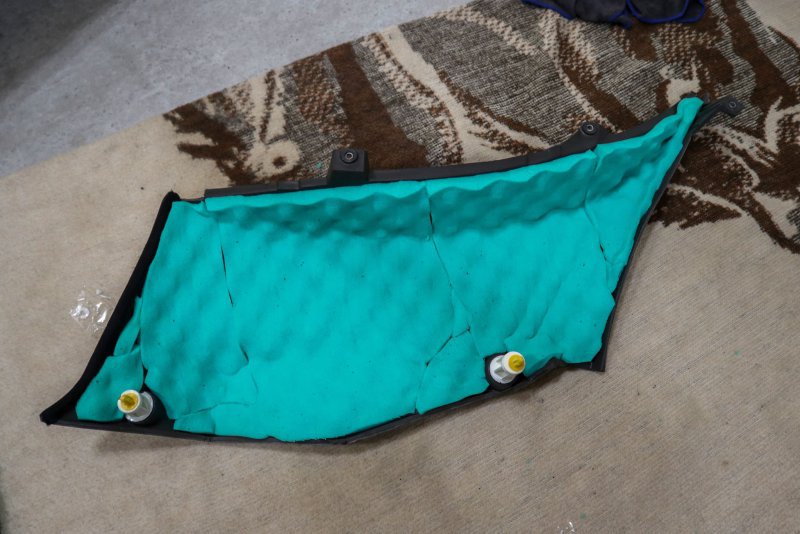
In the same way I do glue some acoustic foam on all the panels before installing them back in the car. Will avoid additional rattles and absorb a bit of the undesired noise.

Being curious, I stated to remove more and more trim tracking the wires and I ended with serious part of the interior out of the car:

And I pulled out this:

I still have no idea what it was. GPS tracker remains? Some sort of signal amplifier for something? Letters PAL can also suggest old analogue TV signal… who knows. The wires were not connected to anything, historically they seem to have been connected to 12V, ground and something more but I have not found any more traces. I also found out that a wire from the alarm/central locking leads to rear screen / parcel shelf area and has exposed copper wiring at its end. Seems like an antenna for the key remote, but I am not sure. What I am sure the end of wire is not supposed to be exposed metal and hanging under the parcel shelf. Somebody has also cut the connector to the parking sensors beeper under the parcel shelf. I have no idea what could have been the reason. My car had no parking sensors so somebody probably just found a connector not connected to anything, so he cut it off. Well, there are signs somebody was in the past behind every panel from some reason, fortunately I am not finding any irreversible changes or damage.
With significant portion of the trim already removed, I decided to go forward and remove the headliner as well. I was planning to retrim that sometimes in the future, just removing the interior trim from the above reasons did push this project forward.
My car probably had the standard textile headliner, but the previous owner in Japan decided to retrim it in leather. Idea was good, execution poor. Firstly, I am sure this was not leather but some fake vinyl like stuff and its surface is now peeling on touch. Secondly, the trimming was done extremely poorly, somebody just took a piece of it and glued it on the roof liner with wrinkles at every corner.
From distance it may still have looked so-so:

But getting close, this job was ridiculous, and I suggest this person does not touch trimming anymore:

I took the roof liner to my leather trimmer with pictures of the Maserati leather stitched roofliners and asked for a copy. That was back in February…. But hopefully it should be ready in few weeks. First, we waited few weeks for the leather as the trimmer said he cannot use leather for seats. That one is thick, heavy, and not flexible enough. So he had to order a skimmed leather where the back side is ground off and only the soft flexible leather surface layer stays. This way it can be done nicely and will not sag by its own weight.
In the meantime, I put some Dynamat – like butyl panels on the exposed steel surfaces to reduce vibration and make the car sound more “solid”. Here is the roof:

Or the rear side panels:

I am not after any professional sound deadening, I don’t want to add additional 25kg to the interior or target any professional install, I just do have these materials at home and if I see exposed steel interior metal I like to improve things a bit.
In the same way I do glue some acoustic foam on all the panels before installing them back in the car. Will avoid additional rattles and absorb a bit of the undesired noise.


