Khamsin

Khamsin433

Junior Member
Messages
414
Thanks guys,

It won't be a full restoration, just the engine really. The body will have to wait until my wallet recovers, it's ok but there a re a few bubbles developing. But more importantly it should be usable whichh will be the fun part....
 

Cossington

Junior Member
Messages
86
Bal,

Thanks for the update. It is in good hands with McGraths - their reputation is second to none.

The longer it takes, the bigger thrill it will be when it is back together (that is what I tell myself, when things take longer than I hoped).

I think you may have to operate a ticket system when it is done - so many of us would love to see it in person. (Could be a way to recoup some of the cost...)
I've always loved the look of the Khamsin, but must confess I don't thnk I've ever seen one. Keep the updates coming.


All the best,

David
 

Khamsin433

Junior Member
Messages
414
Thanks for the kind words David.

I've had to order two exhaust valves as well this week as they turned out to be slightly bent. I'd kind of expected that as the two worn exhaust valve guides were the cause of the drop in compression on #2 & #7. So for the valves not to have had any wear would have been a miracle.

McGrath's have been very helpful in getting parts to me quickly when I've needed them. The bulk of the order however went to MIE who couldn't be beat on price, though I did give McGraths teh opportunity to see if tehy could price match.

The work is being done by Kevin White at Migliore cars in Bromsgrove. He's been very good and methodical about the project, especially as this is the first engine of this type he's done. But with his and Vic's past experience on exotic motors I don't have any doubt's about their skills.

Hopefully have more updates in the next two weeks before Kevin goes on his holidays.
 

Khamsin433

Junior Member
Messages
414
Short update.

All is ow on hold as Kevin is on leave for a couple of weeks. Hopefully he managed to get everything ready for the rebuild to start when he's back. They had a problem with the valve lube seeping out when heating up the heads so couldn't guarantee a successful crinkle finish. Hence they had to be taken apart again in order to finish them, which means reassembly for a second time.

So won't have any progress until the new year.
 

ENZ525

Member
Messages
6,748
Thanks for the update Bal,
sorry to hear that, but a couple of weeks will fly by, especially over Christmas...
 

Khamsin433

Junior Member
Messages
414
Went to drop off the newly painted bonnet at Migliore. Didin't have time to take pics, but the heads are all nicely crinck;e finished. The block and sump are nicely painted silver. Every thing is now there to start re-assembly.

I'll re-visit during the week and get pictures to post up here. Hopefully some re-assembly work may have been carried out by then.
 

Parisien

Moderator
Messages
34,927
Lovely Bal........sounding all very nice......good to see your baby coming along nicely...:)


P
 

Khamsin433

Junior Member
Messages
414
Went down for a visit today and re-assembly has started. 7 of the 8 liners are in, the 8th is not in as the seals won't fit the new liner very well. New liners habven't been as easy as a direct replacement so gonna try another seal from McGraths and if that fails the guys at Migliore will try to source one.
Attached pictures so the items, with crackle finish or silver paint as required. Hope you enjoy the shots.

In order they are;
Cam covers - fresh crinckle black finish
Polished crankshaft
RH - liners
Water pump housing - crackle finished & pump freshly rebuilt
Sump
Block
LH liners
Rebuilt Oil pump
 

Attachments

  • IMG_5690_small.jpg
    IMG_5690_small.jpg
    36.7 KB · Views: 62
  • IMG_5691_small.jpg
    IMG_5691_small.jpg
    35.3 KB · Views: 62
  • IMG_5694_small.jpg
    IMG_5694_small.jpg
    28.5 KB · Views: 62
  • IMG_5688_small.jpg
    IMG_5688_small.jpg
    40.3 KB · Views: 62
  • IMG_5692_small.jpg
    IMG_5692_small.jpg
    22.8 KB · Views: 62
  • IMG_5695_small.jpg
    IMG_5695_small.jpg
    25.9 KB · Views: 62
  • IMG_5693_small.jpg
    IMG_5693_small.jpg
    29.6 KB · Views: 62
  • IMG_5689_small.jpg
    IMG_5689_small.jpg
    30.6 KB · Views: 63

Khamsin433

Junior Member
Messages
414
Don't have any set dates Andrew, not been putting any pressure on the guys. Though I hope she's back together in the next month or so as I really need to be looking for work now that I've been out of contract for 10 weeks. I'd like everything done asap otherwise I tend to get distracted.

I've arranged for them to take the fuel tank off over the next few days so that I can get that attended to (it has a small leak). Then as they say re-assembly is the reverse of dis-assembly......

Costs are adding up too, so I need to underline the whole work and attack some of the other items in a second phase. I'm glad the crinclke finish came out nice, the heads weren't there but they look good too. I've decided against milling the Maserati script on the cam covers as it introduces a path for corrosion and therefore the paint to lift, I'd like the finish to last.

Gotta admit it will look like a jewel in a box when done and re-installed in the car.
 

Khamsin433

Junior Member
Messages
414
Fuel tank after it's been chemically stripped. Now need to find the tiny leak that's casuing the weep of fuel.

Was gonna power coat the tank but my friend is recommending that I use paint as they will need to sand blast before powdercoating. And as he suggested, I don't want any grit getting into the tank no matter how careful they are.

I'll treat any surface rust that's left behind, though there's not much to be honest, what you see in the pictures is surface colouration. Then prime and use a paint like smoothrite. Just gotta pick up the sender from Migliore so that a pressure test can be done.

The cylinder liner O ring from McGraths didn't fit either so Kevin had to source elsewhere. I believe the last liner is now in and the job of bottom end re-assembly can begin.
 

Attachments

  • IMG_5697_small.jpg
    IMG_5697_small.jpg
    26.4 KB · Views: 51
  • IMG_5696_small.jpg
    IMG_5696_small.jpg
    25.8 KB · Views: 51

Khamsin433

Junior Member
Messages
414
Rebuild has been delayed for the last two weeks due to Kevin at Migliore getting a kidney infection that landed him in hospital.

Anyway he's back and slowly getting back to work. He's put the heads together as he had been waiting for the new shims for the bucket tappets that he had made, they look great. Still unsure about the use of unleaded fuel with these valve seats, though the car has been run on unleaded for a good number of years without additive, Kevin said the valves showed no major wear and tear of note.

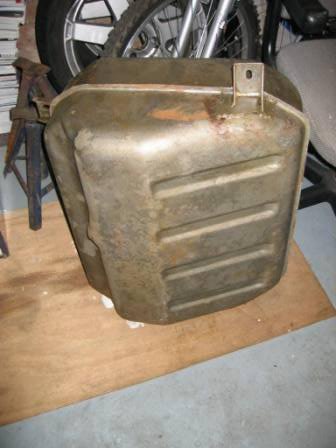
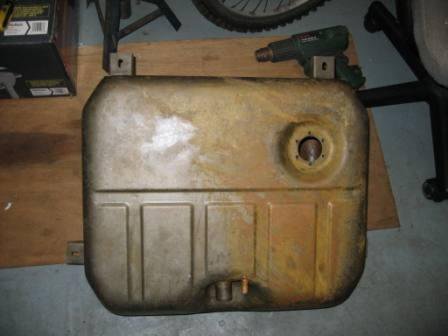
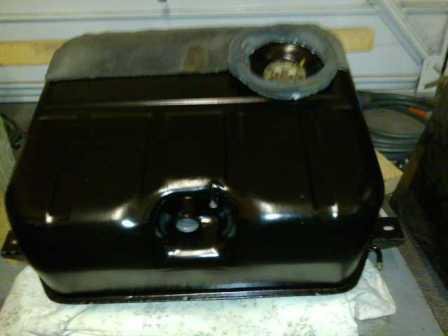
I've had a bad time trying to paint the fuel tank after welding in this cold weather. Having a heater caused some surface wrinkling as the outer surface was drying quicker than the lower levels. I've got it painted and may correct some of the runs/ wrinlkes when the car is back. I also used afuel tank sealer, a brand called POR-15, hope is works as good as they claim. They also supplied as part of the lit a fuel stabiliser that stops the ethanol in modern fuels from separating and damaging sealers, seals etc in the fuel lines. You are supposed to use it if not using the car for a while and there is fuel in the tank.

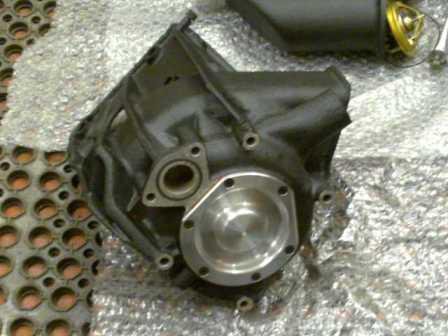
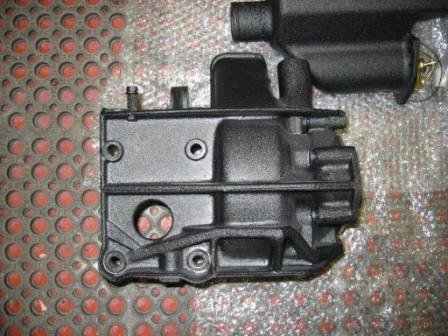
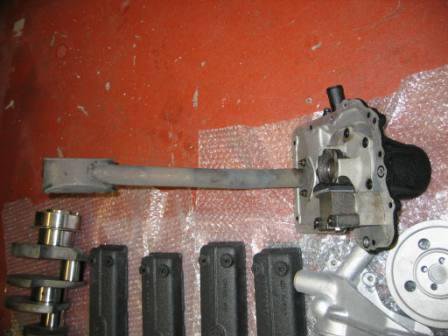
Also attached is a picture of the water pump. This shows a silver disc that had to be machined out of aluminium as the original just started falling apart arount the screw holes.

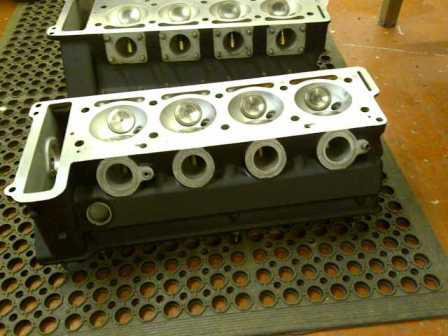
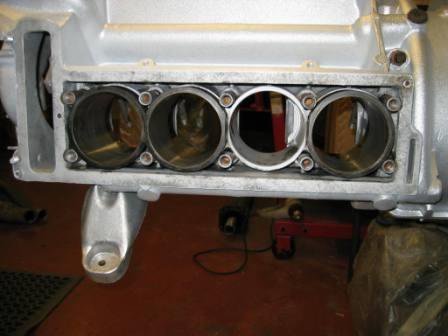
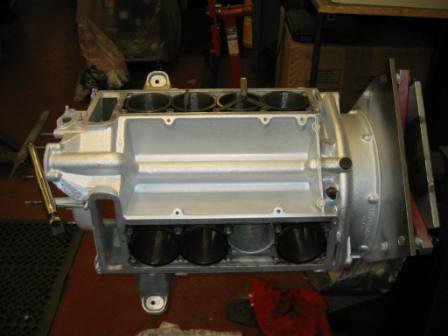
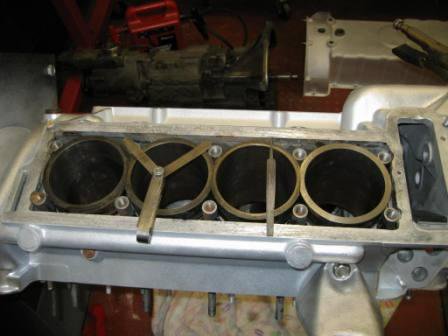
The picture of the block shows the pistons popped in but not all the way for safe keeping as the crank is not yet in. Looks good painted shiny silver......
 

Attachments

  • 18022011105_small.jpg
    18022011105_small.jpg
    34 KB · Views: 38
  • 18022011106_small.jpg
    18022011106_small.jpg
    28.1 KB · Views: 37
  • 18022011103_small.jpg
    18022011103_small.jpg
    34.5 KB · Views: 38
  • 17022011102_small.jpg
    17022011102_small.jpg
    22.1 KB · Views: 38